


This follows on from Part One which contains all of the scenario rules.

Introduction

 The forces were divided as follows. Dan had the German left (west) flank with the four PzIVs of 8/12 SS, and the twelve PzIVs of 5/12 SS coming in from reserve, plus the westernmost 88 to command against Eric's advancing first squadron of 2 F&F Y with 16 Shermans and a motor platoon. Tony had the German right (east) flank and center with four platoons of 15/25 SS with four attached ATGs in the bocage on his right between Colleville and Mouen, the independent HQs security platoon in the red brick manor house forward of Coleville, the easternmost 88 and the two 20mm AA guns near
Grainville in the center, and the four Tigers coming in from delayed reserve on the east edge, to face Steve's Cromwell squadron of 2 N Yeo and his Sherman and Stuart squadron of 23 H. All the Germans on or south of the railway line were concealed by blinds, and a number of dummy blinds filled out the German positions in the bocage. Dan and Tony shared the command of the 12 SS Pio platoon in Cheux, with Dan rolling for attacks by Eric, and Tony rolling for attacks by Steve. The players on both teams also shared their off board artillery assets as needed. Even though this only gave Dan 17 models to push in the early turns, the battle on his side of the table against Eric's forces was a free swinging affair, with a lot of fire to resolve. Tony played the more numerous SS infantry in a more static manner, keeping his troops under blinds and out of sight as long as possible, and Steve always plays fast and decisively, thus the two halves of the table stayed in sync with each other throughout the game.


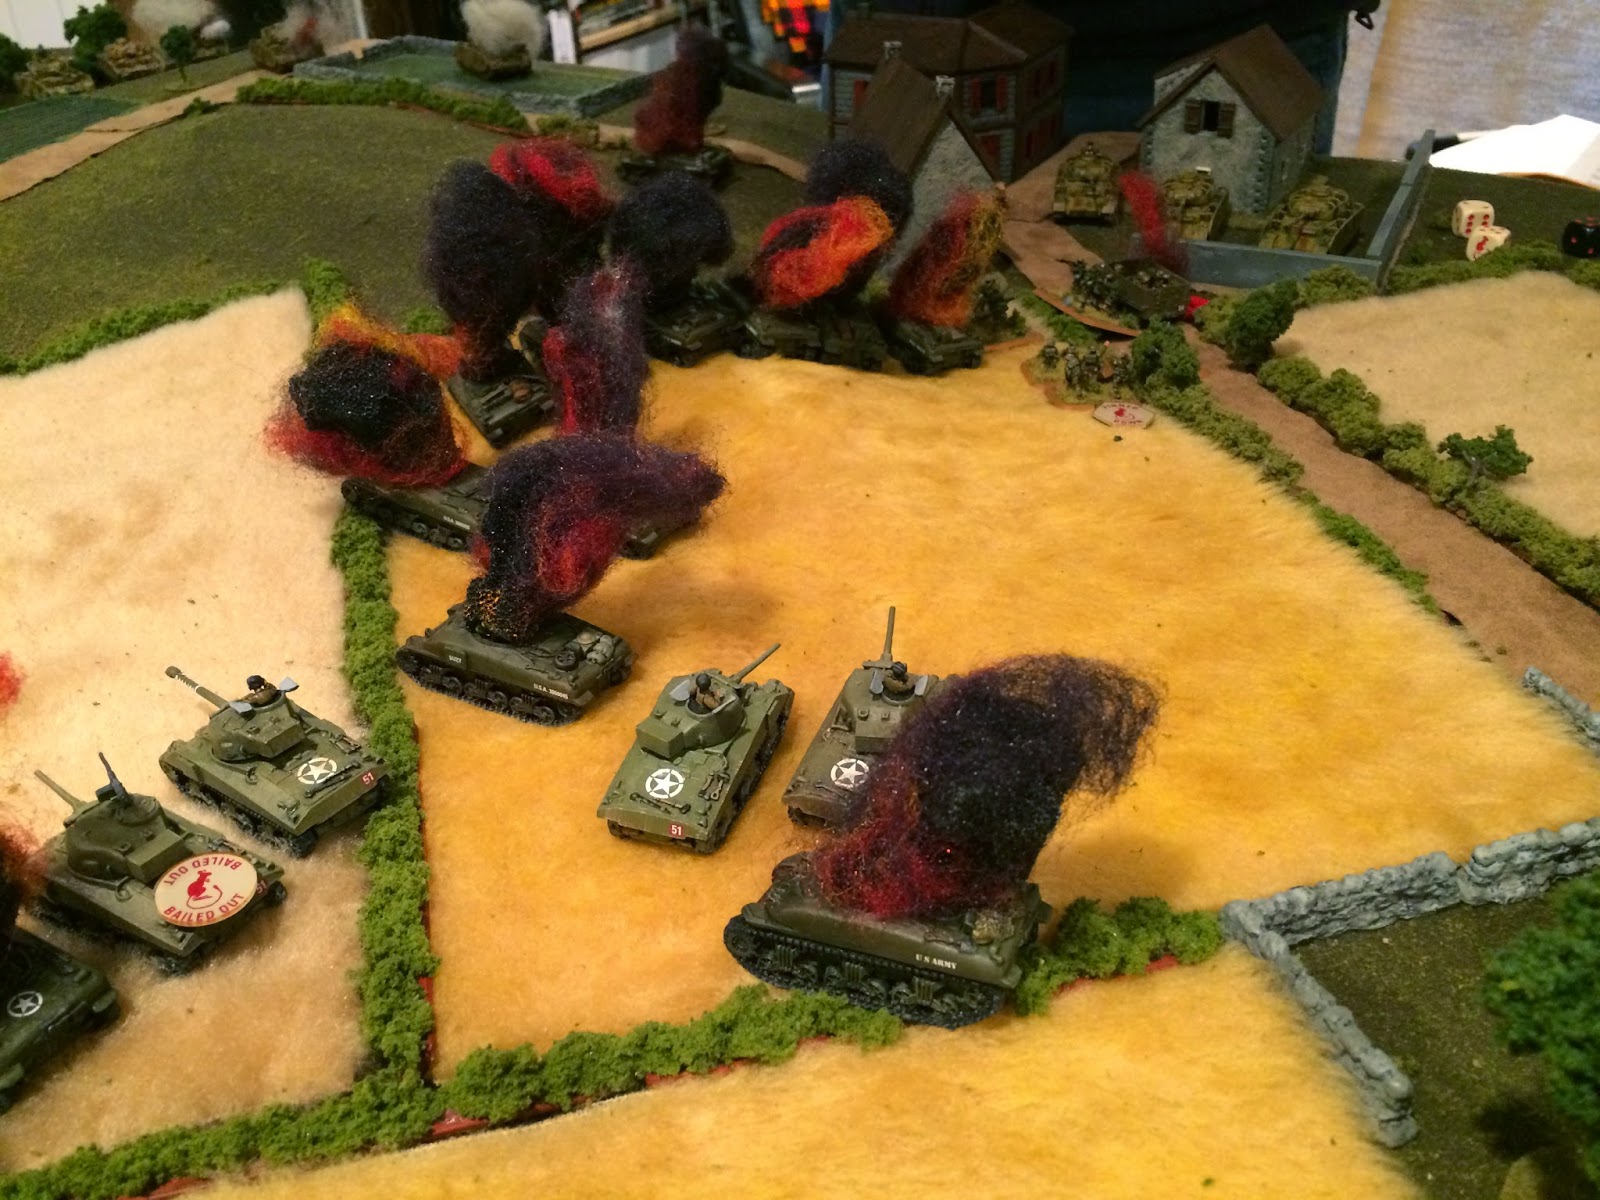
 Eric accordingly brought on his second wave, setting up 20 inches from Dan's panzers in a perfect position to lay down a barrage of semi-indirect fire with all 16 of his fresh tanks! (hmmm… perhaps this special rule is too powerful...?) However, needing 6s to hit with re-rolls, Eric missed an incredible number of shots and only a few PzIVs went up in flames. The mutual attrition then continued on this flank, with Eric using most of the British artillery support, until his second squadron was shot out. At this point, Dan was down to about 6 operational panzers. To keep the game rolling and fun, Tony suggested that Steve give Eric his unused second wave of Shermans, so Eric would have a third squadron to play with against Dan. This time, however, we made the replacement tanks enter from the baseline edge, so the semi-indirect firing squad tactic was not repeated.
This third squadron did the charm, and eliminated all of Dan's remaining panzers. This is when we invoked the special reserve rule and allowed Dan to start rolling for his third reserve PzIV company (7/12 SS). Eric took advantage of the lull to advance his remaining tanks and motor platoon toward the central main road, in a bid to exit the table at Grainville and fulfill the main victory conditions. Eric's command had taken a real beating, but it achieved the very important goal of preventing Dan from sending any PzIVs to support the weak German center, and the central road was lying wide open…
 The Battle in the East: To start, Steve drove several of the Cromwells of 2 N Yeo up to the bocage bordering the red brick manor and began to lay fire on the SS HQS platoon defending the grounds. One platoon of Shermans and the motor platoon from 23 H turned to the right to attack 12 SS Pio in Cheux. (These troops later made an assault against 12 SS Pio in the ruins, but then thought better of it and pulled out to join the main battle, leaving the pioneers in peace for the rest of the game.) Steve's two supporting M-10's from 2 N Yeo took up overwatch positions on the hill called Ring Contour 100, along with two Sherman platoons from 23H, to guard against a flank attack from off table. Steve sent the rest of 23H over Ring Contour 100, led by the recon Stuart platoon, to probe the middle of the 15/25 SS position.
  On Turn 2, Steve committed more Cromwells to reducing the manor house, cutting down the defending platoon to just over half strength. Steve was focusing a lot of effort on this not very important terrain feature, so Tony decided to go to ground and try to hold it as long as possible, even though his panzerfausts were killing the occasional Cromwell (panzerfaust firepower tests were passed all game!). This enabled the defenders to avoid British fire for a few more turns, until Steve threw caution to the wind and assaulted over the bocage. Steve bogged two tanks, lost one more to defensive fire, and only got his command tank into combat. However, that one tank did the trick and reduced the Germans to one team, which converted to a die hard independent rifle team that played no further role as the battle finally moved elsewhere.
Meanwhile, Steve swung six Cromwells around the manor to head for the railroad crossing on Colleville Road. Those six isolated Cromwells were too tempting a target for Tony, who uncloaked the 88 near Grainville and two 7.5cm ATG's on the edge of the bocage that were waiting for this exact opportunity. Seven high velocity shots rang out, with the result of one bailed Cromwell! Return fire immediately killed the 88 and both ATGs, and the center of the German position was left virtually wide open, held only by two 20mm AA guns and some dummy blinds. Tony responded by revealing his leftmost PzGd platoon, moving some of its teams to the left to form a very thin line between Colleville and Grainville.

Steve also pushed forward with the Stuarts and the lead Sherman platoons of 23H, crossed the railway, and entered the bocage between Colleville and Mouen. This forced Tony to reveal two more PzGd platoons and two more ATG's. Steve quickly eliminated the guns while losing some Shermans to panzerfausts and an assault. About this time, Tony brought on his four Tigers from delayed reserve. Steve's M-10s and Fireflys stationed on Ring Contour 100 made any attack to the north of the railway foolhardy, so Tony chose the safer but slower route and brought the Tigers onto the road along the very rear of the German table edge. Via this route, the Tigers would require several turns to get into action. Trying to make up the time, Tony risked a double-time move, which caused the lead Tiger to break down and block the road for two turns, an event that would have dire consequences...
Steve realized the SS PanzerGrenadiers were too strong in this sector and veered 23H into Colleville. He skillfully began infiltrating his Stuarts and Shermans via the lanes in the bocage to engage the more thinly held part of Tony's line. Overall British losses had been heavy to this point, and Steve reasoned that the only way to win was to find or force a gap in the defense and exit as many teams as possible before the Tigers arrived to close the gap. He also moved two platoons of 2 N Yeo Cromwells toward the main road exit at Grainville, followed by the 23 H Sherman platoon and the remains of the motor platoon coming down from Cheux. Eric's lead tanks and motor platoon were also approaching Grainville from the west. The scene was set for the final Gotterdamerung...!
 Endgame: Steve desperately began reducing the thin screen of SS blocking positions to open the exits at the rear of Colleville and Grainville. With no enemy left to their front, Tony shifted the three uncommitted platoons of 15/25 SS to his left to try to catch up with Steve's tanks. Tony also finally got the Tigers unstuck and concentrated them on the road behind Colleville, and called in all the German artillery support. 10.5cm artillery and Nebelwerfers caught the British vehicles packed in the narrow approaches and destroyed some. Shots from the Tigers took out 2-3 more tanks. The British got their revenge when a 25-pounder barrage scored an unlikely kill on a Tiger, and a Firefly killed another. Fleeting gaps in the German line appeared and enabled eight tanks and a halftrack full of motor infantry to depart through the exits before Tony closed them again. A Tiger pushed forward into Grainville and two more artillery strikes put an end to Eric's hopes of exiting anything from the table. As the game was called, Tony's SS infantry were positioned to assault Steve's few surviving tanks that were now cut off in the bocage.
Aftermath: The British attack had been partially successful, but at high cost. The Germans held most of the ground, but had taken casualties themselves and allowed a partial breakthrough. Which side would win this epic fight? When the game was called, neither team had any idea who won or how the victory points would add up. When the counting was over, the victory points totaled 172 to 171 in favor of the Germans!
LOTS OF PICTURES


Steven's Closing Thoughts: off by one point! I demand a recount! Eric and I had an absolute blast. FoW works so well for scenarios, especially when you're willing to "fudge it" a bit for the sake of fun play- as we did (Eric burned through both of our reserve squadrons against those dang Panzer IVs!).
Really had an excellent time!


