Related Posts Plugin for WordPress, Blogger...

Friday, July 28, 2017

Team Yankee - North American National Tournament 2017 Historicon

Ever since Mitch, Sean, and Erik announced that there would be a team yankee nationals this year, I was excited.  After spending around 5 months painting my West Germans (covered in this 3 part series from a few weeks ago) I was ready to get some games in. I read the rules over the night before to see if I could find things I may have missed.  Knowing who was showing up, and knowing that over 40 players were expected to attend meant I had no expectations of winning anything.  Battlefront partnered with WWPD for some prize support, tables, and other logistical concerns.  This would winf up being the largest tournament at Historicon this year,
Below: Luke sets up a display and looks longingly at models he will soon be buying

Some of the 28 or so tables prepped by Brian Sullivan, Sean Sarah, and Mitch Reed (among others)

Mitch tries to take the edge off with a Vacation themed shirt, but his expression says "we are going to be crunching numbers all afternoon" He brought his entire collection with him, and was ready to lend it all out to players that wanted to give the game a shot.


Read More

Wednesday, July 26, 2017

The LRDG II Podcast- Episode 17

The LRDG II Podcast- Episode 17

The LRDG II podcast is back with an another exciting, two part episode. 

In the first segment, I am joined by longtime Ghost Army Podcast member Casey to discuss current hobby projects and the elephant in the room, gaming world wise, Warhammer 40K. We also discuss significant rumours in the Bolt Action and Konflikt '47 world and what it means to be "that guy" when gaming.

In part two, the master of Australian TO'ing, the one and only Peter West rejoins the cast to talk about lessons learned from the most recent Wintercon BA event, getting creative with hobby ideas in BA and to discuss how a Very British Civil War and the Operation Sea Lion campaign are similar and how they can be linked to create a rich "what if" backdrop for Bolt Action Gaming.

As always we love to hear from you through the LRDG Podcast FaceBook group. A number of you have requested that I separate BA from non-BA content differently. In the future I will put non-Bolt Action content at the end of the episode so it is easier to avoid if that game system is not your thing. That said, if you are looking to hear only BA content, I would suggest tuning into this episode at the 40 minute mark. Thank you to the folks that have sent in this feedback! :)

We hope that you enjoy episode 17!  

Old Man Morin


You can find this fine episode in the iTunes store or you can download directly HERE
Read More

On the Road Episode 8: Live from Historicon 2017


Direct Download


Action packed episode after some time off. Mitch and Sean are at Historicon 2017 where they talk about playing in the FoW I-95 doubles tournament and the Team Yankee event they hosted with Battlefront.
The episode also also features three great interviews with some of the vendors who attended the event; Doc Cummings from Decision Games, John Russell from Warlord Games, and the folks from Shapeways 3D printing.

The next show will be from Gencon in August, so stay tuned for more On the Road.

Twitter: @MitchWWPD
Mail: WWPDMitch@gmail.com

Read More

Historicon Q&A Session with Pete Simunovich

by Tom Burgess

On the last Day of Historicon, Pete Simunovich and John Matthews of Battlefront sat down with a group of gamers to discuss the current changes and the near future plans for Battlefront, Flames of War, and Team Yankee. This article is an effort to share that discussion with the larger Flames of War and Team Yankee communities. Though I cross-checked my notes with others present at the Q&A to try to make sure I was as recounting the comments as accurately as possible, the reader must keep two caveats in mind with this article. One; the comments that follow are what I thought I heard. There is ample room for misunderstanding and misinterpretation. Two; Battlefront plans two years out. Anything below that will take more than two years to get to is subject to change.

Before I get too much into the nitty-gritty details, let me thank both Pete and John for talking with the gathered players. Let me also note that they were very keen to hear our comments and ideas to improve Flames of War and Team Yankee going forward. Pete took many notes and was willing to listen to any and all issues. I hope those of us present did a good job representing the Flames of War and Team Yankee Communities.


Flames of War Version 4
1) "First to Fight," the next Mid-War book, will have US Tank, Armored Rifles, and Rifle lists.
2) There will be a later British MW book (Rifles/Matilda/Valentines).
3) There will be a later German MW book focused on the 90th Afrika Division that will have FK36(r)s!
4) Dianas will be a "Wild Card" option in the future.
5) In addition to the known US, Italian, and 2nd British and German V4 Books, there will also be an Airborne forces book with both Fallschirmjagers and Paratroopers.


Read More

Monday, July 24, 2017

There and Back with the Volksarmee - A Historicon 2017 Team Yankee Nationals AAR

by Tom Burgess


I really wanted to get out to Fredericksburg for Historicon this year before it moved back to Lancaster, PA. - and being that this might be my last Historicon for a while, I wanted I really wanted to get the most out of it. So I signed up for the I-95 Late War Doubles, Team Yankee Nationals, and Mid War Nationals. That was going to be ten games over three days! But the focus of this AAR will be on the three games of the first ever Team Yankee Nationals.


Most of my Team Yankee "Soviet" collection was completed before I knew I could actually commit to going to Historicon. The problem was that it was mostly a T-72 collection and had not been terribly effective in any of my Team Yankee games. Turns out that a battalion of T-72s (I had 21 of them) just is not "meta." Sad face. However the Volksarmee book opened up some new options by offering a weaker, but cheaper T-72 and also expanding some cheap BRDM options in both the recon and Anti-Tank roles. Even though my force was painted as "Soviets," Volksarmee would let me use almost all of my existing collection on the table at once! But in a sense, my entire army was "proxied."


My Historicon force as designed by my friend Chris


The force I rolled out with was designed by my friend Chris as the most effective given my model collection limits. This forces was:


Read More

Wednesday, July 19, 2017

DIECON V4 Early War Tournamnet AAR

By Tom Burgess


DIECON, June 3rd 2017, at Collinsville, Illinois included an V4 Early War Flames of War tournament which I had the pleasure to attend. This would be my third Version 4 tournament, but first for Early War. The tournament organizer was the very capable Will Yankowski.  The event had 10 players, some of which traveled from as far away as Wyoming and Kansas. 


The forces played in order of their final standing (1st place to 10th) were:


Tom [author of this article] - Czech Panzerkompanie [CV]- HQ 2 x PzKw-36(t)B; 4 x PzKw-36(t)B; 4 x PzKw-36(t)B; 4 x PzKw-II; 3 x Panhard 178(f); 4 x 10.5cm NbW35 Mortar; 1 x 8.8cm FLaK36 w/ Transport; Limited Ju87B Stuka
Charlie  - Czech Panzerkompanie [CV]- Rommel in PzKw-38T; 2 x PzKw-38T; 5 x PzKw-38T; 4 x PzKw-II C (Late); 1 x M/C Cmd MG, 4 x M/C MG. M/C Lt Mortar, M/C ATR; 2 x FLaK36
8.8cm; Priority JU87B Stuka


Read More

Monday, July 17, 2017

Armor Of The Arab-Israeli Wars - Or - Mike's Visit To Yad La-Shiryon Part 3

In this third installment of my article covering the plethora of armor at the IDF museum and memorial Yad La-Shiryon we will be looking at the armor of the Arab states, generally Egypt and Syria, used in the 1967 and 1973 wars. One thing to remember from all of these photos, most, if not all, of these tanks have been repainted by museum personnel at some point so the paint colors are not necessarily original.

As Soviet client states, Egypt and Syria began to receive large numbers of T-54 and T-55 tanks, and these would form the backbone of both the Egyptian and Syrian armored forces in both the 1967 Six Day War and the 1973 Yom Kippur War. The T-54/55 was one of the first true modern main battle tanks, and despite some early teething problems in the late 1940's, it would go on to become the most numerous tank in history (by production numbers) with estimates as high as 100,000 units being produced in total from all sources.

T-54 Tank - this is an earlier version

The T54/55 would go through several modifications over the years, and while the Soviet Union would eventually phase it out in favor of more modern designs, the type remains in use today by over 50 nations - often in highly modernized forms. Unfortunately much of the Soviet armor is parked very close together, so it is hard to get full views of each tank without a wide angle lens, which I didn't have with me for this trip.

Read More

Friday, July 14, 2017

Tom's Road to Team Yankee Nationals 2017 - Part 3 of 3


In Part 1 - I talked lists and models (insert link once earlier pieces are published)

In Part 2 - Alex Perry and I played out the holding force scenario from the Leo 1 rulebook

And now, in Part 3, my Full West German list for Historicon will get its first run through.
The list...My printer broke, so smart phone to the rescue

it all laid out.

Alex countered with these beauties

 Alex...ready for battle. You can see in his eyes he is ready to liberate the people of West German from the tyranny and oppression of Capitalism and democracy.

The Board:

We used Battlefront's mission selector.  Which we both like as a way to determine the attacker and the mission.  I elected to Prepare an Attach, and Alex picked hasty attack.  The result was me attacking in "Counter attack." While my camera angles will shift around a bit, I deployed in the upper right corner of this photo with my entire force.  Alex deployed in the lower right corner.  He kept half his platoons off table in immediate reserve.  They would come in from the upper left corner.  The two objectives (represented by Fliegerfaust Gruppen we didn't use, were located between the three buildings in the little industrial park, as well as in Alex's deployment area, right near the church.


Using the Spearhead rule, I moved the Luchs forward at dash speed, and in the bubble, deployed my marder formation commander, 2 platoons of Panzer grenadiers, and a platoon of Leo1s with their formation commander as well.  In my main deployment area went 3 platoons of Leo1s, the LARS, and all Air and Anti air assets.

  The last Marder Zug deployed with a clear field of fire into the church with their Milans, dug in and ready to wreck some tanks.


Alex deployed his motor company in the church, their BMPs behind the woods in the upper right of the picture above, and 1 T72 platoon behind the church. A second was held in ambush.

I started off with aggressive moves towards both objectives. Since I left some of my pile of Leo1s home, I had to proxy some hulls as well as some Leo 2s as Leo 1s, apologies to the purists out there.

On the right, my CO dashed to the building near the objective and prepared to get out, both marder platoons were fully mounted, and prepared to drop infantry off on the objective by turn 2.

But while my infanty were still trapped in the transports, the ambush of T72s dropped. and made short work of most of the marders. One platoon escaped to fight another day.

On the left flank, my attack was slowed by terrain and a hail of T72 fire.  The 10 tank platoon would prove to be a tough nut to crack. after killing the BMPS, the T72s wiped their first Leo1 platoon.

PAH Helicopters would take their toll, eliminating nearly 9 tanks before the game ended.  With all his AA assets in reserve, (2 Shilkas and 2 SAM launchers (for which he proxied VADS) the Helicopters had free reign, taking shots with HOT missiles from 48" away


The Carnation battery came on from reserve and took a few potshots at the Leo1s in the woods, but would be quickly finished a turn later.

The left flank turned into a shooting gallery, as Milan missiles and HOT Helo shots wrecked several T72s.  Shots from infantry in the building also destroyed multiple Leo1s.  They popped out for shots and an assault, but found themselves with no active teams within 4" after all the explosions stopped.


The LARS proved worthless, as they failed to range in by rolling no 3's in 6 attempts over 2 turns.  In the course of the game they would range in successfully twice.  once dropping mines that didn't matter to the game, and another hitting one tank, and having him bounce the shot.

The LARS with some ones.

In came the Hinds who Alex was careful to start out of range of the Gepards and Fliegerfaust Gruppen

Then the following turn, I got the Gepards up, along with the Fliegerfausts (who would have to wait a turn to fire....and hit his Hinds 10 times. He saves all but two, and I failed the firepowers.  Alex and me both laugh at my misfortune.

Almost nothing is left, and 3 Leo 1 platoons are dead, Alex fails his last stand for the lone tank remaining. all is quiet on the left flank. save for the clicking sound of the LARS loading its garbage and ineffective rockets.

AA comes on and shoots down a PAH.


But the Leo 1's in the woods have their vengence.  I tried to kill them with the Luchs as an insult to their honor, but their junky 20mm gun couldn't pass a firepower.
 Where the Gepards mostly failed, the Redeye teams come through, the Hind crashes into the nearby factory.  the infantry that survived the death of the Marders high tail it into the red building in the foreground and preceed to pummel the T72s in the treeline with Milan Missiles.

3 Tanks remain of the original 10.  The other platoon is gone.

Trapped by LARS and a Marder Zug, the Church stays quiet.

With all his reserves and helicopters dead, and only 3 MBT left with 2 nearly full strength Grenadier Zugs holding the objective, we call the game for me.


The Final situation

Lessons learned:

My advice to Alex:
I think he should have gone more aggressively after the infantry in the buildings earlier.  his shots at the marders and Luchs were wasted.  digging out the infantry should have been priority one.  Also, the lack of AA assets in the list (both platoons were only 2 vehicles) and it being in reserve, allowed my PAH helicopters to wreak havoc on his armor.

My lessons:

The Leo 1s should have held back and waited for their chance to charge and get side shots, and not put themselves in needless risk.  Gepards should be more centrally located on the board if possible to allow for better coverage of the board.  Relying on artillery for anything in Team Yankee seems to be a waste. I would have been better off with the Hurricane Flight.  They have a template, and some tank killing potential.  They can also go hind hunting. And its almost the same points.

This was a great Game that taught me a lot about the rules. Alex was patient with us looking them up, since we both had limited experience with the ruleset.  I had a blast running through the list and trying things out.  I'm looking forward to playing through the Team Yankee Historicon Tournament! Hope to see you there!

Tom Mullane (aka Captainecho on the forums) is a social studies teacher in Brewster NY, who lives in Danbury CT.  He plays with Ordo-Ineptus at Hobbytown in New Milford CT.  Come by and get a game!
Read More

Wednesday, July 12, 2017

Tom's Road to Team Yankee Nationals 2017 - Part 2 of 3


Part 2 of Tom's Road to Team Yankee Nationals 2017 at Historicon in Virginia

In Part 1 (insert link here please) I showed my army list, and some of the reasons behind what I put into the list.

I had a chance to play a few games with Alex Perry up at Kirwan's Game Store. We ran a full Soviet MBT list against my Leo 1 horde.  But we also tried out one of the scenarios in the Leopard Book.  It was a riveting game that would come down to the wire.

We had the terrain to set it up pretty perfectly to the picture they provided.


The Lists - I held the Leo2s in ambush, and Alex needed to borrow some of my surplus infantry and hulls to proxy for all the BMP2s he needed.  We had all painted models on the table, but some were my West Germans turning traitor.  If the propaganda in the new Red Storm book is to be believed, this all makes sense anyhow.
 On my left flank, I deployed the PAH flight, Gepards, a Platoon of Grenadiers, and the CO. I left space right in the middle for some Ambushing Leo2s, my marders stayed back, worried about BMP missiles and AT 10 guns (which are nasty)
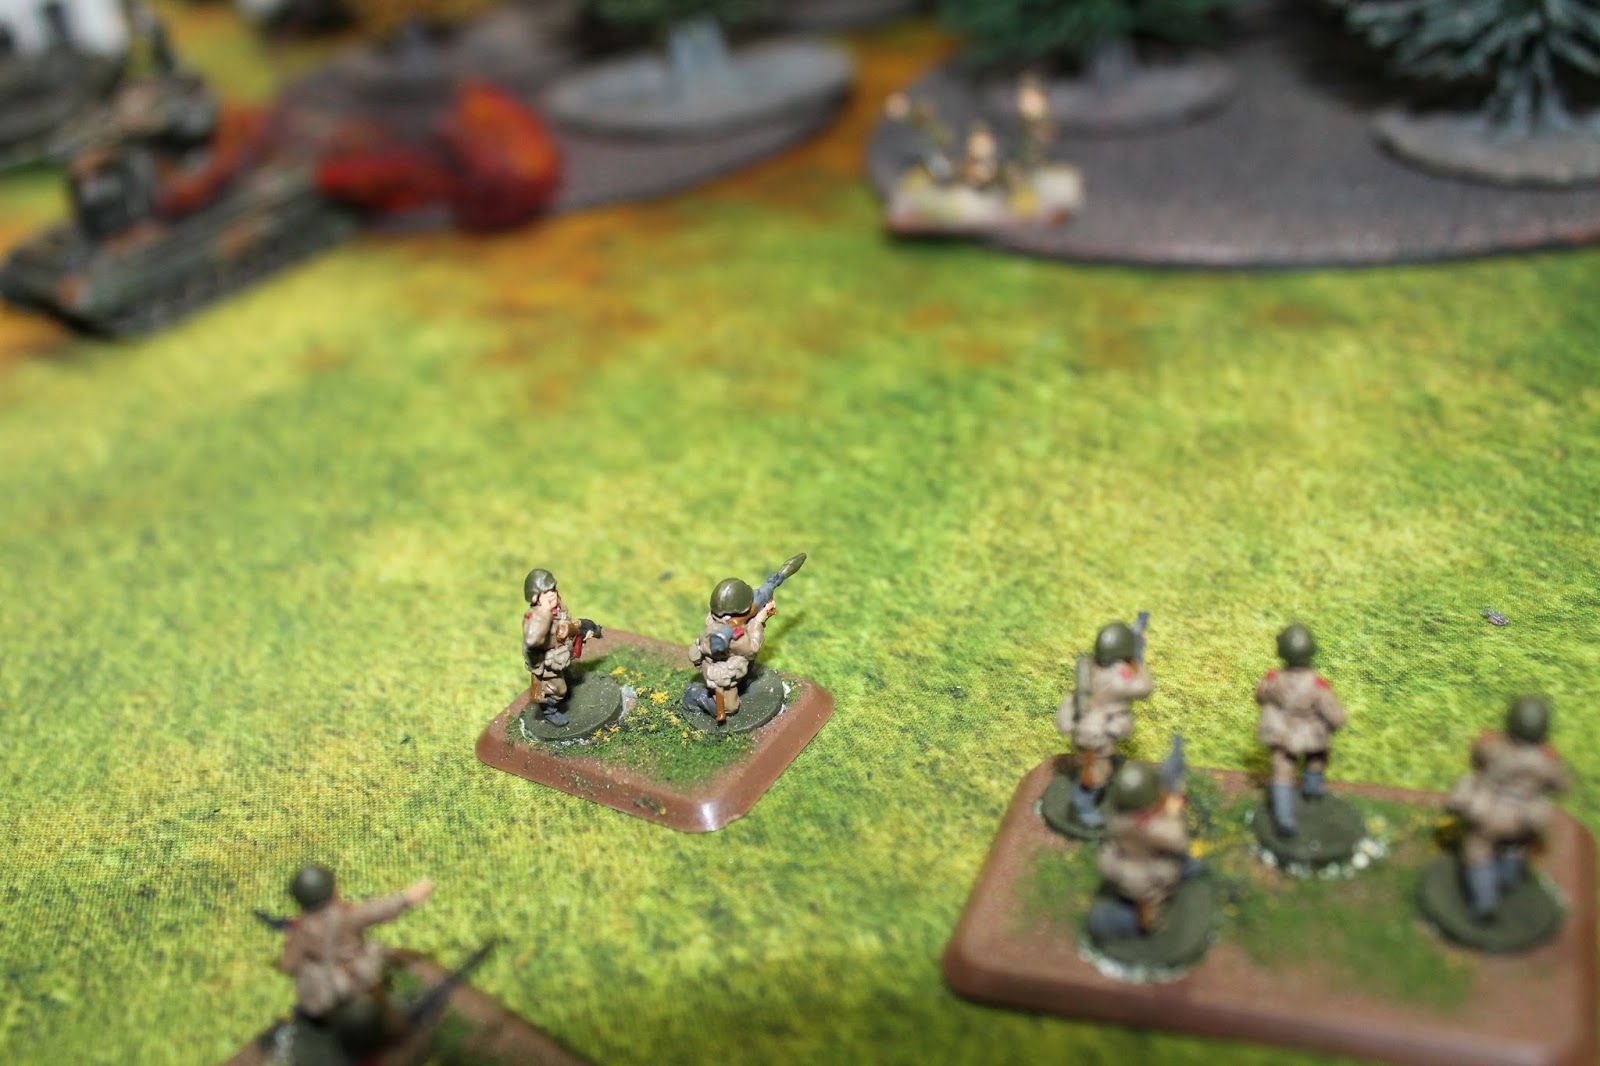
 Facing off against them were the huge Motor Company and the BMP2 scouts, all infantry started dismounted, which is probably for the best, since they can move pretty quick on their own.
 On the Right Flank, I placed a Grenadier Platoon and the 3 Jaguar 2s (I have the Jag 1 models, so We just agreed they were the Jag 2s.

  Roughly in the middle of the table, coming down the road, were all of the T72s in their glory, and the Hinds, which would stay out of range of the gepards for 2 turns, before finding themselves in their sites.

  In the first turn, Alex moved all his troops up, took a few ineffective pot shots, and braced for the inevitable deluge of fire from the West German Army.

And it would prove devastating.


Nearly an entire T72 Company vanished.  leaving 1 tank, who would proceed to pass 7 last stand checks.  His devotion to the Motherland would warrant a medal by the end of the game.

On the left flank, my fire was far less effective.  Pulling into position, the BMPs suffer many bails but few kills at the hands of panzerfausts and Milans.

The Hinds get chased near the town by marders, and the Gepards which pass their cross checks to come out of the woods into range.  But it isn't enough to bring them down this turn, as Alex proves a master of 4+ Helicopter saves.


The Leo 2s shoot and scoot after their ambush, but don't get far enough back to avoid all the incoming fire.  in the following turn, they would fail their blitz move and wind up exposed with more limited firepower to throw at the oncoming horde. An assault by the Company of Soviets is repelled with losses.

Too many soviet shots doom the Leo 2s to a quick end. I probably should have saved them for later on. Still I had taken a toll on the MBTs closing in on the objectives, and delayed Alex long enough for the initial timed objectives in the middle of the table to be pulled.  Now, with 5 turns remaining until the end, I needed to stage a fighting withdrawl, and hold the rear two objectives.  With plenty of equipment left it looked possible.
 The Hinds pop a PAH Helicopter, and his friend will leave the field after a failed last stand check.
 But the Leos are gone, and so are the Jaguar 2s. My MBT killing assets have disappeared.  and like that, the tide has turned.

May day! May day!

The Hinds are shot down by a combination of fire from the Marders and the Gepards.  The Hind crashlands on one of the main objectives, so we just subbed it out and had the Hind be a rescue mission.  It seemed to thematically fit.

 The Situation by around turn 5.  My troops fall back into their transports and hightail it to the other side of town, intending to dig into the buildings and hold the crossroads. On the left, infantry flee through the woods with Gepards leading the way.  The CO, still alive makes it to the woods and the relative safety of the trees.

 Lets wait till this is over folks...wait. the tanks are gone? we're all that's left? we just need to hang on for 3 turns.

Not running fast enough across the field, the infantry try to dig in. and FAIL! so they go to ground and avoid shooting, hoping it can save their lives before they fight the motor company hand to hand.

The Lead tank, the Hero of the Soviet Union, passes his 5th last stand check, and saunters into town.  My Milans fail their Blitz move and are left looking longingly out the window as the tank passes inside their minimum range.
 Their transports get into the fight, moving into position to take the fight to the Soviets should the infantry fail to hold them off.

Soviet Armor pours through the Gap and down the road, can the Germans hang on?

 In a bloody assault, the West Germans force the assaulting Soviets to fall back, but they are down to their last stand.  and flee the following turn.  There is now nothing between them and the objective save a lone Command team and some marders.


In town, the Milans take out several BMPS but its not enough, and the tanks surround their hideout.


The Soviets unpin, and charge into the woods, it is the bottom of turn 7.
 The Marders charge out, and try to savage the infantry with MGs, but to no avail, Alex passes his saves. and BMPS and T72s make short work of them.

 The tanks rev their engines, and
 Charge the House!
 Killing two of the 5 teams, they are forced to fall back, failing 4 cross checks in the process.  one retreats.  While they get their bearings, a lone BMP 2 prevents them from annihilation by being within 4"

On the eighth and final turn, the T72s have been pushed back...... but on the right, the remaining 5 Soviet teams of an original 12 charge through the woods at the lone Command team.....


3 shots ring out...

and he is no more.

Massacred to nearly the last man, the West German holding action has failed, and the soviets are victorious.  On the last die roll....of the last turn.  Alex Perry pulls it out.

The game was exciting from start to finish, and we had a ton of fun.  Coming up next,  My Practice game with my West German List against Alex's Soviet Horde of T72s

Tom Mullane (Captainecho on the forums) is a Social Studies teacher in Brewster NY, who lives in Danbury CT.  He plays with the Ordo-Ineptus Gaming Club based at Hobbytown USA in New Milford CT.  Come by and get a game sometime!


Read More

Popular Posts In the last 30 Days

Copyright 2009-2012 WWPD LLC. Graphics and webdesign by Arran Slee-Smith. Original Template Designed by Magpress.