Related Posts Plugin for WordPress, Blogger...

Saturday, December 31, 2011

Saturday Blast From the Past: Stuarts, Panthers, Tigers! Oh My!

Normally we take Saturday off from posting, so I decided it would be a good opportunity to highlight some blasts from the past! After all, we are getting close to hitting 500 posts! So look here on Saturdays for 3 posts from our past that I've recently rediscovered!

Soviet Stuarts

10 Stuarts I painted up a while back. 


Panthers and Friends!

Panthers, Brummbars, and Panzerwerfers!  Oh my.


Tigers vs Cromwells

Rumble in Normandy.
Read More

Friday, December 30, 2011

Soviet Guards Tankovy vs German Grenadiers

Continuing our christmas tradition, Luke and I played a game the day after Christmas this year (see previous here). I made 6 soviet lists and 6 German lists from Red Bear, and we randomly determined who played what and what mission!

The mission rolled was "Dust Up". This mission has seen the rounds quite a bit in these parts lately.


Luke's Grenadierkompanie
  • HQ + fausts + 2 mortars
  • Full Grenadier Platoon w/ faust
  • Full Grenadier Platoon w/ faust
  • Full Grenadier Platoon w/ faust
  • 3x Pak 40s
  • Looted T-70
  • Grenadier Platoon
  • 2x Tiger I
  • Nebelwerfers
Steven's Guards Tankovy
  • HQ T-34/85 w/ escort (fearless trained)
  • 10x T-34/85 w/ escort (fearless trained)
  • 10x T-34/85 w/ escort (fearless trained)


SETUP AND DEPLOYMENT


Initial Deployment. German defended objectives are in the fenced field and between the small woods lining the road. Soviet objectives are in the bottom left on the hill and near the T in the road.


Read More

Thursday, December 29, 2011

M3 Stuart Part 3- Finishing Touches by Max

By Max

See Part One and Part Two of this tutorial!


After the wash was completely dry I went back and hit some of the areas with a little darker concentration. The gas caps on the deck (to simulate fuel spills) and several areas on the rear deck (to simulate oil or fuel spills), and the area around the rear engine access doors. Once these dried I worked on the tracks. Using a wash of light brown I tried to hit the tracks only to simulate dried mud and sand. The vehicle received very light stippling on the areas where the crew used to get in the vehicle, the fenders and other areas using Vallejo Gunmetal.

Read More

Wednesday, December 28, 2011

M3 Stuart Part 2- Painting the Caunter Scheme by Max

M-3 “Honey Light Tank Part II: Caunter Paint Scheme
By Max

After completing the basic assembly and some minor detailing (See Part One) I primered the vehicle. My first coast was a very light coat of Vallejo primer Gray using a brush. I wasn't happy with this so I went ahead and busted out the airbrush. I gave the miniature three very light coats of Vallejo Primer Black. Once that was dry I “misted” the entire vehicle in the Primer Grey. I believe this has a filtering effect on the vehicle but since this is the first tiem I've used it we shall see.

I ordered a D.O.A. Caunter Paint set from Trackpads, the new owners of this fairly new company (http://doapaints.co.uk/). With shipping it cost about 11 UK or $19.00US for the three bottel set. According to a review online, these paints are GTG (good to go) from the bottle for airbrushing or brushing with out thinning.

I started out by giving the miniature three or four very light coats using the Light Stone” color. I use a Paschee airbrush and, honestly, it went on like regular Vallejo paints that had been thinned. At first I was un-impressed. I tried using a low pressure (about 10 PSI) as recommended by a reviewer online but had to resort to using 25-28 PSI to get it to spray well. It could be my airbrush.


After letting that dry I started masking off the lower hull using Tamiya masking tape. I was reccomended this tape by my local hobby shop, Modesto Hobies in Modesto CA. I masked off the areas I wanted to keep in the Light Stone color and went back to the airbrush.


I hit the model with several light coats of Silver Gray and let it dry. So far I wasnt impressed with the DOA paint.

After that dried (and dropping the turret causing the barrel to come unglued and the hatch to break – oh and several choice words) I went back to the workbench (yes I fixed the hatch – by gluing it SHUT!) and masked off the Silver Gray areas.

I let the model sit for about two hours before unmasking. The Tamiya masking tape worked well and the lines were failry straight. The pattern did not come out EXCATLY as Caunter should be but it was close – atleast for the first tank. I was yet to be impressed by DOA paints unfortunately. I painted the track a muddy brown color and painted the rubber on the road wheels, the .30 cals, the antenna, and the ammo box (I forgot the tools – next chapter). I let that dry and brushed on a coat of gloss varnish. Still not impressed with the DOA paints. I gave the model a brushing of gloss varnish (let it dry) and added some decals.

Once the decals set I gave it a coat of 50/50 Black and Sepia. I placed about 10 drops of this mixture in a little mixing cup and then added 3-4 drops of Umber Wash. I then proceeded to give it a good wash. As soon as the wash started spreading though the model HOLY COW! The DOA paint colors REALLY came out! I was surprised how much the wash brought out the colors.

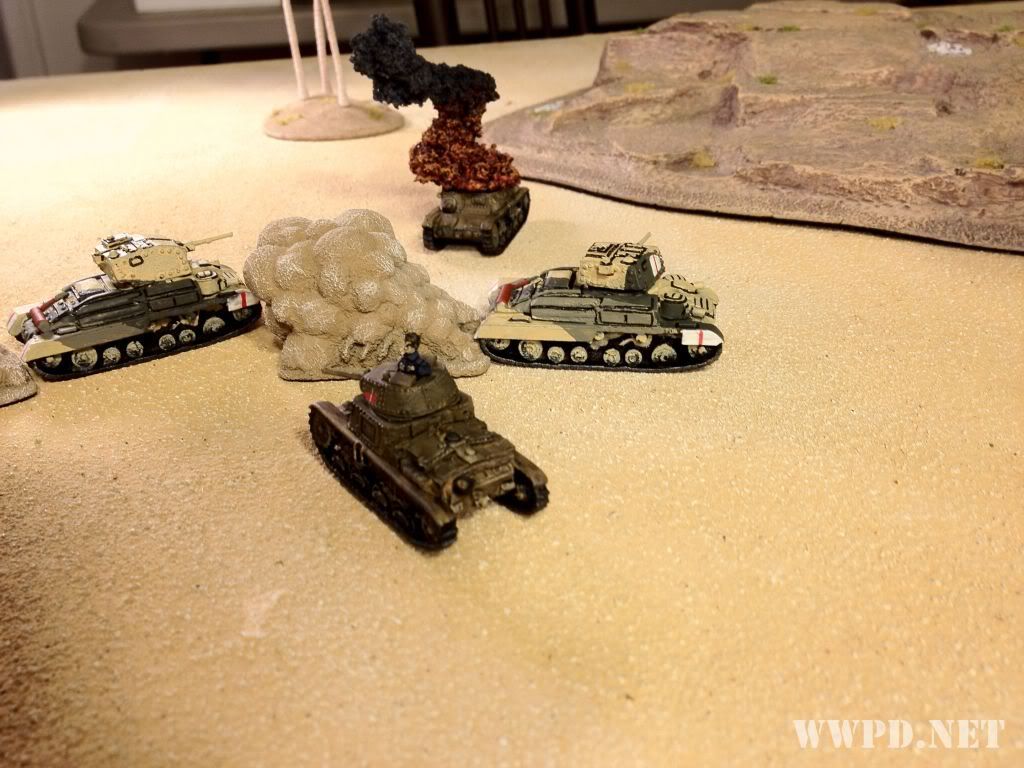
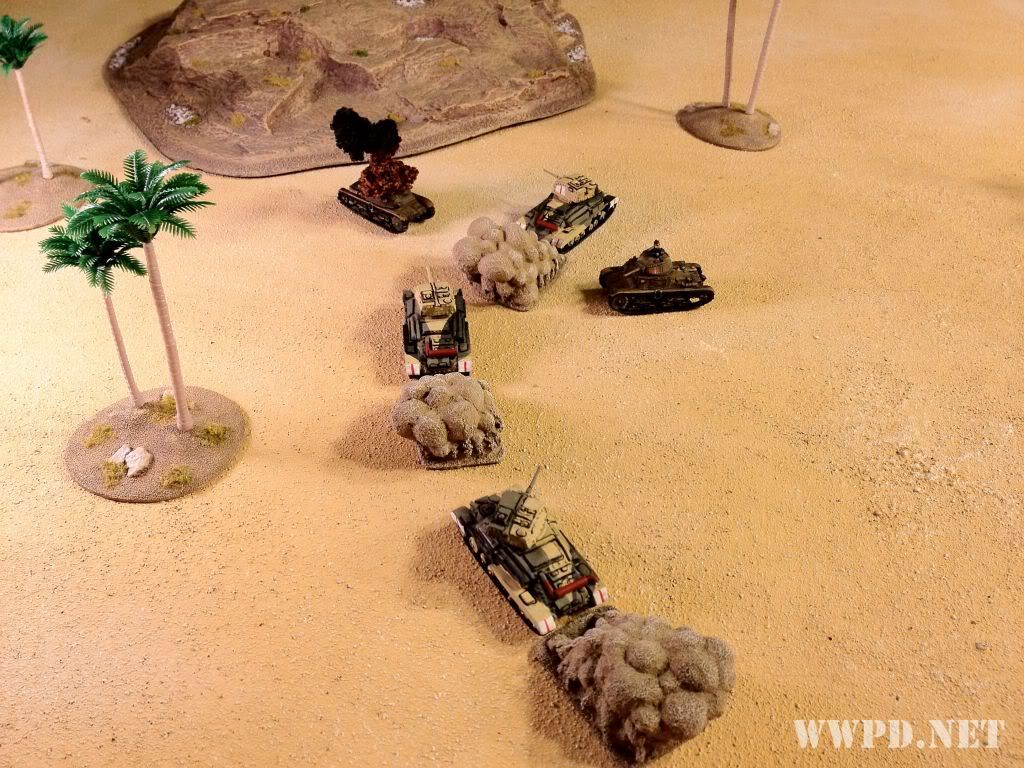
The kit had the shortcomings of a bad casting on the right bogies so I was not happy with that. I snapped these last few pics before I sat down to write this. The wash was still wet and I may hit it with a lighter tone if it dries too dark.


Up next.... Part III: Highlighting, Detail and Weathering.
Read More

Tuesday, December 27, 2011

Battlefront's M3 Stuart Assembly by Max

Building Battlefront's M3 Honey Stuart
by Max


My Early War project is a Stuart Light Tank Squadron for Early War. I was able to find one
Battlefront M-3 “Honey” Stuart at my local store and had inquired about purchasing more. Chris at EndGame in Oakland, CA told me they were out of production and, most likely, being remastered.

Read More

Monday, December 26, 2011

L Patrol Part V: The Hunters Hunted

SEE THE PREVIOUS INSTALLMENT HERE: L Patrol Part IV: The Convoy

Tenente Sergio Monopoli sat lazily on an overtuned, bone dry Jerry can. In the sand at his feet a crude map of the area had been drawn with his boot-tip. Luigi, the compagnia's intelligence officer, strolled towards the Tenente- eyes squinting as the breeze whipped sand particles about.

"Did you make contact?", Sergio commented idly without looking up.

"Ci, Tenente." It took Sergio a moment to process. The answer had been negative on so many nights like this before. He looked up at the young officer, moved his lips to speak, but knew his query was printed on his face. Best to save the moisture in his breath.

"A Gnochi re-supply mission headed for Fort Zeneti has been lost. 3 Days since last contact."

"And?" The Tenente's eyes fell back to his map. He had no love of the Germans, and no desire to drive across 100 miles of unforgiving Sahara to rescue them.

"Well, sir…" Luigi paused. Sergio looked up, squinting. Was that fear?

"What is it?". Luigi gulped.

"Well sir, it's just that Intelligence reports indicate that radio traffic picked up a nearby communication from British special forces in the area."

Sergio slowly stood up. Fire burned in his eyes.

"Finally." Sergio's eyes fixed East- his gaze unbroken by the harsh winds.

"Tell the men. We leave in 15 minutes."

--------------------------------------------
MacCall surveyed the crumbling fort in the distance from atop an escarpment. Behind him, the hum of his idling Chev truck was barely audible above the whistling, whipping wind.

"Looks like some Jerries made it to the fort. Been a few days. The tracks have disappeared. Should be an easy snatch up." He handed the binoculars to his new driver, Johnston.

"Sir- who's that?" Johnston brought the binoculars down and pointed to a growing dust cloud in the distance.

"Not sure. Let's go find out shall we?"

*********
The mission played is the new "Missing In Action". We also rolled for the Will of the Sahara in the new Raiding Aces campaign rules and came up with "Waste Land"- re-roll to dig in and no double timing.


Sergio Monopoli's Compagnia Sahariana
  • HQ: 2x AS37 w/ extra MGs
  • 1st Patrol: 4 AS37 + 20/65
  • 2nd Patrol: 4 AS37 + 20/65
  • 3rd Patrol: 4 AS42 + 2x 20/65
  • Meharisti Platoon w/ 3 Squads (Fearless Veteran)
MacCall's LRDG Patrol
  • HQ: 2 LRDG Jeeps
  • "Blue" Patrol- 6 Chevs, 2x .50 cals, 3x extra MGs, Breda
  • "Green" Patrol- 6 Chevs, 2x .50 cals, 4x extra MGs
  • "Red" Patrol- 3 Chevs, 2x .50 cals, Breda
  • Commando Troop w/ 1 squad


SETUP AND DEPLOYMENT


Reconaissance photo of Fort Zeneti


Read More

Thursday, December 22, 2011

Happy Holidays from WWPD!


Guys, if you haven't already seen the news:


I think I speak for everyone when I say we could not be happier about this! I'd like to take this brief opportunity to say thank you to Battlefront for providing we masses with the best tabletop miniature wargame in existence. Thank you to the staff of WWPD who keep this site active and the podcasts flowing. And most importantly, thank you to YOU for supporting us. 2011 has been an amazing year for us, but we're ready to dive in to 2012 and be your guide to navigating Version 3!

We're going to take a few days off from posting to let this V3 news sink in (oh, and spend time with our families). Check back on Monday for great new content! Until then why not visit our forum and join in on the conversation about Version 3?  Or look back over some of our best Battle Reports.

On behalf of WWPD- we wish you and your family a very Happy Holidays!
Read More

Wednesday, December 21, 2011

Italian Saharianas: Spotlight!


REVIEW
I just finished up a force of the new Italian Raiders that Battlefront Miniatures released to match the list in Burning Empires.  We received one box of the AS37 Autosaharianas and one box of the AS42 Autosaharianas for review.  I couldn't wait to have a foil for my LRDG.


 Each box comes with 5 of the appropriate trucks (Either AS37s or AS42s) and all of the options you can use- 2x 20/65 AA Guns, a 47mm AT Guns, and a Solothurn AT Rifle + a metric boat ton of extra MGs.  

The AS37s lack stowage, but the AS42s are each unique.  I'm a big fan of the sculpted on stowage as Battlefront always seems to get the balance just right.  Enough to look used, not so much as to be a pain to paint.  However, for those who want to add to their AS37s or pile more on to their AS42s, Battlefront is also offering a package of desert raiding stowage!


The models themselves are up to Battlefront's typical excellent quality.  Very good sculpts, very little work was needed to be done to prep them.  I would personally prefer them to not have the big resin base, but that's been the norm for Battlefront's transport vehicles for a long time.  The AS42s especially standout as their extra stowage is very well done.  Every vehicle also has the option to be upgraded to any of the weapon systems allowing quite a bit of flexibility.  My only real complaint is that there is very little variety in the included crew: a driver, a guy with a rifle sitting, a guy with an SMG sitting, a guy standing and waving, a guy standing.  There's also the crewmen for the solothurn rifle and the gunner for the 20/65.  But, you can arrange them in a variety of ways so the monotony is not obvious in the finished product.


The AS42 box is hands down my favorite.  That vehicle looks so cool as is- but the stowage brings them over the top.  The AS37 box is really good, if just a bit monotonous.  But you can spruce that up yourself by acquiring some other trucks (like the trucks recommended in Burning Empires), and doing just a bit of extra work.  Overall I'm gonna give these guys 11 Ciantis out of 12.  Avanti Savoia!


FROM WIKIPEDIA
(link)
The SPA-Viberti AS.42 Sahariana was an Italian reconnaissance car of World War II. The AS 42 Sahariana was developed by SPA-Viberti using the same chassis as the AB 41 armored car, including its four-wheel steering, specifically for desert operations, primarily in a reconnaissance role. Its origins trace back to requests stemming from units operating on the North African Front for a long range, highly maneuverable vehicle, similar to those widely used by the highly successful British reconnaissance forces, the Long Range Desert Group (LRDG).


(link)
The SPA AS.37 was an Italian military vehicle of World War II. The AS.37 Autocarro Sahariano was developed as from 1937 on the frame of the TL.37 artillery tractor and was especially conceived to be employed in the North-African desert. The most outstanding evolutions of this new vehicle were its autonomy by far higher than that of the tractor since it reached 900 km with vacuum, as well as the added water tanks. A.S.37 could transport 8 men and their material in its rear cargo box.


The military authorities did not judge the problem of desert vehicles urgent, FIAT, supported by Marshal Italo BalboGovernor of Libya launched its own initiative which resulted in the A.S.37. The first 200 A.S.37 specimens were sent Libya in 1938 and were assigned to Commando LED the Sahara Libico and to Autogruppo della Tripolitania. Marshal Balbo wanted to use A.S.37's for the motorization of the Company Sahariane, which was to have 22 vehicles. In March 1942, 584 A.S.37 were in service, and by April 30, 1943 a total of 802 were in service in North Africa.
The crews of A.S.37 put forth very favorable judgments on these vehicles; their four wheel drive and large diameter wheels prevented them from becoming easily bogged down. The A.S.37 principal defect lay in a silhouette too high and thus too visible.


IN FLAMES OF WAR

Name weaponMobility rangeFront ROFSide anti-tankTop FirepowerEquipment and Notes
AS.37
 With 20/65 Gun
 With Solothurn ATR
 With 47mm (early) 
 With 47mm (late)
Wheeled
16"
16"
24"
24"
-
4
3
3
3
-
5
5
6
7
-
5+
5+
4+
4+
AA MG
anti-aircraft


AS.42
 With 20/65 Gun
 With Solothurn ATR
 With 47mm (early) 
 With 47mm (late)
Jeep
16"
16"
24"
24"
-
4
3
3
3
-
5
5
6
7
-
5+
5+
4+
4+
AA MG
anti-aircraft


These raiding vehicles use the Blitzkrieg Motorcycle rules (essentially making them recon cavalry while mounted up- giving them a 3+ save which makes them far more survivable).  Thus, being cavalry, they may dismount and be represented by Rifle/MG teams.  Unlike normal cavalry, however, they may later remount, giving them ultimate tactical flexibility!  For the full rules check out Burning Empires!


Read More

Tuesday, December 20, 2011

After Hours Episode 13- Happy Holidays From WWPD

After Hours 13- After recording episode 29, the dudes talk version 3, red bear/grey wolf, and the upcoming holidays. Get $1.00 off your next After Hours purchase until Jan 1, 2012! The secret code is: wwpdholiday. That means you can get this episode for free, or any previous episode you'd like! Code is valid for one use per customer.

Note: This episode may be a bit more PG13 than usual!  If language offends you, these aren't the droids you're looking for.
Add to Cart

View Cart

Read More

Monday, December 19, 2011

WWPD News From the Front Episode 29


"Red Donkey, Grey Moose"
The boys are back in the studio (sans Jon who joins remotely) to talk about their upcoming Holiday Break and (most importantly) Red Bear & Grey Wolf! Flames of War Version 3 is on the horizon- and we talk about it!
TABLE OF CONTENTS:
  • 0:00 - Intro/General chat
  • 0:21 - Battlefront Paint Review Revisited
  • 0:24 - Red Bear & Grey Wolf
  • 0:57 - I-95 Game Vault Tournament AAR
  • 1:21 - New on the Web!
  • 1:32 - World of Tanks 7.0 News
  • 1:36 - Luke's Editorial- List Building
  • 2:00 - Battlefront Podcast Response
Download this week's episode directly: http://www.archive.org/download/WwpdNewsFromTheFrontEpisode29/WwpdNewsFromTheFrontEpisode29.mp3
Subscribe via iTunes: http://itunes.apple.com/us/podcast/wwpd-news-from-the-front/id398903039
Subscribe with other: http://feeds.feedburner.com/WWPDPodCast
Links discussed in this episode:
CGR Painters
Jon's Paint Review
The Game Vault
World of Tanks
Red Bear and Grey Wolf Design Notes 
Red Bear and Grey Wolf: Spoilers!

 EDITOR'S NOTES:
It had been a while since we were back in the studio- had a great time with the guys!
Read More

Sunday, December 18, 2011

Setting the B.A.R. (British Armoured Regiment!)


REVIEW

With the release of Hellfire and Back, I knew I had to make a BAR of my own. I hadn't seen any made of primarily A9s yet and that concerned me. It concerned me because the A9 has to be one of the absolute coolest tanks ever conceived! Twin Deck Turret MGs? YES PLEASE!


So I ordered 4 A9 CS tanks, and 20 A9 Cruisers from Game Models. I also threw in an A13 just to see how it was and in preparation of BAR #2. You all have heard us time and time again talk about Game Models and these tanks are no different. They are low quality compared to the Battlefront models, but their price is equally low! This, like my IS-2 Polk, is an army I don't plan to have on the table all that often, so I was happy with the trade off.

My attempt at painting caunter is fairly laughable I suppose. I know I could make the lines smooth if I went through the trouble of using putty/tape to mask. But frankly, $4 tanks just didn't seem worth the time investment.

Overall I am really quite happy with the outcome! Once they're painted up and on the board I think they look great. Game Models continues to be a reliable source for inexpensive models to bolster your forces!
17 out of 20 deck turret MGs


FROM WIKIPEDIA

The Cruiser was an effective tank in the French, Greek and early North African campaigns. The 2 pdr gun was lethal against the early Italian tanks encountered during the North African campaign and could hold its own against Rommel's early Panzer IIs and IIIs. The A9's 2-pounder gun could also breach the 20 – 30 mm of protective steel on later opponents such as the Panzer III variant D and the Panzer IV D. It was effective until the Germans introduced the more thickly armoured Panzer IV E variant to the desert in Spring 1941. However, the minimal armour made the A9 an easy kill for most Axis anti-tank weapons. Also problematic was the lack of High Explosive shells for the 2 pdr gun and even worse the lack of AP for the 95 mm gun on the Close Support version. Another issue was that the areas around the front machine gun turrets created a frontal surface that was more vulnerable to enemy fire than it would have been had it been a flat plate, let alone a sloped glacis.

The mechanical unreliability of the Cruiser was also a disadvantage. In particular, tracks were easily slewed causing difficulties.


THE A9 CRUISER MK I IN FLAMES OF WAR

Name
 weapon
Mobility
 range
Front
 ROF
Side
 anti-tank
Top
 Firepower
Equipment and Notes
A9 Cruiser Mk I
 QQF 2 pdr Gun
Fully Tracked
24"
1
2
0
7
1
4+
Co-ax MG, Two Deck Turret MG, Unreliable
Broadside, Tally Ho!, No HE
A9 Cruiser Mk I CS
 QQF 3.7" howitzer
Fully Tracked
24"
1
2
0
3
1
4+
Co-ax MG, Two Deck Turret MG, Unreliable
Broadside, Tally Ho!, Smoke
Thanks to Easy Army I can see exactly what I can bring to bear before adding any support options!
Read More

Friday, December 16, 2011

Red Bear vs Grey Wolf: Soviet Forward Detachment vs German Sperrverband

With the release of Red Bear and Grey Wolf, we were champing at the bit to get a game in! Joe hadn't been over for a game in a while and he was more than happy to push some Soviets. We tried to make fairly historical matchups that would both be fun and highlight some of the new rules from the new books. We rolled up Breakthrough!

Pak 40 RSOs by Panzerwerks Studios
See More about Red Bear & Grey Wolf


Joe's Soviet Peredovoye Otryad
  • HQ: 1x T-34/85, 2iC Rifle Team, Komissar
  • 10x T-34/85 w/ Tank Escorts
  • Tank Rider Company w/ 3 Platoons, HMG, Komissar
  • 3x Decoy Stugs
  • 3x SU-152
Steven's German Sperrverband
  • HQ w/ Panzerfausts + Panzerschreck Team (attached to pioneers)
  • Sperr Pioneers w/ Supply Truck
  • Sperr Platoon +2 HMGs
  • Sperr Platoon +2 HMGs
  • Sperr Anti-Tank Platoon w/ 4 Pak 40s
  • Sperr Assault Gun Platoon w/ 3x Stug IV
  • Heer Nebelwerfers


SETUP AND DEPLOYMENT


The board. Soviets start with their T-34s and Decoy Tanks on the board. Germans put a mine field in the top center, with Stugs and RSO Pak 40s in reserve.


Nebelwerfers and Pak 40s deploy with an eye towards Joe's reserves.

>>>>READ THE REST OF THE AAR

Read More

Thursday, December 15, 2011

US Special Forces in FOW Part Two


Being Special With Brian Part One
(Painting, Planning, and Reviewing US Special Operational Forces for Flames of War)

The Game Plan
After some messing around on Easy Army, I came up with a solid 1750pt list from Dogs and Devils. It will be a 6 platoon list with an extra platoon of 81mm Mortars commanded by the 2iC.  The supporting armor and artillery are all CV. In order to have three full FSSF platoons I needed to pick up US748 The Devil's Brigade Platoon blister.
FSSF Company
HQ, 2iC, 2 bazookas
3 Full FSSF Platoons with bazooka and 81mm Mortars
1 Stewart Light Tank Platoon
1. Sherman Platoon
1 Battery of 105's with AOP
I am still working out a specific list for my OSS raiders. I do know that I will be picking up a blister of FR860 FFI Rifle Platoon to mix in with some extra Americans for a guerilla platoon. Furthermore I will be raiding both my own  and my friends bit boxes for extra weapons for the operational platoons.


Getting Started
When starting a new paint job I always like to get an idea of what colors I am going to need. For my Americans I used the following two paint guides with the following modifications.
Guides:
1. American Infantry http://www.flamesofwar.com/Default.aspx?tabid=110&art_id=737&kb_cat_id=27
2. Airborne Infantry http://www.flamesofwar.com/Default.aspx?tabid=110&art_id=737&kb_cat_id=27
Modifications
1. I used Vallejo Sepia Shade (732) as a wash after I have finished painting all my base colors (i.e. uniform, flesh, rifle, and equipment. This will do two things. First it will help bring all the colors together, second it will darken the base color. With the base color darkened you can then go back and used the original base color as a highlight. For example for an US Infantry jacket you might use 70988 Khaki. then once dry you would hit it with a wash of sepia shade. Let that dry overnight then you can go back and highlight with Khaki.
2. Recently a member of our SoCal game group painted up some US Airborne with what had to have been the best uniform color I had ever seen. His ratio uses three vallejo paints at a 10:4:2 ratios. 10 being 70881 Yellow Green, 4 being Brown Violet 70877 and the 2 being Buff 70976. If you want to darken this mixture you can add more brown violet and to brighten increase the amount of buff.
Bases
I am using Plastic Bases: Urban Rubble (XX106) for both of these projects. I have now purchased and utilized 5 packs of these bases and I am never going back, ya hear me, NEVER. These bases are easy to use, paint up great and really add another dynamic for making your army look awesome. My only tips would be to find a cheap liquid based super glue since you will be using a ton of it. Other than that the FOW website and Cassino book have a easy to follow tutorial for assembly and painting of the bases.
Transport
I have been mildly annoyed with foam trays for some time now. However I had not come up with a better alternative until recently. Many of the gamers here in So Cal have been using these white cardboard boxes that you can buy from Staples for $10-12 for a pack of five. To this they either line the bottom with a piece of sheet metal or magnetized paper. Then with the addition of a metal or magnetized base you have a great carry/storage case that, unlike foam can be used to carry infantry one day and tanks the next.

Read More

Wednesday, December 14, 2011

WoT Map Analysis: Cliff

Each map in World of Tanks has some optimal places for tanks to go. No strategy is perfect and often times player skill rules, but a good strategy followed by a platoon can often times swing things in your favor. This series will hopefully lay out some ground work and give ideas on how best to tackle a map by analyzing the standard game play for each map.

Our second map that we will cover is Cliff. Starting in the north and south, both team are connected through a valley on the extreme west of the map. Large boulders offer cover south of the valley, and a small town provides cover to the north. The eastern portion of the map is elevated, with two large jutting hills providing cover from enemy fire. An overlooking position near the center of the map allows tanks to fire into the valley from above. Plentiful cover throughout the area allow for multiple attack routes, with careful coordination and flanking playing a significant role.


This map features 3 main avenues of traffic with one breaking into two separate paths that can be utilized. The Valley (columns 1 and 2) is a sniper lane, the Hill Access (column 6) where the majority of the battles take place, and the Lighthouse (column 9) where flankers will travel.


The Valley has two main features to it with the Red Line consisting of the flow of direction and vast sniper lanes between the village to the North and the rock outcropping to the South. These are the hiding spots for any Tank Destroyers that will be sniping or the general defenders. The Lime Line represents that travel path that any Heavies or Mediums will be taking as it hugs the cliff wall and provides limited cover from the snipers but no cover from the tanks above on the hill. Additionally, it is most common to see the SPGs set up in the A1 and A2 zones to the North and K1 and K2 to the South.


The Hill presents several options and will see the majority of the action. The main pathing for direct confrontations is in the Blue Line with the hill at E6 being the place that most mediums race to. The Yellow Line is the safe path around the mini mountain that many tanks will hug and use to take shots on anyone traveling through the center of the hill using the Blue Line path, this may be slightly exposed to fire from the capture zones and bottoms of the Valley. The last major area on the Hill to be utilized is the Orange Line, along the cliff face to the Valley. This allows for complete access to top shots and spotting of tanks that travel the Valley but can also be exposed to return fire as they must move down the cliff surface to be able to aim down.


Finally, the Lighthouse has a single path around it, with limited cover from shrubs. This flanking path is best taken by large amounts of Mediums and Heavies, or a few Light scouts attempting to get behind the enemy position. The Purple Line is the only path around the flank which also presents a bottleneck if large forces being to move this way. A few tanks can hold off an army here as movement is as limited as the cover and so lanes of fire can quickly become blocked by friendlies if too many are there.

Effectively plan around this analysis, use the route to your advantage to best take on what tanks to expect in each area, and always support where areas are lightly defended but be ready to reenforce as needed. With a good platoon at your side, and now knowing this map better, you should be able to light the way for your team in the Lighthouse.
Read More

Tuesday, December 13, 2011

US Special Forces in FOW Part One

Being Special With Brian Part One
(Painting, Planning, and Reviewing US Special Operational Forces for Flames of War)
Background
So a few weeks ago I got an email from Steve asking if I would like to paint up and review the new OSS Operational Group (US802) out of Burning Empires. Since I needed a break from painting a slew of Union Infantry for Fire and Fury regimental I jumped at the chance to paint up a small 700-800pt. raiding force. However with Steve things are never that simple. I received in the mail the OSS blister and instead of the FFI box or blister (which would be used to fill out the guerilla platoons, here in front of me was "The Devil's Brigade" Special Service Force (UBX19).


So now I can't ever do things the easy way so I decided to build both the OSS raiding group and a LW FSSF company and write it up as a guide for those of you thinking about either running a special forces company or an American infantry force.  Ok enough with the chatter and let's get moving.


Review of the OSS blister and FSSF company set.
The Good:
The OSS blister contains enough figures to make 16 2-man bases. In game terms that give you a HQ, 2iC, and two operational squads at 7 stands each. The figures are a mixture of US infantry and airborne infantry. The minis will be familiar to those who have painted FOW Americans in the past. Nothing new to see but they are the pre-Cobra American sculpted by Evan Allen. These are my personal favorite to paint up and if I wrote anymore about them, my man-crush on Even would really start to shine. The amount of flash was almost nonexistent for these figures. Most of the metal that needed to be removed was on the underside of the base.


The Devil's Brigade" Special Service Force company box contains the required figures to form the core of a FSSF company. It included HQ, 2iC, with 2 bazooka stands, and two full FSSF platoons. It also contains two of the coveted US flame thrower stands, and the options to have either 60mm or 81mm mortars. Like the OSS blister these figures contained no extra flash were designed by Even and are a joy to paint.


The Bad:
I have nothing bad to say about the quality of these figures in either set. They are up to the high quality you would and should expect from Battle Front. That being said there are some minor issues that I need to bring up. In Burning Empire the core of your OSS raiding list will be your Operational Group platoon. These platoons are a bit pricey @ 230 points for two squads since you are only working with 700-800 points for a raiding list. The reason for this high price is due to the fact that prior to deployment you can swap out your 2 man rifle stands for a host of cool weapons from .30 cals and bazookas, to SMGs and MGs. So the downside here is that this blister will contain a lot of stands that will never make it into the game. On the bright side for all of the current US players out there, this is your chance to finally make good on all those bits in your US infantry bit box. 


 Personally if you wanted to do an OSS raiding list I would pick up this blister, the FFI blister and a weapons platoon blister. That would cover most bases for your raiding company provided that you plan accordingly.
The only bad thing I can say about the FSSF box set is that there is one beret wearing dude who looks like he is about to fall over. Like I said it is a solid box set and there really is nothing bad to say here.


Stay Tuned for part 2 when Brian talks about planning his list!
Read More

Popular Posts In the last 30 Days

Copyright 2009-2012 WWPD LLC. Graphics and webdesign by Arran Slee-Smith. Original Template Designed by Magpress.