Related Posts Plugin for WordPress, Blogger...
Showing posts with label Leviathans. Show all posts

Thursday, February 28, 2013

Leviathans Battle Over Libya

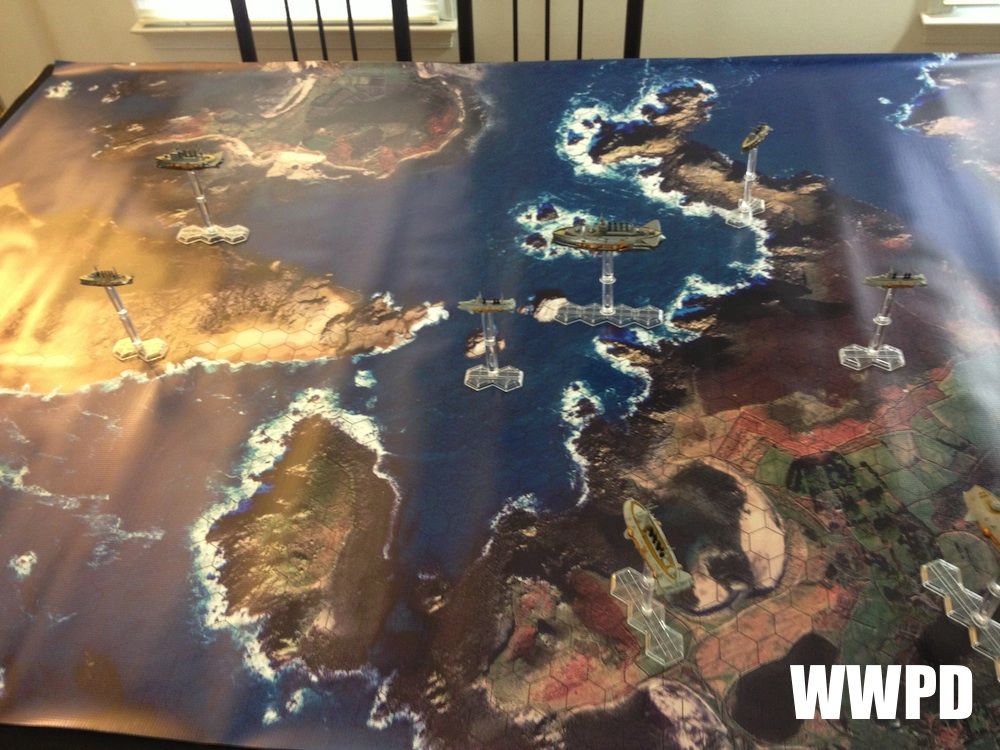
 The French Navy Vessels Pontbriand and Pelletier are on patrol over Libya, when Her Majesty's Leviathan New Zealand and her escort HML Raven move to intercept.  Early on, some well placed shots from the New Zealand cripple the Pontbriand's engines, and kill the crew leaving the French cruiser crippled.


 The french vessel Montpellier is nearby, and quickly arrives to support the crippled French cruiser.  Meanwhile, the Pelletier deftly maneuvers around the HML New Zealand, continuously crossing the T, and leaving the bow of the New Zealand a smoking ruin.

 The New Zealand is swarmed by the two light and fast French ships Pelletier and Montpellier, but the HML Raven escorts her valiantly, firing salvo after salvo into the French.
 The New Zealand easily avoids the Pontbriands bristling 65mm guns, but cannot last long against the swarming dogs.
 But the HML Raven is never far behind.
 Despite her valiant efforts, the HML New Zealand finally succumbs after taking a withering beating.  In a salvo of flame and fury, the French vessel Montpellier also crashes to earth, her hulking frame intertwined in the ruin of the New Zealand.
 The Raven is left outnumbered, but has not a scratch on her.  Her Captain is known for his daring, but even the French give pause as he comes about, and moves to intercept the Pontbriand.
 The Raven pulls alongside the Pelletier and lets loose.
 She then maneuvers herself into the bow of the Pontbriand.
 And scores a critical hit on her Engine, sending her plummeting to the earth.  Low on ammunition, and damaged, the two remaining ships part ways.  Both sides lost several good ships.  The Captain of HML Raven receives a distinguished service medal, and later receives a knighthood.
The Raven is in relatively good shape, all things considered.
Read More

Tuesday, February 19, 2013

Leviathans: Action Over the English Channel

The French Leviathan Jean Bart and her escort of 1 cruiser and 2 destroyers encounters the British Leviathan and retinue and an epic battle ensues.


The French attempt to keep their distance while firing torpedoes as the slower British try to close.


The French Leviathan and Cruiser both mounted Port and Starboard Torpedoes and began firing on the British early.  None of the British ships carried torpedoes of their own.
A British Cruiser and Destroyer break away from the HML Leviathan and close quickly.
The French and British cruisers square off to deliver broadsides as the British Destroyer makes a headlong run at the Jean Bart.

The French Destroyer Pontbriand makes a daring run at the Stern of the Leviathan, only to succumb to 2 withering salvoes from the monster's Stern gun.  In the same breath, the British Cruiser falls to concentrated fire from the remaining French ships.
The 3 remaining British ships get into close range and a furball ensues.

In a massive explosion, the Jean Bart crashes to the ocean below!  Her guns also pounded a British destroyer, sending it spiraling to the sea as well.

The french cruiser Dupuy De Lome and the Destroyer Montpellier hound the Leviathan.

After the engines are reduced to almost nothing, the more nimble French ships are able to stay out of the Leviathan's broadside arcs, and eventually bring the monster down.  The remaining British Destroyer beats a hasty retreat.

Both sides are severely bloodied in the fight over the channel, each having lost a Leviathan.  The French come home with a cruiser and destroyer, but both will need extensive time in dry dock to repair the damage!

Read More

Thursday, February 7, 2013

Map Master Battle Maps for Battletech/Leviathans

 Both Leviathans by Catalyst Game Labs and Battletech use 1.25" hexes.  Being a newcomer to hex mats, I was surprised to find that there aren't many manufacturers of high quality mats with those size hexes!  So I spent a good while internetting (yeah, it's a verb) and finally came across Map Master Battle Maps who specializes in Battletech maps.  I emailed Grayson from Map Master and asked if he could remove the hex numbers and elevation lines (used in Battletech but not Leviathans) for me on 2 maps I picked out.  He obliged and a few short weeks later the two maps I picked out arrived!


 The maps I received are just a hair under 6' x 4' and so work perfect on a standard size gaming table.  They're printed on a heavy duty vinyl.  The printing is high quality and the images look great.
 The first map is a big desert outpost.  All sorts of cool scenarios could be built around this map.

 In the fictional world of Leviathans, much of the combat takes place in the Mediterranean in and around Colonial North Africa, so this map would be perfect.
 My one gripe about the mats is only that they're glossy, and thus the light can tend to catch them and reflect a bit.  Not a huge issue, but in my gamer oom with all the lighting I use, it can be a little distracting.
 The second map I got depicts an archipelago that looks right at home in the English Channel, again fitting the Leviathans fluff perfectly.

 In total, I paid $165 for both mats on vinyl, shipping included.  At just over $80 a piece, I'm quite happy with them!

Read More

Tuesday, January 29, 2013

A Brief Leviathans AAR

My buddy Sean and I got in a game of Leviathans, and being Sean's first game we used the recommended starter battle setup.  He ran the French and I the British- through several games my father and I played we found the French to be far more forgiving, and so I was curious how that would play out.  The British ships were the HML Hertfordshire and HML Raven.  The French were the Pontbriand and the Montcalm.
The British Ships deliver broadsides to the bows of both French ships.


Commandant Pierre Deperdeaux of the French Destroyer Pontbriand

Captain Wilks of the HML Hertfordshire
We found a number of things to be true of Leviathans: #1- the mechanics work really well.  We really like the colored dice system, the firing arcs, etc.  #2- Initiative is HUGE.  Winning the initiative, especially in such a small game, is the single most important roll you can make.

The French win initiative several times in a row, putting their high speed to good use.
#3- The British ships really suffer from caliber schizophrenia.  With so many different sized guns on the ships (meaning they can't bracket fire), and a lack of crew in the HML Raven's Port and Starboard arcs (which adds an extra die to the gunnery rolls), we found British fire to be much less effective than the French.  While the British are more heavily armored, we found that having double the movement (in the case of the Destroyers), and far more weaponry of like calibers, the French could get where they needed to be and deliver the fire they needed to every single time. Unless the British won the initiative, the French were going to press their advantage every turn.

The HML Hertfordshire takes heavy damage to its Starboard side.
So I am excited to learn what makes the Brits tick in this game.  My knee jerk reaction is that the French are just better, but I'm hoping there's something I'm just not seeing yet.  The British guns have better range than the French, but not by much.  And with the French movement abilities, it's an advantage they don't get to employ more than once.  Combine that with firing at long range without bracket fire, and the British don't sling much lead at long range, allowing the French to close fairly easily.
The HML Hertfordshire goes down.
All in all, I am really enjoying the game mechanics and hopefully larger games will see some of the British advantages come into their own!

Edit: After seeing the Leviathans point calculator beta, the French ships are both pointed higher than the British.  In the case of the Destroyers, the Pontbriand is considerably more than the Hertfordshire, so hopefully the French superiority wasn't my imagination!

Editor's Note #2- We've since played many more times, and have found the French to not be quite as powerful as we first thought- true they can deliver a beating when they get up close and personal, but we've discovered the British can try to stay at range and have a better chance of survival when they do!

Read More

Tuesday, January 15, 2013

Leviathans- Unboxing and Brief Review

It had been a while since playing Leviathans for the first time at Adepticon.  But I liked it then, and kept my eyes on it thereafter.  When it was released, I was fairly caught up in other things at the time, and never got around to picking it up.  I added it to my Amazon Wishlist ages ago, forgot about it, and was pleasantly surprised when my parents got it for me for Christmas!  Thanks mom and dad!
This is a pretty big box! 


And it's packed full of goodness
The prepainted ships and stand peices


The massive French Leviathan

The French and British Leviathans side by side

The opposing fleets
 The ships are prepaints and fairly high quality, hard plastics.  They feel solid though you need to be a bit careful with the masts.  There are extra flight pegs for altitude, although no altitude rules are included in this box set.
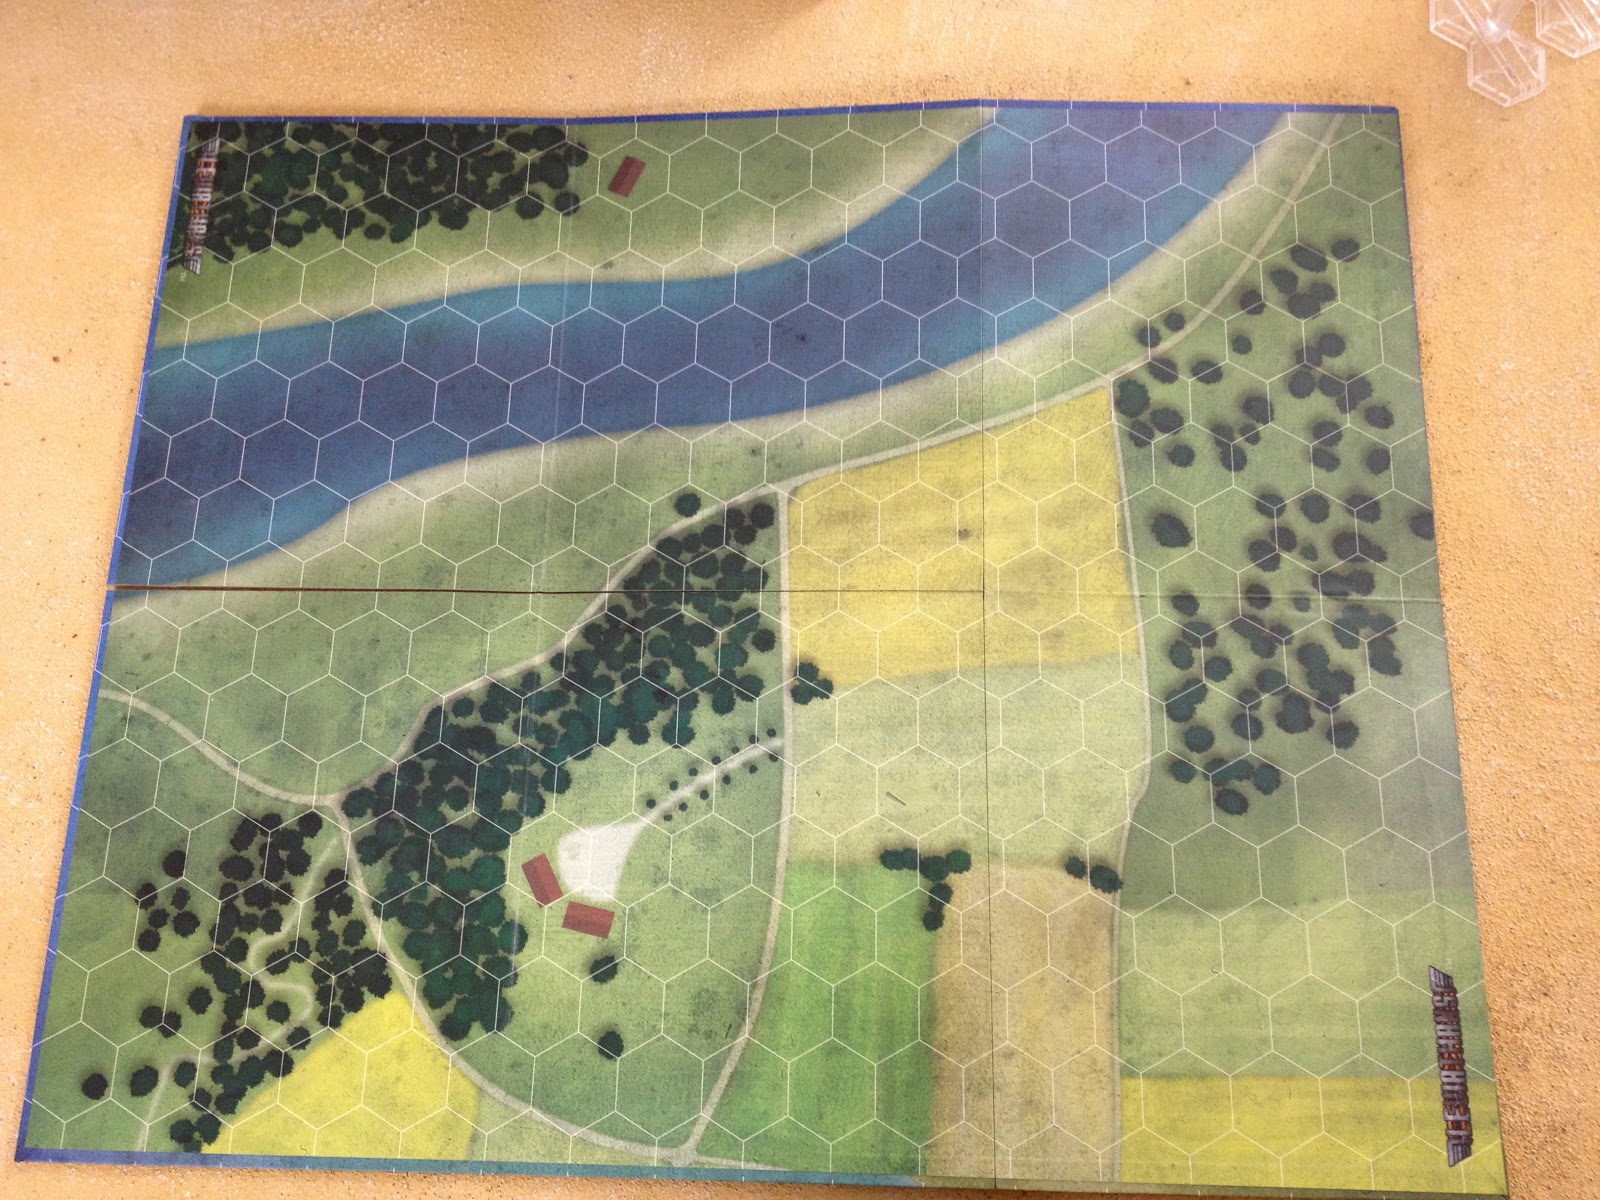
There are 2 double sided maps included.

The reverse side of the first map/

The second map

The two maps side by side

The printing is slightly off- not too annoying, but a bit ugly.

The other sides are also a bit off, thanks to the bleed from the reverse side.

But having a game look like this straight out of the box is pretty cool in my opinion!
 In addition to the game board and minis, there are lots of included components.
Neat information sheets for every ship are included.

With some beautiful artwork on the reverse side.

The main ship status display cards have cool blueprint style artwork on the reverse side.
Here is a WiP Italian ship display card I took from their website MonstersInTheSky.com
The SSD card is fairly straightforward, and manages to cram a lot of info on it!  Obviously the ship is divided into 4 "locations": Bow, Port, Stern, and Starboard.  These locations serve 2 purposes- the first is to determine which weapons can fire when shooting your foes.  The second is to see which part of the ship receives fire when being shot at.  

I will now cover the basic rules briefly.  The entire rule book is available online on their website.  
Movement: Movement is very straight forward.  On the bottom left, you will see "Starting MP".  That is essentially how many hexes you may move per turn.  If you note in the aft location, there are 3 "engine slots".  As those get knocked out, their associated MP points are lost.  So if I get an aft shot on that ship, and knock out location "2" (Engine/MP 4) then next turn it's max move is 10.

On the bottom right you see the minimum distance that must be traveled before turning.  In this case, the ship is rather nimble and so can rotate after only moving forward 1.  Rotating 1 hex facing costs 1 MP.  Movement alternates from player to player, ship to ship with the player winning initiative moving 2nd.  Bigger ships move first, leaving small ships able to react.

Shooting: My father and I played 2 games, and weren't overly excited about the movement rules, but were really blown away by the cleverness of the shooting rules.  Included in the set are 10 color coded d12 dice.  The black dice have 1-12.  The red 1-10, and the other colors progressively less possible numbers.  So all shooting is done by color.  The equation is simple: Firing weapon (modified by range) + Any Crew from that location + the target's facing modifier.  

The firing weapon is straightforward- if you look at the Italian ship above, the 47mm gun has a short range of 3 and a max range of 5.  At range 1-3 it rolls a blue die, and at range 4-5 a green.  If firing from the bow arc, there is a crew modifier of blue.  The triangle and T icons indicate the weapon can be bracketed- able to be joined by other weapons capable of bracketing in one salvo, and the T indicates it is a turret weapon giving it broader fields of fire.  Similarly, in the bow location, there is a crew modifier of blue.  So at short range our 47mm would have a base of blue + blue (weapon + crew).

Finally, you determine what you roll for the targeted ship- see how each location has a green and red arrow?  The green arrow is what is rolled when the ship moved and you are firing into that arc. The red arrow indicates the ship is stationary.  So, consider this situation: We are firing our bow 47mm gun at an identical ship, moving perpendicular to us (we are firing at his starboard side).  He moved last turn and we are at close range,

So we get a blue die (47mm gun at close range) + a blue die (crew in the bow) + a yellow die (starboard side, moving shot).  We take those 3 dice, add in a d6 (to see what location we hit) and roll.  We then consult the d6 to determine the location, then add up the numbers on our d12s.  If we equal or exceed the "breach" number of the system, we knock that system out!

For example, let's say we roll our 2DBlues and 1DYellow and score a 2 on the d6.  Our d12s add up to 10.  That means we knocked out our traget's starboard 47mm gun.  Had we rolled a 1 or 6 on the d6, our shot would have missed.  Had we rolled a 3 on the d6, our 10 points rolled on the d12s would not have exceeded the location's breach score (11) and the shot would've had no effect.

That is the basic mechanics- there are of course rules for critical hits (scoring against an already knocked out location has a chance of breaking the keel- something which happened catastrophically in one of our games in a very cinematic moment!)  There are also rules for torpedoes, etc.  

Dice.  The string is for checking line of site
 In all the mechanics were fairly easy to pick up, and after a few rounds we had it down.
More included stuff!  Shown here: torpedo markers, screening markers (a somewhat advanced rule that we didn't utilise), turn/movement guides, Commander's Manual (full rules), Lieutenant's Manual (quick rules), The Gazetteer and a short story, 2 SSDs for the big ships (each having 2 additional arcs), and a sticker sheet.

Battling it out in our first game.

My Dad thinking very hard about his next move- does he deliver a broadside but expose his already damaged port side? Or make a run for it to turn his good side to my guns?
In all, we played 3 games of Leviathans.  We really enjoyed it, though we struggled with finding what makes the British any good.  The French ships were far faster, and could deliver withering fire at close range.  The British ships had marginally better armor, and slightly better range.  We concluded that we needed to play more to really figure it out- a prospect that both of us were quite happy about.

Very fun game to be sure!

Read More

Popular Posts In the last 30 Days

Copyright 2009-2012 WWPD LLC. Graphics and webdesign by Arran Slee-Smith. Original Template Designed by Magpress.