This is part of the Judge Dredd series of posts. See the Main Article for more information.
The Build - Helmet
I did a ton of research on creating a lid and on buying one. Very quickly, I dismissed making one. Unless I was flat broke, I could never see making one myself, as it is very labor intensive and full of 'Nope' for me.
If you decide to buy one like me, I suggest you poke around and figure out what will be right for you. Some are larger than others, some are more accurate, etc. Whatever you decide to do, make sure you get one from a reputable vendor - again, see the Facebook Group. If you go for a cheap lid on eBay, you could be buying a re-cast or getting a helmet that is just not right for you. I am a pretty big dude, so I was worried about fit. I found my helmet from Mr. Pinsky's Props. For me, this offered the best combo of price, size, availability and accuracy.
There is some significant trimming and sanding required to get the helmet ready for primer and paint. I would recommend some sort of power sander - your arm will fall off otherwise. I went ahead and added some damage to my helmet at this stage as well. I painted the whole thing with a couple of coats of grey primer before doing a few layers of aluminum paint. If I had to do it again, I would do a couple of more layers of the aluminum. The thinking is that if I get a chip, it should be metal underneath. Also, I can just sand off a little paint to reveal the aluminum below. This worked ok, but I did end up going back with a silver sharpie on a couple of spots.
Anyway, I did a couple of coats of Satin Black and let that dry overnight. I like the satin paint because is has a very slight shine and is also tougher than flat black. I am very happy with the way it turned out. I then masked that off an did the Rust-Oleum Colonial Red.
After getting this done, I went back with the Goldfinger and just rubbed it on to the badge. I think this looks great!
For the visor, I used the recommended Hobart 770580 Face Shield Replacement Lens, Shaded. I just cut the thing to size with some tin scissors. Make sure you use the templates from the Studio Creations site for your lining. I used some foam floor mat for the liner and covered it with a spray of plastidip. Use velcro to attach the visor and all lining parts so they can be removed for cleaning and upgrades.
Updated March 19th, 2014 This is part of the Judge Dredd series of posts. See the Main Article for more information.
The Build - The Belt
People are doing a lot of different things for the belt and buckle. I decided to go ahead and order a buckle with my badge from Sean Cho (rattlehead1 [AT] msn [DOT]com) on the Facebook Group. His buckle is very accurate and very well made. I used a little wash on it and it was ready to go. I found a great Dickie's belt that allowed me to attach the buckle on a flat surface with just a piece of Velcro. This was one of the easiest parts of the build.
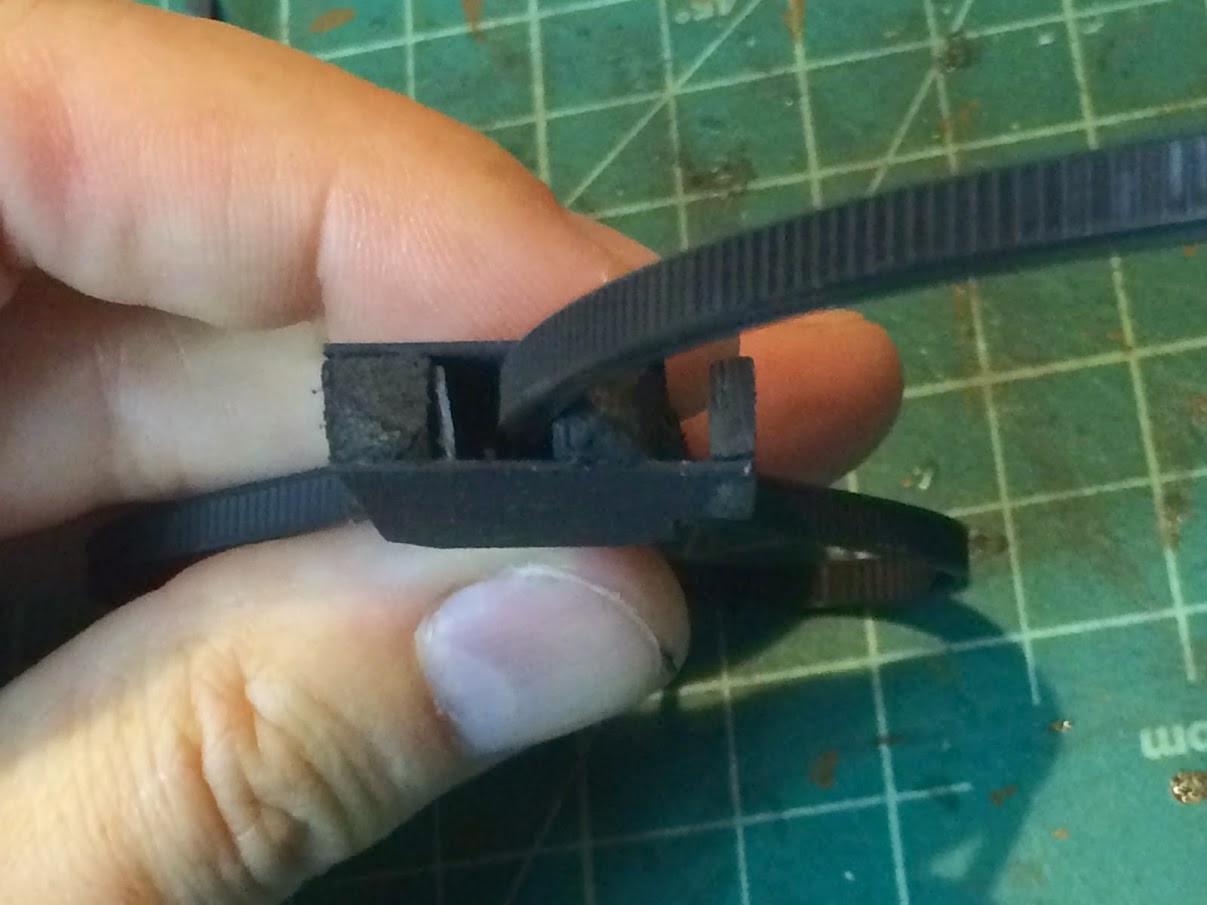
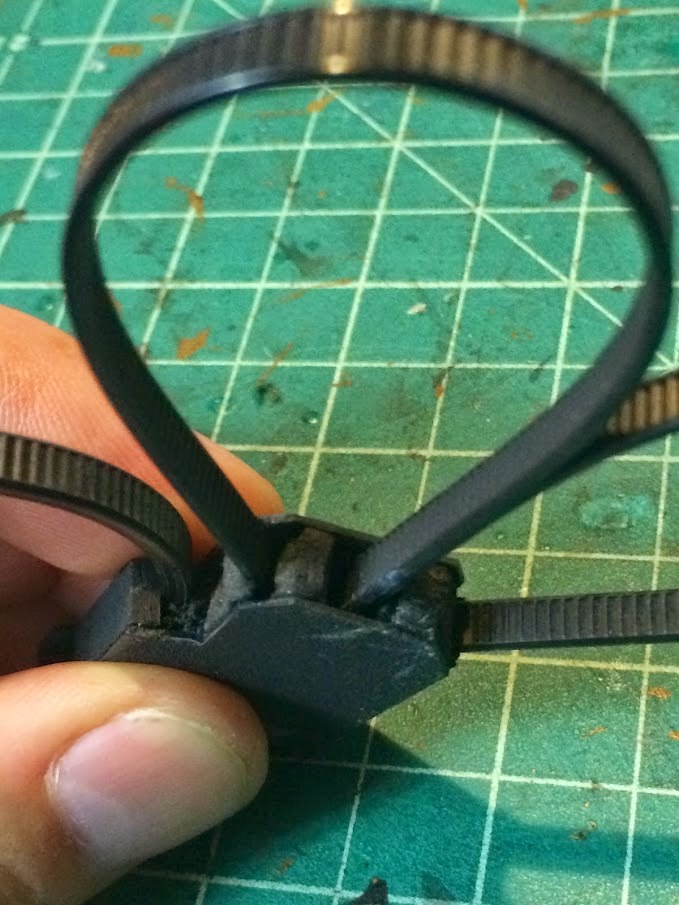
For the accessories, I decided not to make much. I ordered the leather from Dave's Leathers (dferrickleather [AT] yahoo [DOT] com) for about $160. I ordered mines and grenades and such from vendors listed in the Facebook Group file. For the magazines, you can use Tactical Magazine Pouch, which is pretty close to the screen-used. Patterns - Update 11/13/2014 In helping a friend with her build, she found these great patterns for the belt accessories. These templates were created by Steve Mack on the JUDGE DREDD Costume Group on Facebook. Thanks, Steve! Door Mine Pouch Stun Grenade Pouch Med Pouch Med Pouch/Grenade Holder I made the Med Pouch out of 1/4" EVA Foam and it worked great. I did use some thin Kydex to reinforce the inside of the back wall and the sides for strength. For the cross, I just cut one out of 3mm foam and glued it on - I was pressed for time. --- end update Cuffs - Update 9/3/2014 For my recent event, I had no cuffs at all, so I decided to make some not very screen accurate ones just to have something on the belt. Again, thanks to Studio Creations, there is a build sheet for the cuffs. I simply used some of my spare .028" Kydex to fashion the top and the bottom pieces. I then cut strips of the kydex that were a little thicker than the zip ties I had to make a channel down the center of the plates. I glued those in, making sure to leave enough room to two zip ties. Next, I took 4 layers of kydex and made the outside piece where the two ties are held in place. For the last bit, I just glued in some 1/4" craft foam to fill out the thickness. After that, I hacked up the foam to fit and the ends of the zip ties and glued them in. I wrapped the zip ties in place and glued them together at the ends. Next, glued the top on and call it a day.
Craft foam sandwiched between kydex.
See the channel created with the kydex?
Carved areas to fit the ends of the zip ties.
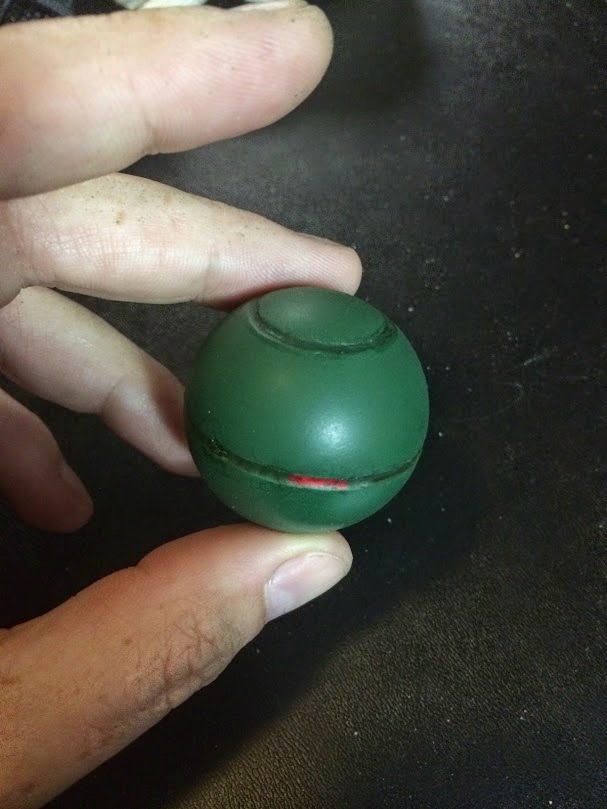
Screen accurate? Absolutely not - these are not long enough or thick enough to match the screen. Cost? Probably $.25 and they are better than nothing. I could have probably done something with the ends, but I was in a big hurry and I can always chop them off and make them better later. Flash Bang Grenades Update - 9/5/2014 Originally, I just had nothing in my flash bang pouch. This was fine, but I cannot keep the build static, so I got busy building some grenades! Apparently, the ones used in the movie were 1.75", which is a little larger than a ping-pong ball (40mm). I figured that these would be close enough! I looked into ordering these, but found you can really only buy a bunch. This took me to my local sporting good store where I got 6 balls for about $4.
Hold your ping-pong ball up to a light and note the natural line running right around the middle of the ball. This is where the two halves join. Use your sharpie to trace this so you can see it.
Next, use the tip pictured above in your rotary tool to slowly and carefully grind away at the line your just drew.
Use sandpaper to clean this up
To trace a line for the switch, I used the inside of a roll of electrical tape. I held this tight to the ball and just traced a line with my trusty sharpie.
I used the same technique as above to grind out the switch. Be very careful on this part, as the material is only half as thick as the middle part.
I used some thin wire to secure the ball and paint it. When this was dry, I used a brush to fill in the area around the middle and paint in a red indicator. Then, I used some black wash to darken the depressions. Last, I sealed the ball with a matte spray.
Screen accurate? Nope. Cheap and looks good on the belt? Yep! --- end update
This is part of the Judge Dredd series of posts. See the Main Article for more information.
Last Update: September 18th, 2015.
The Build - The Boots
This was going to be a challenge, as there was really nothing available at the time I was building. I believe that some screen-accurate boots are on the way, but I had to scrounge for something. Again, I did a ton of research and settled on some older O'Neal Elements for about $80 on eBay.
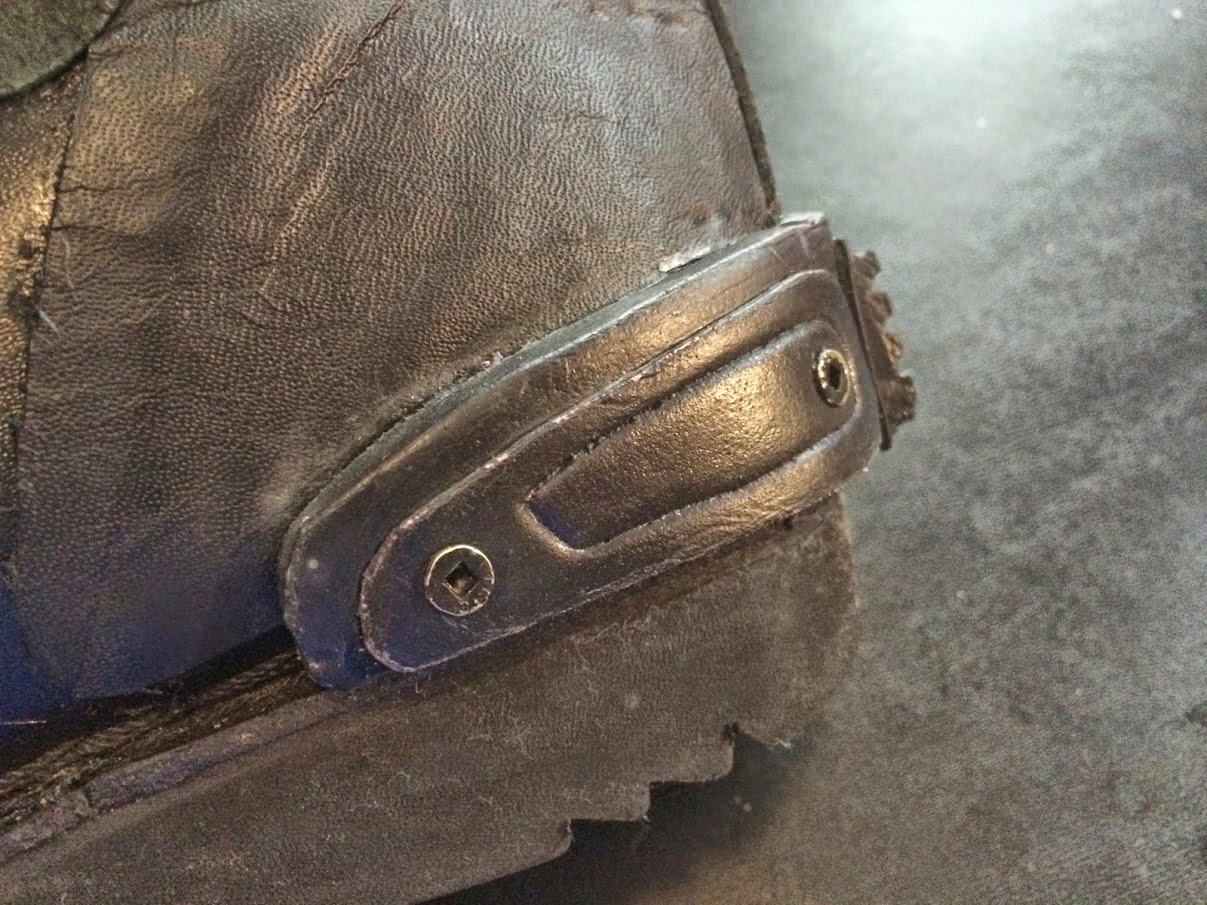
The first thing I did with these boots is to rip off all of the plastic and such that did not fit the build. You can see where I cut off areas and replaced them with some cheap leather or suede pieces. I decided not to alter the number of buckles (they should have 3, not 4) as that just seemed too involved. I took my trusty silver sharpie and made the fasteners look more like the screen-used ones.
Once that was done, I set about making the heels and toes. The heels were just craft foam cut out to look like what I saw in pictures on the web. I made a paper template and went to town. I hand-sanded the craft foam to get the proper look. I used a ballpoint pen to draw in the shallow lines on the heels. I also found some brass screws that looked good enough to attach to the foam. Plastidip and paint.
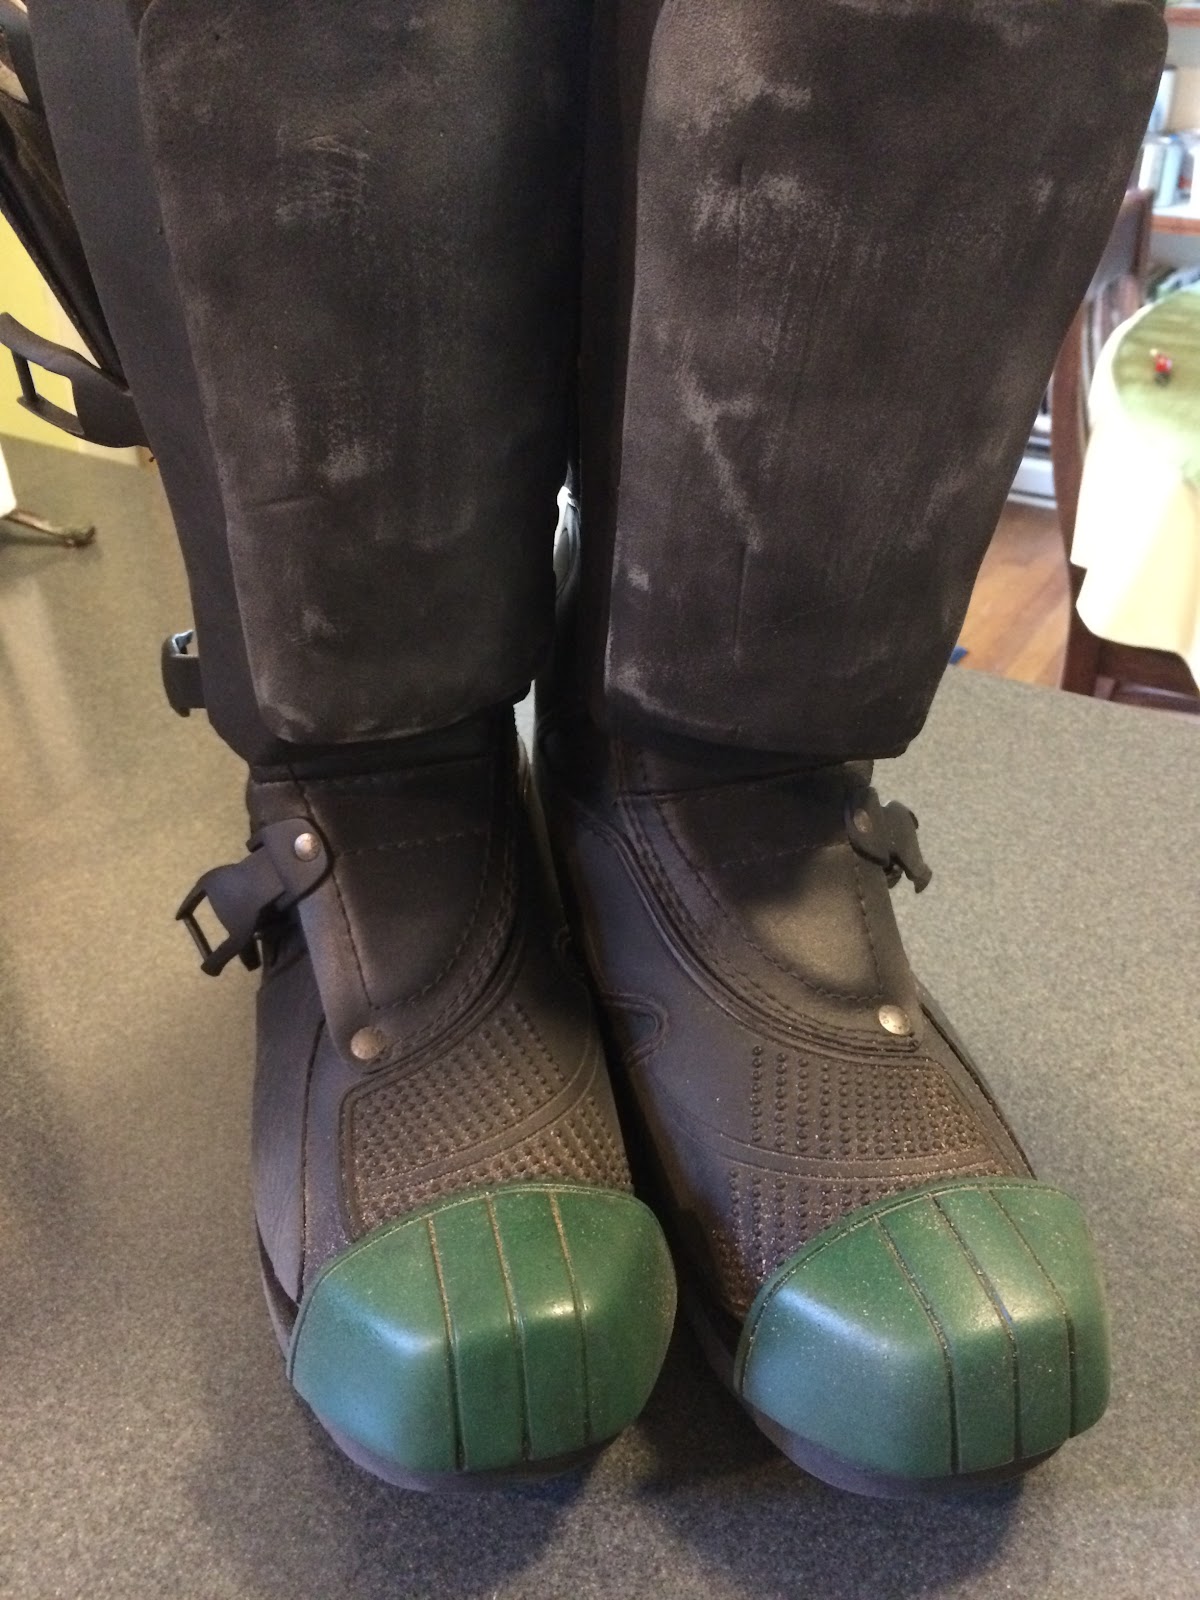
Update: September 18th, 2015: I went ahead and ordered some toe caps from Bawz Props. Make sure you use IC-2000 rubberized superglue to attach these things - none of my regular glues work.
---- End Update
For the shin guards, I used the template in the instructables. This was difficult to assemble and I wish I had a better idea for how to make these. My shin guards look a little concave, but they are passable. I actually ordered some from a vendor, but they were WAY too small for my boots (size 11). After building and painting, I simply used Velcro to attach to the boots.
OK from this angle...
...terrible from this one. Will be fixing soon.
UPDATE - 8/25/2014 I worked on the shins, and I think I have something acceptable. I built up layers of craft foam to fix the concave surface of the shins. I then added another, slightly larger front piece to look fairly close to the Dredd ones. These are not perfect, but much better.
--- end update
UPDATE - 9/22/2014 I recently ordered some suede for another project and took the opportunity to order some extra to upgrade my boots. In keeping with the build it, wear it, upgrade it philosophy, I am upgrading the boots to have the inside suede heat-shield seen on the Dredd boots.
This is what the movie boots look like. Picture from Studio Creations.
My O'Neal boots.
As you can see, my boots are not exactly the same as above, but I think I can add some suede to give more of the look of the screen boots.
For materials, I ordered half a yard (WAY too much) 6807 Ultrasuede Heavy Weight #6807 Ash from Fields Fabrics. All darkened up, I think that this stuff is pretty close.
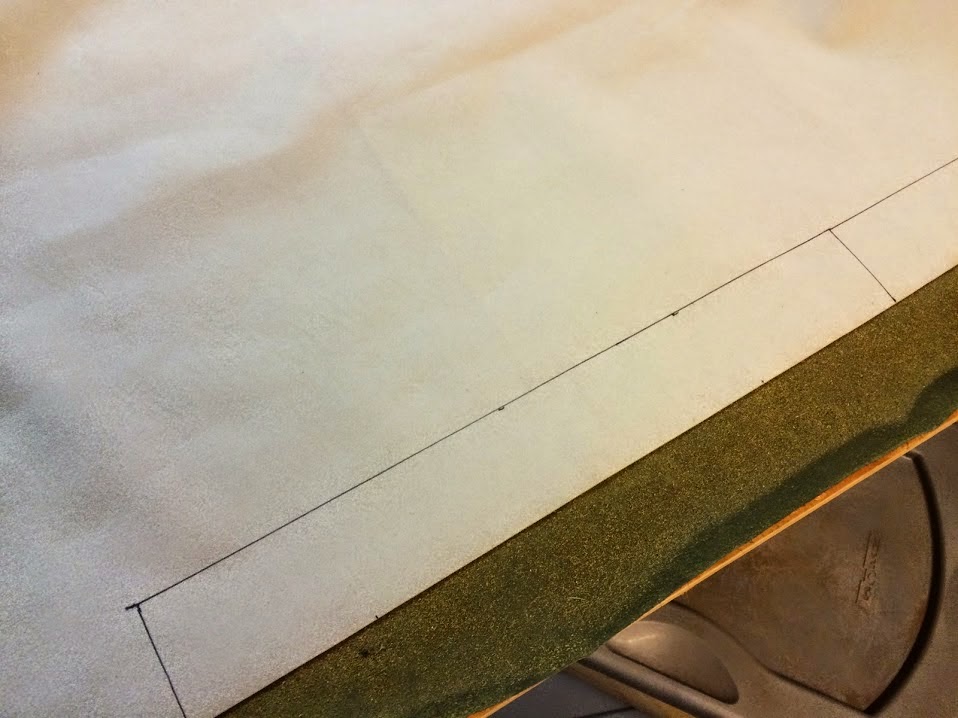
Above, see me making a template. I love to use painter's tape and paper - so easy! Since the area I want to fill is recessed, I simply tape along the edges and push it down with my fingers. Once the tape is good and in there, I use a pen to make sure I get the line correctly. Next, cut out with a hobby knife.
Above, see the two pieces of suede I cut out. I went over them with a little flat black spray paint. I went pretty light, as I can always add more later. DO NOT try to actually burn these black, as that will only ruin the fabric. At least, that is what I hear. >.<
I used hot glue to attach the suede to the boot. I made sure to go lightly and to apply pressure to the suede to keep the bumps to a minimum.
To give a finished look, I cut another piece of suede for each booth. The piece is about 2" wide and 15" long. I made sure to darken them up a lot with the black spray paint, as I think the originals are actually black.
I glued the trim piece around the top. I made sure to stretch out the boot tongue flat to glue the pieces on. I cut the trim as show above to give a more finished look.
Above, see the finished boot. I will weather and such to make the whole thing match. I am pretty happy with how this turned out. I think the boot looks much closer to screen now.
--- end update
The toe caps were the scariest piece, so I saved it or last. With the shin guards being too small, I figured anything I ordered would be too small too, so I decided to make these. I needed a pattern, so I used blue masking tape to create a toe cap on the boots. I just put on layers of tape over the toe until I was 3-4 layers in. I then took a razor blade and cut away tape until the toe cap looked right. Next, I used a sharpie to draw in the panel lines as seen on the Dredd boot.
After peeling off the tape, I cut along the lines I drew and had my pattern. I used the templates to cut out 2mm craft foam and heat-shaped to fit. There were some gaps between the foam I cut and the soles of the boots, so I just cut out several strips of craft foam to fill in the open spaces, building up with layers. This created a much better base to glue the caps on. Hot glue was used to attach to the boots. I then used a ballpoint pen to create the line around the top edge. Seal with white glue and paint (after masking). I used the Hunter Green paint suggested, but I found that to be WAY too bright. I went back and misted on some flat black until I got the shade I wanted.
I feel like the toe caps and heels are still a little soft. I got some gouges on them at my first show, so I will be looking to strengthen them. I think I will try another couple of layers of white glue. Maybe I will mask again and hit them with some plastidip.
In late 2013 and most of 2014, I secretly toiled on making a Judge Dredd cosplay (I hate that word) outfit for GenCon. Once the WWPD Crew decided to head out there, we discussed doing something for a costume, but pretty much dismissed it as a group, though Steven's Xyzax was great. Of course, I could not give up the opportunity to spring a surprise on my man Luke, so I started researching and building.
I hope that this article will help people looking to do their own build, and contains information I used to do mine from mid 2013 to mid 2014. This article contains my process and experience - I am sure that others have used different methods and information sources, but these are mine. Some will make more, some will make less. My objective is to create what I would have wanted when I started out. I hope this tutorial for building a Judge Dredd costume helps!
Version 1 - Improvements below. Like the upside down buckle? It fell off at one point and somehow got re-attached upside down. Oh well.
The Decision
I had recently discovered the 2012 Dredd movie and loved it. Like most Americans, I saw the previews and skipped the theatrical release - the Stallone version was not good, and influenced my decision. I did some preliminary research around the web and quickly decided to go for it. I had almost a year to put it together, so I could take my time and spread out my budget. Time and budget are your primary concerns - can you afford it, and can you do it in a reasonable time period.
In doing research, look here:
Facebook: Get on there and look for the JUDGE DREDD Costume Group. This is a wonderful group with great information and suppliers. I could not have done this build without that group. The files section on the Facebook page is a great resource and is usually kept up to date with information - learn how to use it.
Studio Creations: Unbelievably helpful and updated when new info is learned. If you are building a vest, this is a must. Seriously - go read this site right now, or at least open it in another tab, as I will reference it constantly.
The RPF: I found this site to be helpful in the beginning, but less and less as I moved through the build. I did return from time to time to look for specific how-to types of things.
The Brit-Cit Forums: Good for specific solutions people have documented in the Forum.
I used the equipment list from the Facebook group to get an idea of what all I needed to assemble for the build. I had never done anything like this before, but I did not want to just slap something together. I was not planning to go all the way to having everything screen-accurate either. On a screen-accurate scale of 1 to 10, I was going for about a 7 or 8.
I figured that it would take about $1000 to get this together if I made my own vest and got fairly cheap leathers (it ended up being more). From a construction and time standpoint, the vest would be the most difficult piece to tackle. With that, I decided that I would buy all of the belt accessories and the helmet - too much to try to make on my own, and reasonable pieces seemed to be available for a reasonable cost.
In laying out the work, I figured that a year would do it. I looked through the web and other people's experiences and calculated 6 months was the absolute minimum to do a good job. Given that, let's do this!
The Build - Vest
The vest would be the most difficult part of my build and had to be tackled first. Kurt Struss - who is a very nice guy struggling to get a one-man show off the ground and has outfitted 300 Judges - has some great stuff, but at the time I was building there were a ton of production delays and I was in no way guaranteed to get a vest at all, or in time for GenCon 2014. If you are not prepared to spend a lot of time on construction, I would consider buying one. I thought it would be fun to make, so I decided to go ahead and make the vest, starting with the shoulders. I figured that if I could make the shoulders, I could make the rest of the vest. Be warned - the entire vest is a very time consuming and difficult piece to make -- but, if you get through the whole vest, you can make the rest of the build easily.
The first place to go is to this awesome Instructables writeup by krsprops - there is even a short video intro. Use this tutorial to get your bearings, and be sure to consult the Studio Creations site as well. I will not show a ton of build photos, as the links above do a much better job than I could. I watched some videos online to see how to work with craft foam and a heat gun. Make sure you can use a sanding block and have a suitable rotary tool for shaping and smoothing the craft foam. Here are a few pictures:
I really like the textured surface the flex-seal gives on the eagle.
I made an entire pair (not pictured) too small for me (I am about 6'4", 230lbs) and then created this second pair. Take your time and figure out how to adjust the scale of the patterns provided. I found them pretty easy with the great instructions and templates. I did not get the eagle wings just right, as they should go all the way to the edge on the lower pauldron. I used plastidip spray on the plain shoulder, and flex-seal on the eagle. I am pretty happy with the flex-seal, but be very careful with it -- it goes on really thick. It has amazing durability, but is also fairly rigid. I spray painted all of this flat black.
Next, I cut out patterns for the shoulder pieces using those in the Instructables. Lots of sewing and glue for the result below.
For the gold, I used Daler-Rowney Goldfinger Metallic Finish. Somewhere online, it was discovered that this is exactly what was used on the actual screen-used armor. Next, a little bit of black wash, then sealing with testors dulcote spray. I touched up from time to time with some plain old black craft paint.
See the instructables for details on manufacturing. No, really - go read it.
I also created the tabs that go at the bottom of the shoulders. I got some cheap leather pieces from a craft store and ordered some 1" brass eyelets on Etsy.
I cut out two pieces of leather for each shoulder and put the cut-off tabs from the Premier Kayak Sit on Top Handles in the middle. I then just hot glued it all together and attached to the bottom center of each shoulder. This is where you will run some 1" webbing through with some 1 Inch D Rings - painted black - to secure the shoulder pads to your arm.
Note that this one above is actually backwards - the tab should be flipped the other way.
For the rest of the vest, I went through the web and dug up the materials that I would need. I purchased 7 running feet of 2mm Foam Sandwich Mesh Black for the outside facing vest material. This was WAY too much fabric, but I figured I would screw up a few times on the build. I had no major re-work, so I only ended up using about half the fabric. For the inside lining, I just got some plain old black material from a craft store. I made sure it was tough, but it was just some cheap stuff you will see below. It felt a little like very thin leather on one side, and just plain old t-shirt like cloth on the other.
Next, I wanted to to try the back piece to get my technique down. I figured that it would get the least attention and offered me a chance to check my skills and to screw up a little on a less-closely-seen part of the build. For a result closer to the movie, you will have to make some changes to the patterns provided in the instructables, or check out the awesome pattern at Studio Creations. First, you need to adjust the size of the patterns provided to fit you - if you didn't read the Instructables yet, go do that now - I will NOT be repeating instructions available there.
In making the back plates, I cut out the recessed areas after I glued them together. I used 1/4" (6mm) foam for the base - the light grey - and 2mm for the thin plates (in colors). If I had to do that again, I would cut them out before hand and add in yet another piece of foam to get the correct depth. The bottom piece was done this way and looks better, but took more time. Finally, I glued a piece of 2mm foam to the back of the finished piece and hand-cut it out to leave a thin border. This is what you will use to sew your plates on. Tip: Use a sharpie to write on the foam - it works great!
I trimmed the base vest pattern by hand to make it fit the photos seen on the Studio Creations site. I rounded the top and bottom and generally sculpted the look. Have a friend help you take some measurements before cutting out your fabric.
I cut the material out - lining and mesh - and used spray adhesive to put the fabric together. I didn't even notice how lop-sided the bottom was when I took this picture, so I doubt anyone else has noticed. This looks ok, but I would have fixed this if I noticed. Make sure you account for the edging you will be putting on the piece!
I used some cheap fabric tape (sources locally, so no link) to line the back piece, attached with hot glue, as I tried to avoid sewing as much as possible. In the picture below, I have used blue tape to mark the locations of the plates before sewing. For both the look and the strength, there is no getting around sewing the plates on. I hand-stitched the plates on after a good spray with plastidip.
After that, I used thin superglue to seal the stitches and really make the foam stick together on the edges. I had noticed a bit of separation on the plates while I moved them around, so I just applied some thin superglue to the plate and rotated it around to spread out the glue. Make sure you glue AFTER sewing! The superglue strengthens the edges and holds in the stitches. If you glue first, it is really hard to sew through it. After that, you can use some black paint to finish the plates off. If they shine, use some dulcote to reduce that.
With my vest construction method, you basically cannot sew the webbing staps on. You would have to sew the webbing to the liner first, then put on the sandwich foam fabric, then the plates, and -- screw that. Honestly, I did not think of that while I was constructing, but I think I would do it this way anyway. For the 2" webbing, I used a bead of hot glue about every inch to attach. This holds the webbing on well, but allows for flexibility. It seemed to hold and work well.
This is a picture of the inside of the back plate, after adding some of the webbing. The Studio Creations site has an awesome guide to the webbing, so go read that. Really - go read it. Tip: Use chalk to mark up your vest - it comes off easily.
Note: I have since moved the strap pictured above up the vest about 1.5"
To make the front lower plates, I followed the patterns from the instructables. I used a piece of 1/4" foam and cut out a right and a left. I then created the bend with a heat gun and cut out the recessed area. I recessed the area and re-glued it in. Shaving off the excess in the back was a breeze.
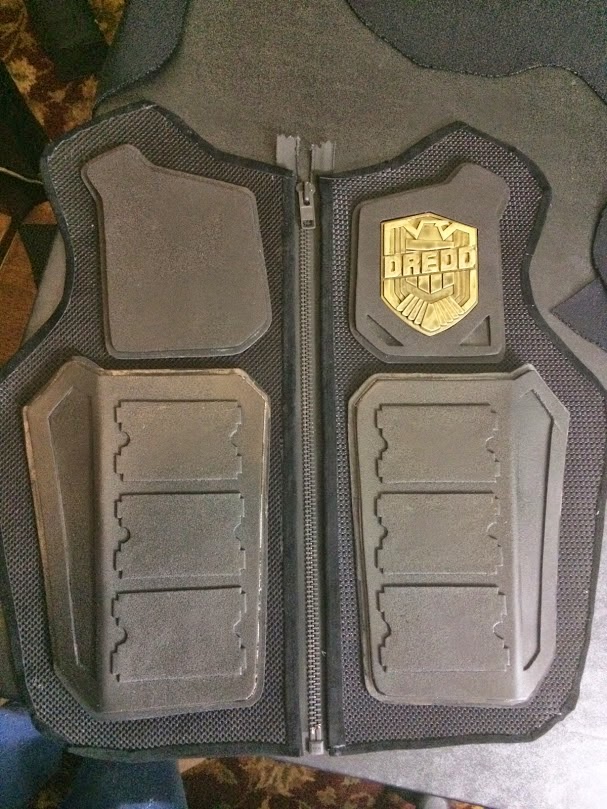
For the upper plates, use the pattern and make two copies, one reversed. Use the recess trick from above to get everything done properly. Note: Have your badge done BEFORE this step. I got a great badge from Sean Cho (rattlehead1 [AT] msn [DOT]com) on the Facebook Group and used it as a template. You see two magnets sunk into the badge area so that I can replace it in the future, should I choose. Again, you need to use a lot of glue to keep this all together. Make sure you do all of your edge gluing AFTER you sew the plates onto the vest.
Again, I glued a sheet of 2mm foam to the back of the plate and cut it out to leave an edge to sew the plate to the vest fabric. Plastidip, then paint.
Badge - Update 9/16/2014
I went to the Wizard World Richmond Comic Con this past weekend and pulled two days of patrols. On the second day, the first thing I did was drop my badge. The main part was fine, but the last D broke off. Luckily, two young ladies let me borrow some tape to fix it up. When I got home, a permanent fix was in order.
I decided to add some more magnets to the badge itself to hold it on more securely. At the same time, I would back the removable DREDD with metal to both hold in straight -- it had started to bend a little -- and to allow for a better hold from the magnets.
In the above picture, you see three more magnets added. The one in the center will also provide more holding power for the metal-backed DREDD. I just used my drill to carefully drill into the badge just enough to hold the magnets flush. I used plenty of super glue to hold them in place. Make sure the magnets are all aligned the correct way.
When the magnets on the badge were dry, I put some paint on the back of the magnets and put the badge in the vest. This allowed me to see exactly where to cut the holes to put the securing magnets. I cut the holes with a hobby knife, as my armor is just craft foam. Glue in the magnets with super glue, making sure you have them oriented correctly.
For the removable name plate, I used my rotary tool to cut out a piece of metal from a putty knife I had around the house. I shaped it to fit the back perfectly and used a grinder to finish off the edges. I roughed up the surfaces and used super glue to mate the pieces.
Above, see the finished product. The DREDD sticks up a bit more, but it looks fine. The hold is now VERY strong and the name plate does not bend at all. I like the modification and I am sure there will be no more badge dropping incidents.
------- end update.
For the rest of the vest, I did not take a ton of construction pictures -- sorry! Below, see the base vest just prior to sewing on the plates. Basically, I got my pattern sized correctly, cut it out and assembled it. I used just one pattern for both sides. One copy one way, flip the pattern, do the other. This makes sure both pieces are at least the same. I test-fitted the plates and adjusted the pattern as necessary. When I was satisfied, I cut out fabric to match the pattern.
Make sure that you account for the trim when doing all of this! I used 20mm Ultra Suede Tape, and I wish I used it for the back too - it looks great. I have no sewing skills and no equipment, so I glued it on with hot glue. This took a ton of time, as you have to cut and nip pieces of the suede to make sure it doesn't bunch up too much. It is a pain in the rear, but I did not know what else to do. I am sure someone will tell me now!
I tackled the strapping using the guide from Studio Creations. For webbing, I used hot glue and reinforced with cross-pieces of webbing for a secure connection. For elastic, I used hot glue on a small area, and used webbing cross-pieces to reinforce. Do not try to use hot glue on a long piece of elastic, as that will compromise the flexibility and it really just doesn't stick well.
Make sure that you run the 1" webbing from the front of the vest to the back through the top shoulders - I didn't, but will ASAP. Fixed! This is NOT shown on the SC diagram. This will help keep the shoulders locked down right, which is a major issue to figure out with a home-made vest. Again, thanks to the Facebook Group for helping with this!
I decided against the screen-accurate, very expensive buckles. I just could not see putting out the cash for them with my objectives. I can always upgrade later!
Photo by Mike Thompson of a Leather Next product.
My new version of the above.
Here are some of the items I ordered to complete the piece:
My vest strapping after GenCon. See the ripped strap at the top? This is also prior to re-doing the shoulders.
Here's the vest out for repairs.
Shoulder Buckle Update - 9/18/14
I have been keeping a keen eye out for affordable upgrades for the build. I recently came across some pretty good 1" metal buckles that are very affordable at $24 for 5 buckles. Look up: Metal side release buckles 30mm - I think the guys over at Brit-Cit or the RPF found them. Anyway, I ordered them and I think they look pretty good. I painted them with auto primer, then went over with a few coats of flat black.
--- end update
The Build - Neck Roll
I knew this would be hard, but I had no idea how insanely hard this would actually be. I tried using an american football neck roll as a base and a steering wheel cover for a covering to disastrous results. After wasting money on materials, I ordered a wonderful neck-roll from Nadja Yates in the UK (nadjacoplander [AT] hotmail [DOT] com) for about $150. Expensive, but well worth every penny. Don't build this, buy it.
The aborted piece. Do not make this, buy it.
The Build - Jacket and Pants
There is some awesome leather available if you have a very large budget. The items are spot-on and really great quality, but were way outside of my budget. I thought that the leathers were mostly covered up, so I quickly set about looking for something I could use. For the jacket, I ended up ordering the River Road Race Vented Leather Jacket, but it was not my first choice. For months, I waited for the Xelement Executioner Jacket to get back in stock, but it did not in time for GenCon. Of course, a week before the Con, it is back. I still may get one if I am feeling rich at some point, as I think it is the closest reasonably priced jacket out there.
For pants, I think that the Xelement Armored Cowhide Racing Pants are the best affordable thing available. You will want to get these 2"-4" larger than your normal pant size, as they are very tight.
I got away with spending a mere $250 on leathers, and I felt very good about that. I got real leather stuff that looks pretty close. I would prioritize pants over jacket, as 75% of the jacket is covered by a vest, gloves and pads.
I was very pressed for time when working on the elbow and knee pads. I just drew up some patterns really quickly on cardboard. I held the pattern up to the pants and made sure they were close enough to the correct size. I then used 2 layers of 1/4" (6mm) craft foam to make the basic shape. I cut out the ridges with a sharp exacto knife and sanded all around with a sanding block. Plastidip, then paint. Again, I misted the Hunter Green with back to darken it up. I added elastic straps to the back of each according to need -- shorter for elbows, longer for knees. I used the same size and pattern of pad for both sets.
These are pretty lame.
These turned out ok, but this is another are where I plan to make upgrades. There are some really great products out there that look much better than mine.
The Build - Gloves
I looked and looked and looked for gloves that were cheap and close. I actually purchased a cheap pair for $20 with the intent to modify them, but did not go through with it. I found that picking up all the little bits and pieces would end up costing me a ton of money and not look as good.
I ended up with Lawman V4 Leather Gloves from LeatherNext for $100 shipped to the US - they went on sale for a short period. They are on V5 now, so I am sure they are even better. I found no way to get cheaper, better looking gloves than these. Keep an eye out there, as sometimes people upgrade and let their old ones go for a discount.
The Build - Lawgiver
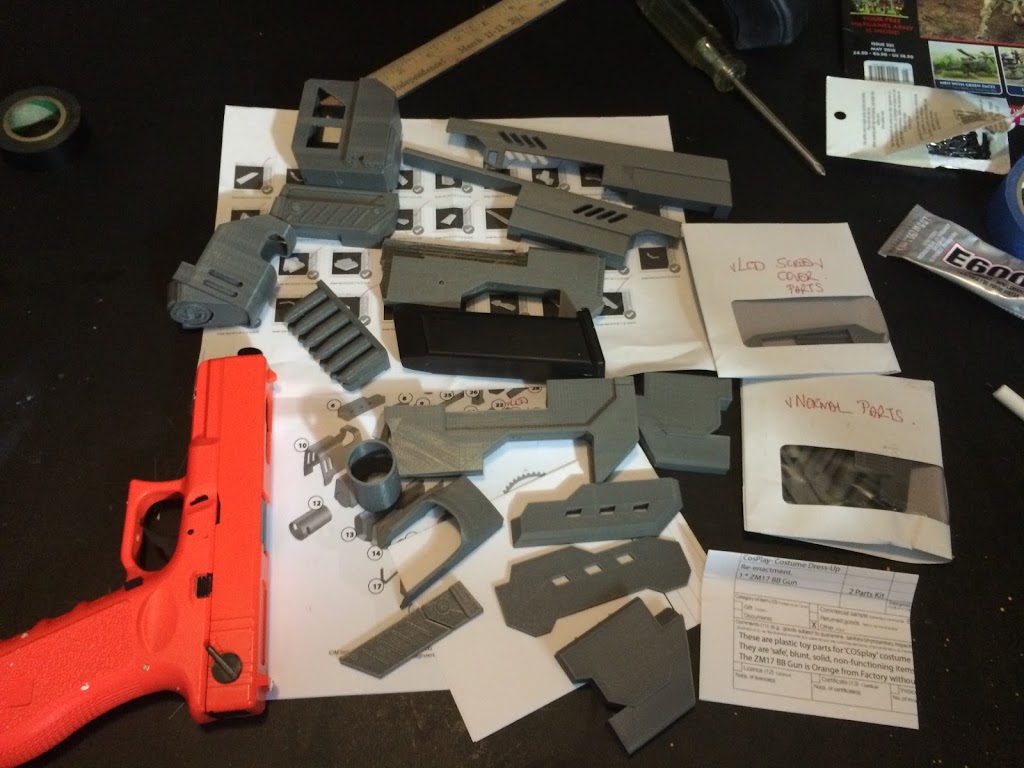
Update - September 20th, 2015 So, I decided to spend some money. A LOT of money. I ordered the Lawgiver kit from IDM Imagineering, the LCD Display from Dredd Tek Division, and a holster from Igor Pinsky.
This is how the parts kits came:
The best thing to show you is a video:
Here is a pic of the holster:
All of this stuff for the gun set me back over $500. Ouch.
I had to make more room for the speaker in one of the parts. Above, see how I modified the part to fit properly.
Adding some more pics below. I also lined my holster with faux suede.
---------------End Update-----------------
Again, I decided to be cheap. I was not sure how the host conventions felt about semi-real looking weapons, so I planned to keep mine in the holster. There are a ton of great looking replicas out there, but I decided to get a cheap thing that was close enough. I ended up with a Nerf Recon CS-6 that was very cheap on eBay. I used some plastic card, sanding and a dremel to modify the gun a little. I glued it all shut and painted the gun with the aluminum paint, then black over top of that. With some light scuffing with sand paper, the aluminum shows through for a great worn look.
I build a pretty lame Holster out of .028" Kydex and some leftover 1" straps and buckles. I plan to did upgrade to a much better lawgiver and holster - see above. in the future. Mine is pretty bad, honestly.
Even worse?
Please see the links below to see the rest of the Dredd build!
I did some very simple weathering on the original build, but I was in a big hurry, so it was kind of lame. I read all over the place that Fullers Earth should be used, and I found some in the local auto parts store.
I gathered the tools needed for weathering - an old sock, a rubber mallet, some matte clear lacquer, and a wide paint brush. Load up the sock with a few handfuls of the safety absorbent and tie off the end. Next, beat the crap out of the stuff in the sock until you see dust fly. Periodically beat up the sock during your weathering to make sure you have dust coming through.
This brand is not cheap, but I find it the most flat of all the clear coats.
Work is a well ventilated area and just beat the crap out of your stuff with the sock. I used the brush to gently brush away some larger pieces of grit and to make the flat surfaces cleaner than the recesses. I alternated spraying on the clear coat before and after hitting the pieces with the sock. You will just have to experiment with it until you get your technique down. I recommend going light on the dust and on a less-seen place for starters. More can always be added.
Nice and dirty.
Photo by captainkarebear @ VA Comic Con. 2014 I got the shoulders locked down pretty good now and I weathered up the whole suit.
Photo from VA Comic Con 2014
Photo from VA Comic Con 2014
Wearing the Law - Update 9/3/2014
At GenCon, the general environment was pretty chilly -- Steven and I actually got a little cold a couple of times. This was great when doing Dredd! This was not the case at VA Comic Con, and I am sure it will not be the norm. I went out to the VA Comic Con without any type of sports undergarments -- just normal stuff. I left my skullcap at GenCon, so I didn't even have that. I will never, ever do this again. This suit is HOT. Head over to your local sports apparel store and get the Underarmour stuff that wicks away sweat. It is not cheap, but totally worth it.
Conclusion
I really like having this all together. It was a ton of work, and cost closer to $1500 than my $1000 budget. I liked spreading out the work and the cost over about a year, and I highly recommend doing that. I hope the info helps you with your own build! Good luck with your build, Creep!
- "Dirty" Jon Baber - jon [AT] wwpd [DOT] net
Special Thanks to Maurie Kent and Sean "Throckmorton" Sarah for all their help with getting my Dredd stuff out to Indy! Additional Thanks to my handlers at the Con, Steven MacLauchlan and Chris Hecht for helping me not run into anyone or anything while there. 50,000 people are hard to navigate in that helmet!
Last up, here are some final pics of me in the costume at GenCon.
GenCon 2014
GenCon 2014
GenCon 2014
GenCon 2014: Restraining a Perp...that looks a little too happy to be restrained...
GenCon 2014: This pic shows how I needed to fix the straps for the shoulders -- sticking up WAY too high.
Wizard World Comic Con Richmond 2014 - photo by Chris Sheehy
Wizard World Comic Con Richmond 2014
2015 VA Comicon pic from Strike and Hide
2015 VA Comicon pic from Strike and Hide
For those who are new to WWPD, click on the graphic below to go to a discussion Topic in our Forum.