


Its time now to talk about the Boyevaya Mashina Pekhoty aka the BMP. That lovely little world changing armored vehicle that scared NATO to death when it first came out. Now sit back and while I share my thoughts and tricks and tips on the BMP models by Battlefront for their Team Yankee version of Flames of War. For Team Yankee you will find this in the BMP Company (TSBX02) which has 5 complete BMPs in either the BMP-1 or BMP-2 configuration.
Bottomline up front...This is another great plastic model kit. This one is even better than the T72 kit that I talked about earlier! The beauty of this set is that you can build both configurations from the same box, saving A LOT of money in the process. In the box you get a common hull; a BMP-1 turret and deck; and a BMP-2 turret and deck. The only thing preventing you make both versions at the same time is not having that second hull section. With a little magnetic magic, you can do hull swaps with ease and have the flexibility to run with configuration at your whim.

Now, you can do the hull swaps with magnets. The decks do fit snugly in most cases. The thing is, after a couple of hull swaps, that snugness goes away and you start to have the decks sliding around. Not something you want to have happen in the middle of a game. Magnets solve this issue.
Before we get to magnetizing this puppy, there are a couple of little tricks you should know about for this model.
- Smoke Dischargers. These are as much of a pain to clip and clean easily as the T72 dischargers were. You need to be extra careful and have a sharp knife when you clean these up.
 |
| Notice the very tight sprue connection points |

For the hull, glue the back to the main hull section and then the tracks. For the back piece it can be confusing as to which end goes up; the rounded piece with the extra detail goes on top. If you only want to build 1 version of the BMP then glue the deck. If you want to magnetize the hulls and hull deck, DO NOT glue the deck down. We'll talk about magnetizing these in a little bit. For the BMP-1 turret glue the turret top and bottom together.
Next, glue the missile to the shorter and thicker of the two barrels; ensuring that it is aligned on top of the barrel. When that dries, you can glue the barrel to the turret. Now, you can glue the hatch to the top of the turret and if its an open turret, insert the tank commander. For the BMP-2 turret it is a similar process. Glue the turret top and bottom together. Glue the gun to the turret, paying attention to the orientation so that the gunners sight is on the same side of the turret as the hatch. Next, take the searchlight and the hatch and glue the spotlight to the front of the turret. When that dries, you can glue the hatch to the top of the turret and if its an open turret, insert the tank commander. Next come the smoke dischargers. These go on with the "flat" sections at the bottom and go centered on the little lip at the bottom/center of the turret on each side pointing forward at an angle. Now you can top it off with the AT-4 Spigot missile.
Magnets. I LOVE magnets. They help the turret turn smoother and keep it on the model during any movement. But there is a golden rule that has to be followed when using magnets. You have to keep an eye on the polarity of the magnet and make sure that the two connecting sides are of differing polarities. Otherwise, you get the opposite effect where the turret will pop off...a cool damage effect, but not what you want for most of the game. So how do I ensure proper polarity pairing (like that?)? A Sharpie or other permanent marker is your friend. I get a stack of magnets that will fit and set them aside on something that will help me ensure the same side is always "up"; I use my flat file.

Next, mark the top of the stack with the Sharpie. Now comes the tricky part...which part to magnetize the first...the hull or the turret? The rule I go by is to magnetize the piece with the deepest/widest hole.
 |
| You can see that deck has a shallower...easier hole |
 |
| Here you can see the deck magnet is not marked and the turret is |
- Place the magnets on something metal so that they keep the same orientation throughout your assembly
- Mark the top of the magnet stack
- Put the first magnet into the piece with the deeper hole first
- Put the second magnet so that the opposite side shows (marked/clean or clean/marked)
Now, how to magnetize for Hull Swaps...This isnt an exact science and does involve a little trial and error. First, you need to choose a spot on the hull. I went with the sides and a spot on the middle of the side.

I have found that if the magnet is at least partially embedded in the model it is less likely to come loose. This means you will have to drill a little shallow divot in model. If you do the center of the inside method, I would add a piece of plastic to the inside of the model first and make the divot in that added piece. On the sides you have a little room to work with.

Next, glue the first magnet in place doing the marking method I mentioned above and in the previous article. Now comes the tricky part. Getting the magnet on the hull to match the magnet on the deck. Where do we glue that sucker? The trick I use is to stack magnets up (dont glue these yet!) on each side to the point where the deck almost sits snugly on the model.

This will be 1 magnet too many, but just what we need here. Now, take some white paint and slop it on pretty heavy on the top of the magnets you have on the hull. Now gently place the deck on the hull without sliding it around. The paint will transfer to the deck's underside and show you exactly where to put the magnets.


Remove one magnet from the stack on the hull's side and return it to the supply pile. The magnets you have on the hull now should be the exact number you need to fit perfectly and have a secure mate. Mark the magnet on top of each of the hull's stacks as appropriate so you dont lose track of which end is up. Verify the fit of the hull and deck and make sure the stacks arent too tall. If they are you might have to use at least 1 thinner magnet in the stack. Take that top magnet off the stack and glue it to the underside of the deck in the paint mark while ensuring the opposite side is visible (marked/clean or clean/marked). Finally, glue the remaining magnets on the hull together. It is best to take them off and apply a little glue to the top of the magnet on the hull until each is glued down, but not that last one that will be on top.
 |
| Note how the hull magnets have a mark and the deck magnets do not |
Paint Plan. I used the paint plan from the Team Yankee book (pages 116-7) as a guide.
- Vallejo Surface Primer Black
- Basecoat of Vallejo Model Air 71.017 Russian Green.
- Then I hit it with Ordnance Shade From the Team Yankee Color set.
- Then a hi lite of 75% model Vallejo Air Russian Green 25% AK Interactive Dunkelgelb Light Base coat AK-007.
- The top third of the smoke dischargers are Vallejo Model Color Black 70.950, then a little hi lite with Vallejo Model Color Black Grey 70.862.
- I did the tracks like the book. A dirt brown with a metal hi lite and then an Ordnance Wash. Very nice way to do metal tracks.
- Glass areas/Vision Slots: Vallejo Model Color 70.950 Black, Vallejo Model Color 70.816 Luftwaffe Uniform, Vallejo Model Color 70.943 Grey Blue
- Night Vision lights: Vallejo Model Color 70.979 German Camo Dark Green; Vallejo Model Color 70.968 Flat Green; Vallejo Game Air 72.732 escorpena Green
- Next the model is gloss varnished.
- Decals are now applied. Micro Sol used were appropriate to kill the edge and make the decal melt into any detail and when dry a little gloss varnish applied over the decal, ensuring this layer covers the decal and goes over the decal edges. This helps keep those edges from coming up.
- A pin wash of Black was applied to the detail areas. A pin wash is a very targeted wash, just to those detail area and any excess that gets on top is wiped off. My wash is a pretty traditional "Magic Wash" of 10-20% Acrylic Floor Was (I still have a bottle of Future Floor Wax I use) then the rest distilled water. I add a drop or two of Vallejo Model Color Black 70.950 to the mix and there you go. The Gloss coat on the model pulls the floor wax in the wash (and the rest of the wash with it) into the detail doing a lot of work for you.
- Lastly seal it all with an anti-shine spray. I LOVE Army Painters Anti shine. About the best I have seen. I use mine through my air brush with no issues and have never frosted a miniature as can happen with spray cans of anti shine. Don't go heavy with any anti shine...too much and can get a shine and defeat the purpose.
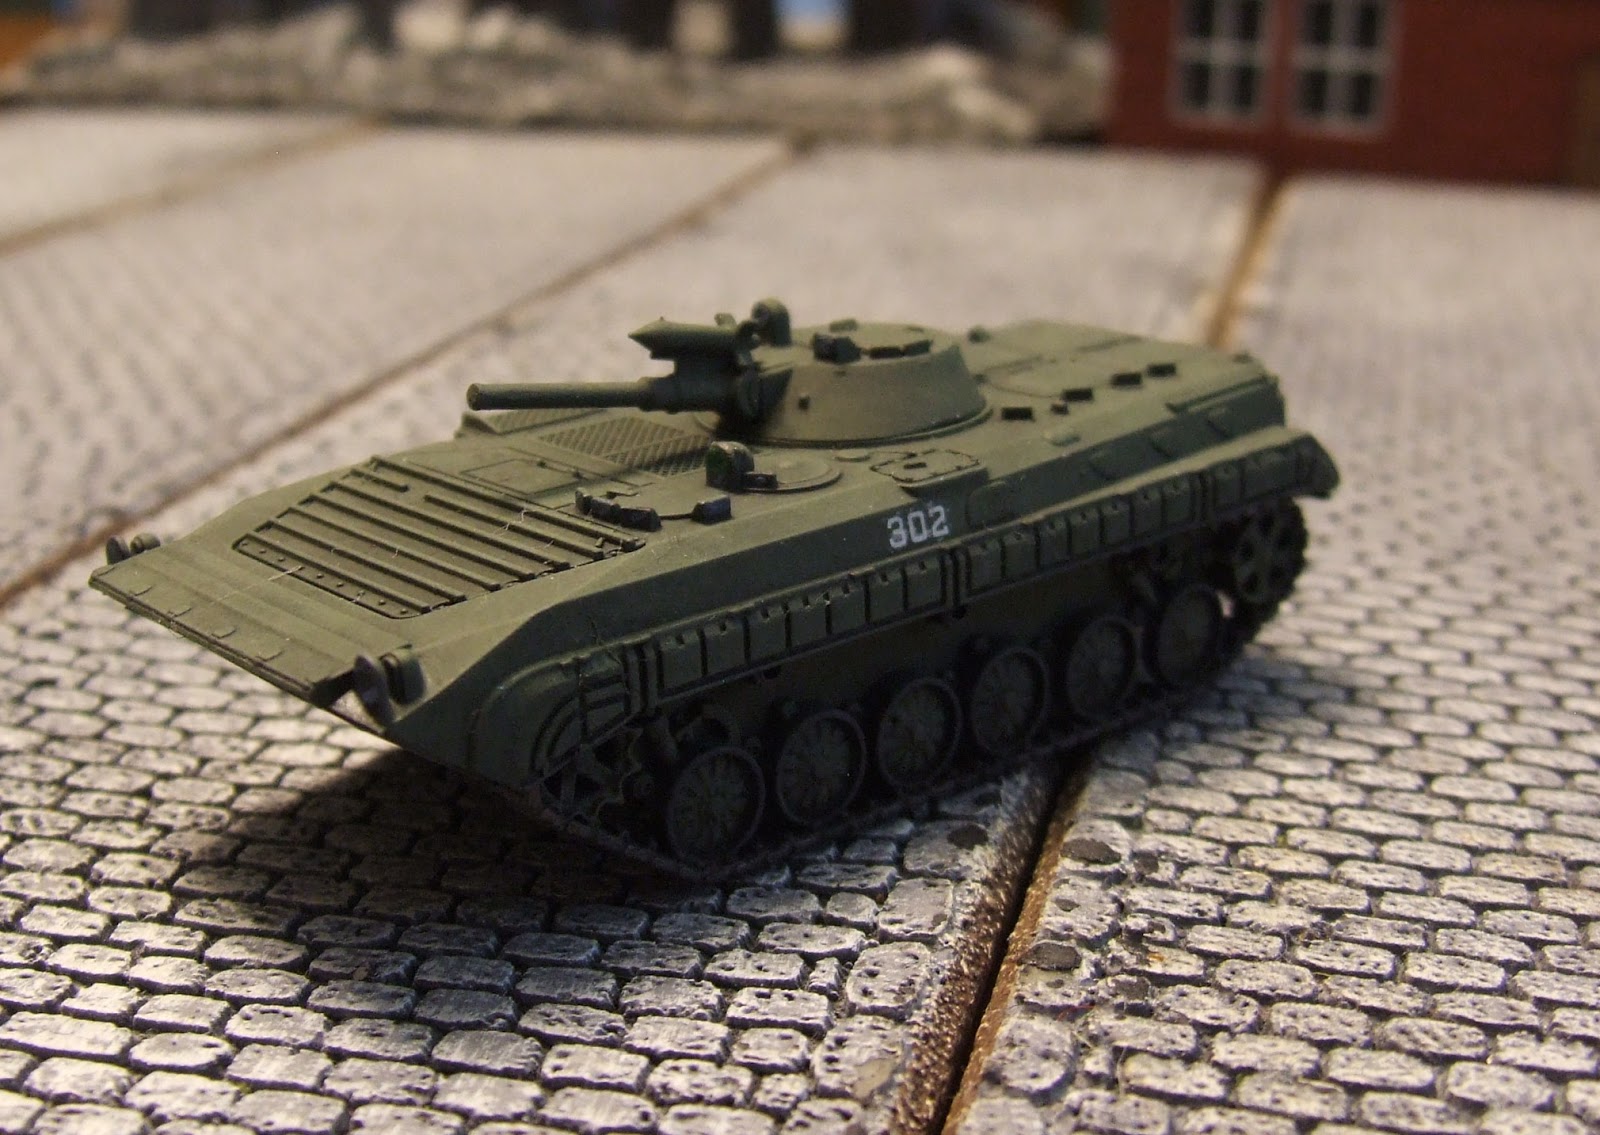
And the money shots:


 |
| Note the smoke discharger placement |

Jeff Flint "SonBae" has been a long time contributor to WWPD and admin on the forums. A long time gamer and painter and recently a new studio painter at Mastermind, Model and Miniatures in Huntsville, Alabama. Just trying to keep the cats herded in WWPD-South!


