


Welcome to another painting guide to add to our collection, this time I will look at the very iconic US Airborne. Before reading on though please be aware that while I have themed my force on historical US Airborne I have adapted the colours and general look to suit my style and how I like my wargaming miniatures to look. If you are after a totally accurate historical representation this guide may not appeal to you.
I have used the Artizan Miniatures range of Airborne exclusively and purchased them from War & Peace Games here in Australia. In my mind the miniatures are the top of the class and offer enormous variety on individual sculpts and support weapons as well as maintaining the excellent quality that Artizan represents.
Like so many others I was inspired to paint this force from watching Band of Brothers and Saving Private Ryan. I was heavily influenced by Tom Weiss who is just an amazing painter, and in my own way I attempted to copy his style (as a child attempts to emulate the adult!).
For the uniform and skin I use the layering style without a wash, I know washes are very popular and I certainly use them as well but I wanted to have a little bit more control over the blending. You could certainly replicate the style with a strong tone wash if you wish.
I have primed the soldier by using a white Army Painter spray primer as I really wanted to have the colours to pop. It can be much harder to do so from a dark base as lighter colours over dark will be naturally subdued.
A full list of paints and the numbers can be found at the end of the article.
Step 1 - Skin
I start with a base colour of Orange Brown.


The last thing for the face for the moment is the bottom lip. For this I use a 50/50 mix of Red (Any red will do) and Dwarf Skin and paint a gentle line on the bottom lip. This creates a colour variation and subtle depth.

This is a good diagram of how you should highlight.

Step 2 - Uniform
For the uniforms I have maintained a consistency with the pants and shirts, but you could easily throw in some different colored pants to mix it up.
I start with a base coat of Green Brown.


Finally extreme focal points of Bone white.

Stage 3 - Other gear and equipment
Rifle/ammunition pouches/helmet strap and belt = Parasite BrownHelmet/Knee and Elbow Patches and Bazooka pouch - Dark Green
Webbing harness = Brown Violet
Water bottle = Khaki
After I have put all these colours on I used a Strong Tone Army Painter wash.

I then highlighted those colours as follows:
Rifle/ammunition pouches/helmet strap and belt = Orange Brown - Orange Brown/ Off white
Helmet/Knee and Elbow Patches and Bazooka pouch - Dark Green - Brown Violet
Webbing harness = Brown Violet - Green Brown/Off White
Water bottle = Khaki - Khaki/Off White
At this stage I also 'blacklined' the entire miniature using a sepia ink. This is a process where you use a very thin paint brush and outline all the different parts. Ink is really good for this as it is very easy to use and seeps nicely into the recesses, it can also be wiped off straight away if you make a mistake.

Next up was a black ink, I had previously used it to fill in where the eyes were to be and you can see I have used a think brush and placed two white dots to represent eyes. I use the black ink to outline the areas that need a little extra emphasis as the black is not as soft as the sepia. These areas are places like outlining the knee and elbow patches, the rifle and around the face.
Finally I put a Brown down for the base, once dry this is followed by a dry brush of Iraqi Sand. I also hand painted the US Flag and Airborne logo on the shoulders. After painting the base I paint the boots with Parasite Brown.

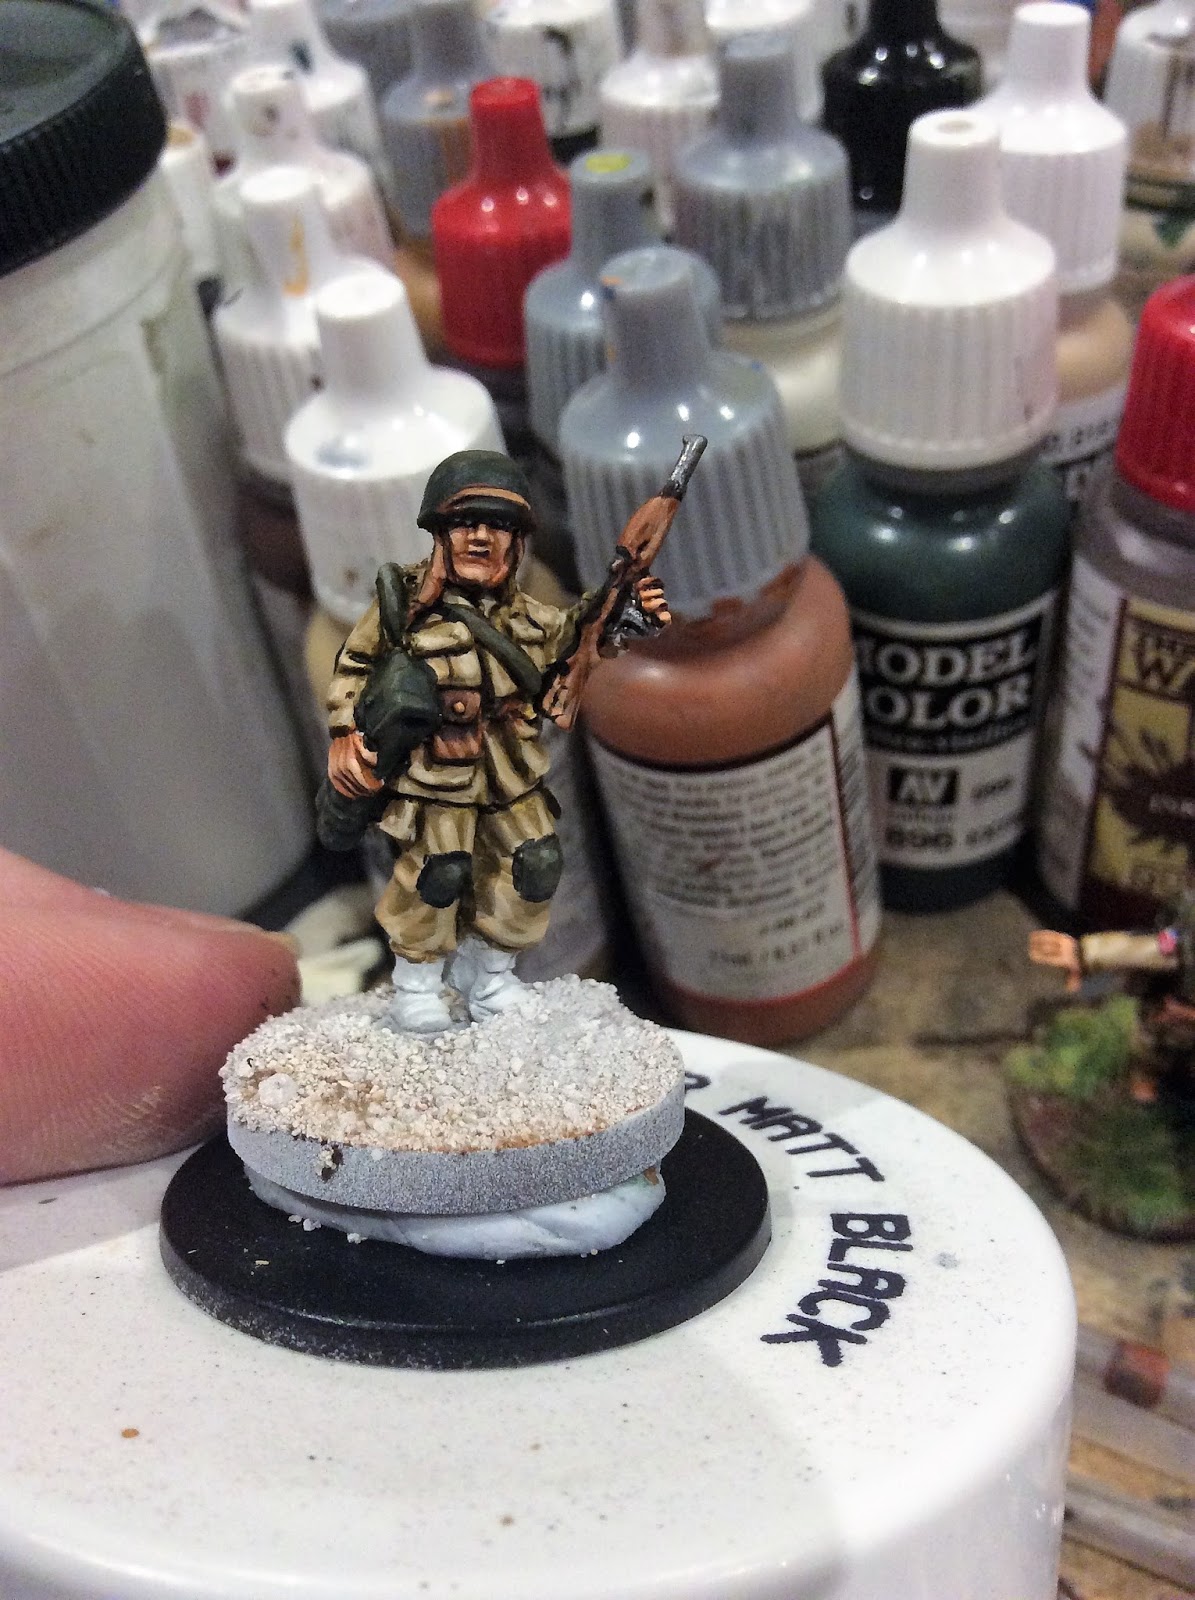
Step 4 - Basing
I use a number of different products and you can use whatever you have laying around. I cant recall who I got most of my pile from but you can mix and match as you want.I think the most effective bases tell a story and have depth. This can be achieved by using different colours, material, height and bulk to create layers.


List of Paints Used
Army Painter White Primer
Vallejo Model Color Green Brown 70.879
Vallejo Model Color Desert Yellow 70.977
Vallejo Model Color Iraqi Sand 70.819
Vallejo Game Color Khaki 72.061
Vallejo Model Color Extra Dark Green 896
Vallejo Model Color Brown Violet 70.887
Vallejo Model Color Orange Brown 70.981
Vallejo Game Color Parasite Brown 72.042
Vallejo Game Color Dwarf Skin 72.041
Vallejo Model Color Basic Skintone 70.815
Vallejo Model Color Flat Brown 70.984
Vallejo Game Ink Negro Black 72.094
Vallejo Game Ink Sepia 72.091
Vallejo Game Color Off White 72.101
Vallejo Game Color Bonewhite 72.034
Army Painter Strong Tone Wash
Army Painter Gun Metal
We have many other step by step painting guides, to check these out simply click on the 'Painting' label on the very top of this article.


