


By Tom Burgess
In my efforts to give Flames of War Version 4 an intensive work out, I feel it is important to test "extreme list." One such extreme list that has been noted by noted by many as perhaps overly unbalanced is the "Honey Swarm." With Version 4 allowing multiple formations, it's possible to get well over 40 tanks in this list! Fortunately one of my good gaming friends, Charles, just so happened to have a huge collection of "Axis & Allies" Honeys that he was able to pick up dirt cheap a few years back. A fitting match for my "Axis & Allies" DAK Panzers. So Charles and I meet at Hard Knox Games in Elizabethtown, KY for an epic clash of these historical opponents.
Player skill would be a factor in this playtest game. Charles is not a "competition" player at all. He has been playing Flames of War as long as I have, but not nearly as much. Additionally this was his first game using the Version 4 rules. So our game was a learning/teaching game for Charles as much as it was an experiment to see how our two forces might be expected to perform under the new rules.
Charles' force included three Squadrons (V4 Formations) of Honeys. Two of the Squadrons had a Troop (V4 Unit) of M3 Grants as their 4th troop. His force was as follows:
1st Squadron (Formation)
HQ Troop - 3 x M3 Honey Tanks - 5pts
1st Troop - 3 x M3 Honey Tanks - 5pts
2nd Troop - 3 x M3 Honey Tanks - 5pts
3rd Troop - 3 x M3 Honey Tanks - 5pts
4th Troop - 3 x M3 Grant Tanks - 18pts
2nd Squadron (Formation)
HQ Troop - 3 x M3 Honey Tanks - 5pts
1st Troop - 3 x M3 Honey Tanks - 5pts
2nd Troop - 3 x M3 Honey Tanks - 5pts
3rd Troop - 3 x M3 Honey Tanks - 5pts
4th Troop - 3 x M3 Grant Tanks - 18pts
3rd Squadron (Formation)
HQ Troop - 3 x M3 Honey Tanks - 5pts
1st Troop - 3 x M3 Honey Tanks - 5pts
2nd Troop - 3 x M3 Honey Tanks - 5pts
3rd Troop - 3 x M3 Honey Tanks - 5pts
4th Troop - 3 x M3 Honey Tanks - 5pts

A full Regiment of Honeys! What a glorious sight!
That's 45 tanks for 101 points coming out of the new "Desert Rats" book! Charles had a great observation about his force that I had not previously considered. His comment was, since he was effectively running a "Regiment" in this game, should he not have a "Regimental HQ?" I tend to agree with him. Version 4 is allowing us to combine multiple company size "formations" into a single force, but it's doing so without requiring us to add in a "Battalion/Task Force/KG HQ.
I suppose these could be considered to be "just" off board, but our artillery certainly makes it onto the board. I don't know if this is something Battlefront has considered, but a Force HQ certainly feels like it's a missing element when we are running forces that employ more than one formation in Version 4. I feel that that's an extra "cost" we should have to make before we expand our forces beyond one formation.

Some of Charles' more colorful troops!
Like Charles, my DAK force would also employ multiple formations. This would be a first time for me in Flames of War playing two formations on the same force. My force combined a Panzer Company and Africa Rifle Company from the new "Afrika Korps" book. My force was as follows:
Africa Rifle Company
HQ - 2 x SMG - 2pts
1st Platoon - 4 x MG, 1 x 2.8cm ATR - 7pts
2nd Platoon - 4 x MG, 1 x 2.8cm ATR -7pts
3rd Platoon - 3 x PaK 38 5cm ATGs - 12pts
Support 1 - 2 x SdKfz-231 8 Rad - 2pts
Support 2 - 2 x SdKfz-231 8 Rad - 2pts
Panzer Company
HQ - 1 x PzKw-III Short, 1 x PzKw-III Long (attached to 1st Platoon) - 12pts
1st Platoon - 3 x PzKw-III Short - 15pts
1st Platoon - 4 x PzKw-III Short - 20pts
3rd Platoon - 2 x PzKw-IV Long - 20pts

My DAK force...looking kind of puny!
In this game I also I wanted to experiment with the Version 4 "More Missions" PDF. Considering the composition of our forces, Charles decided that "Prepared Attack" seemed appropriate for his all Tank Force while I tough "Hasty Attack" would be a good historical fit for my DAK boys. We then rolled a "4" and consulted the "More Missions" PDF which assigned Counterattack, with the British defending and the Germans attacking as the battle to play. I thought this was a bit odd as I'd expect the more aggressive British stance to mean they would be attacking, but I suppose this was a play balance thing that would compel an attacking force with all tanks and "Prepared" attack to be at some risk to defending.
Our table terrain was probably a bit too open for tournament focused players, but we like to play desert battles on desert boards. We're not big fans of a lot of Palm Groves (woods) and buildings (towns) on a desert board. Consequently, our table had a just few hills (tall terrain) and some low concealing terrain areas dispersed about the table. Nothing was considered to be difficult going.

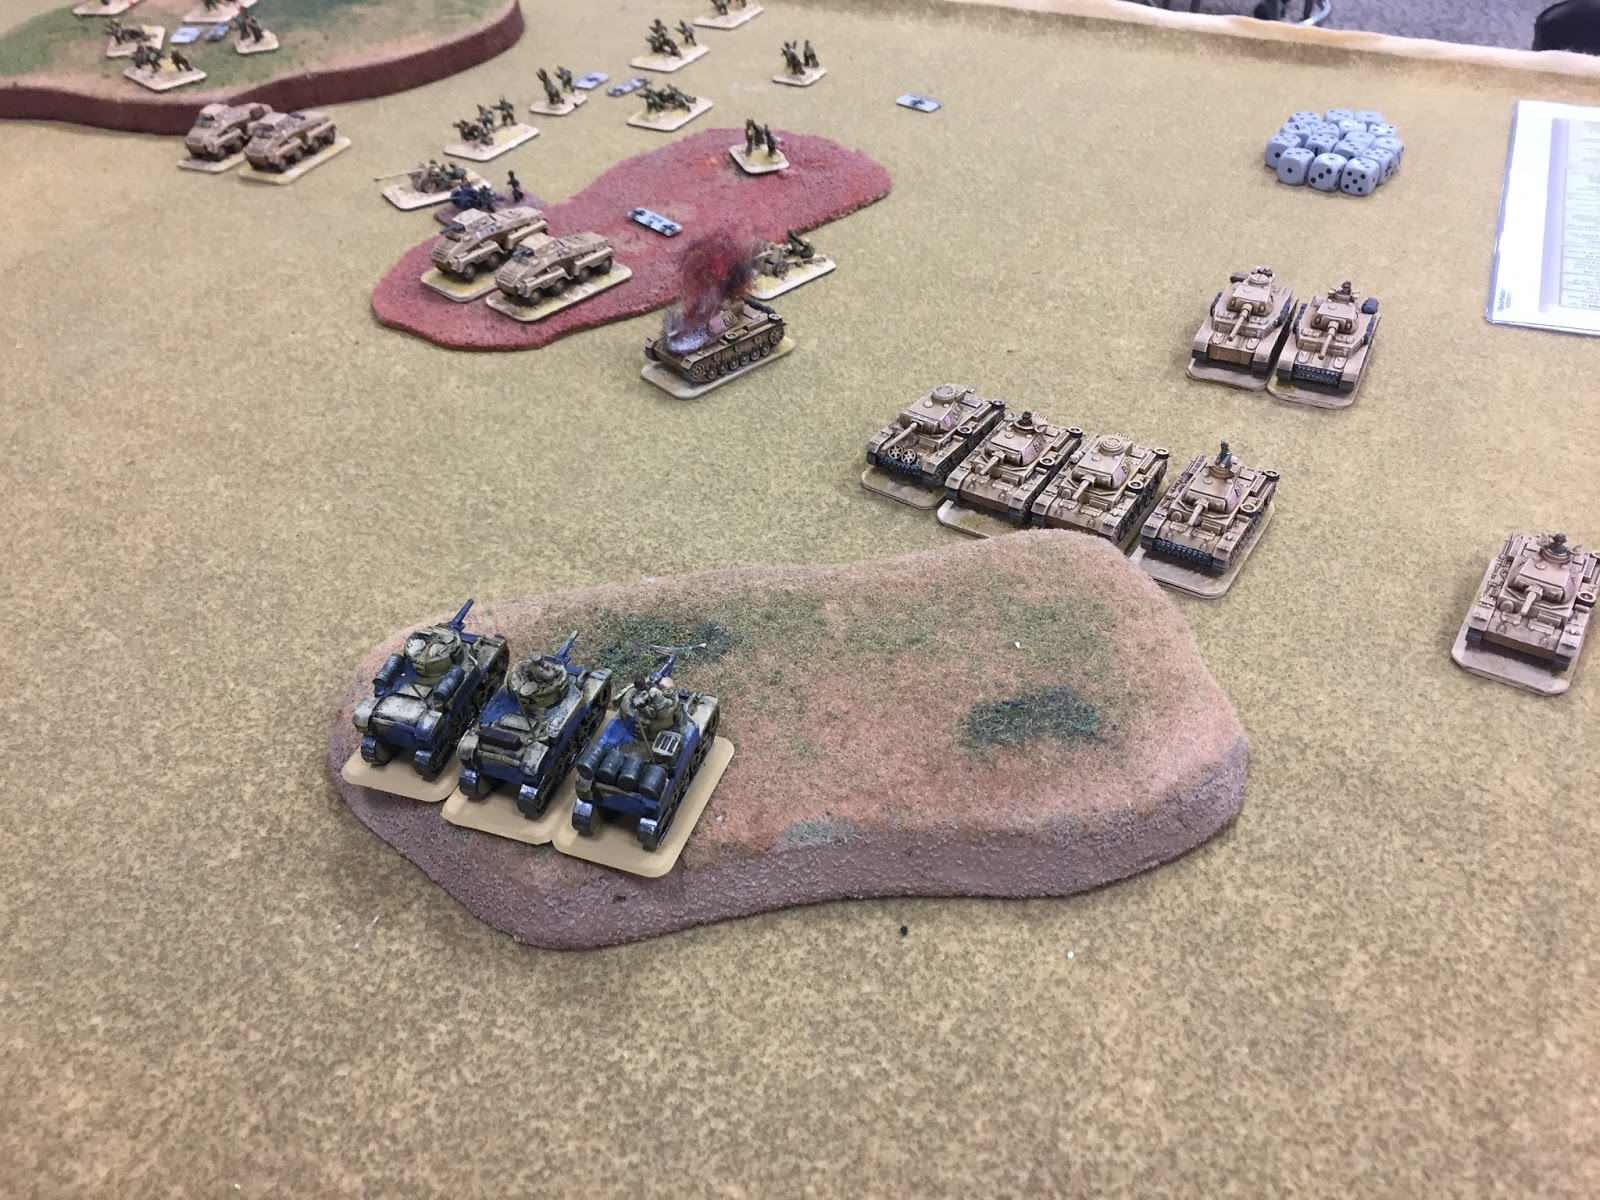
The table at the start of Turn 1
Charles as the defender ended up having to place his entire 2nd Squadron and an additional troop of Honeys from his 3rd Squadron in reserve. So he started off with his 1st Squadron, Grants in ambush, and the remainder of 3rd squadron on the board. His forces were stet back a bit in his deployment to try to keep most over 24" from my deployment area. He mostly had deploy in the open due to the lack of terrain.
My initial deployment. I think I should have maybe used Spearhead more.
My deployment was made in accordance with my basic plan. I wanted to get a jump on Charles' onboard forces and try to break them before Charles' reserves arrived. So I placed my PaK-38s at the corner of my deployment area as close to the board center as I could get. This would let the PaKs range just far enough to hit the lead Troops of the British 3rd Squadron. Later the position would serve to help block and attrit the reserves that Charles might send to reinforce his main force. All of my Panzers line up to the left of the PaKs. With some lucky Blitz move orders, the Panzers would also be able to get in some first turn shots at full ROF at long range. On my right, I used one of the SdKfz-231 8 Rad units to "Spearhead" one of my infantry platoons close enough to the neutral zone objective so that they could Blitz and then dig in within 16" of that objective on Turn 1 (a cool little V4 trick to make sure I did not lose on turn 6 due being too far off from an objective).
Phase I of the Battle - Alpha Strike
Rather than going through a tedious turn by turn breakdown I'll lay out the action in groups of turns. My initial plan to Blitz and "Alpha Strike" did not go well. I just could not make those 4+ firepower test and I shot well below average. This was compounded by Charles passing four of his first five Unit Last Stand Checks for Honey Troops at a 5+!!!

My Alpha Strike Volley in very unimpressive especially when Charles rolls "6" for his Last Stand!

The first of the British Reserves, they'll take a while to get in position.
I struggled to break one of his two on board formations. That did not occur until Charles, tired of me sniping at long range came at me. I broke his 3rd Squadron, just as the reserve troop from that Squadron was dashing in to join the main battle. I had lost two or three Panzer III's by this point.

"Come at me Bro!"The British move out against the German "attackers."

Charles just can't help but roll "6's" on his Last Stand test!

And then he finally fails one! It only took like six tries!!!
The British counterattack stalls out.
Phase II - Attack the British ObjectiveAt this point the British had five troops of Honeys run off. The 2nd Squadron was gathering is strength in the neutral quarter and engaging my guns at long range. If I was to take the objective in the British deployment zone, it had to be now. The British 1st Squadron was down to three troops, one of which was the Grants. Charles had what was left of the 1st Squadron using what little terrain his deployment area had to maintain hull downs positions with the Grants while the HQ troop and another troop of Honeys hid out of LOS behind the hill that the Grants sat on.

The Panzers close in! But where are those Grants?

Charles just continues to make Last Stand after Last Stand!
While the PzKw-IV Longs took up a hull down position to snipe at the Grants, I sent the Panzer Company CO and three PzKw-IIIs to contest the unguarded British objective. The other Panzer III platoon, now with just two tanks, moved to try to get around the Grants on their right. The Grants being "Cautious" were just too hard to hit in their hull down positions. I only destroyed one with a lucky shot from my sole PzKw-III Long. 
With Panzer in close and in the open, the Grants ambush finally happens!

My 8 Rads go out to draw fire. They do and just a single bailed out vehicle refuses to remount and then the unit immediately fails its 5+ Last Stand! Recon does not like to be used as "bait!"

German PaKs and 2.8cm ATRs are not to be trifled with as Charles' reserves find out!

My sole PzKw-III Long kills the only Grant Charles would lose in the whole battle!

The British reserves are now on board in full strength, but have not pressed the attack yet.
Now Charles had to react. He had to push the two remaining tanks of his 1st Squadron HQ troop back into the open to contest his objective. His other Honey Troop had to try to flank my weak PzKw-III platoon before the Panzers flanked his Grants. Charles' Grants did not get sucked into a counter sniping game against my PzKw-IVs, instead he combined their fire with his HQ troop's and destroyed the Panzer III Platoon contesting the objective. He also had a couple of long range concealed shots at the rear of my unit coming from his 2nd Squadron Grants who had come out of reserve a couple of turns earlier.

The "Big Push" on the British Deployment Zone objective.
The Honey platoon on my left, KO'd one of my PzKw-IIIs leaving the platoon just one tank now.

The British 1st Squadron HQ moves out to contest the objective and deny German victory.
It had been costly. My attack force was almost caught in a vice with enemy to its front and rear. But I still had a chance to kill or run off just four Honey tanks to break the 1st Squadron (Formation) and win the game. The sole PzKw-III on my left made its "Last Stand Check" and KO'd the Honey Troop that had flanked him. But even with my CO PzKw-III and both PzKw-IV Longs shooting at the 1st Squadron HQ Troop it was left with a single Honey contesting the objective.

The two remaining Grants force what Panzers are left to break off. The German push has failed.
Phase III - Shift FiresNow with just three tanks left and those being between two enemy forces, I decided to abandon the attack on the British objective. While the Panzers had been pushing, my PaK 38s and even my 2.8cm ATRs had done a respectable job whittling down Charles' 2nd Squadron as it came out of reserve. If the 75mm guns on my PzKw-IVs could just help with knocking out the 2nd Squadron's Grants and my guns could take down one more Honey troop, then I would be able to force a Formation Last Stand Check on the 2nd Squadron. If the 2nd Squadron folded, my remaining SdKfz-231 8 Rads could seize the German objective unopposed. The only reason I even had this possibility was due to the one Spearhead infantry platoon Blitzing to with 16" of the German objective on turn one and then digging in, daring Charles’ reserve to come at them.

The game is still on due to one infantry team still being within 16" of the objective! There's still a chance for the Germans if they can break the reserve British 2nd Squadron!

An accurate volley from the PaKs goes to waste as Charles make saves and I fail Firepower checks.
Phase IV - Endstate
German victory was not be. The Grants did get pushed into poor spirits, but passed their last stand check. The 2nd Squadron HQ, like the 1st Squadron's was left with just one bailed out Honey, but the HQ unit never goes into poor spirits.
By this point we had played eight turns and had reached the 2.5 hour mark. Charles felt that the game should end there. Charles, still unfamiliar with the new Version 4 victory conditions, did not know that the game would not end as a "win" for the British but a "draw" as it would have in Version 3. I pointed out to Charles that he had not "won" yet according to Version 4, but he still felt that enough time had expired and his 2nd Squadron was not likely to survive another turn anyway. So he took the draw at "time" rather than risking another turn which could see him lose. The game ended as a 3-3 draw.I had lost eight PzKw-IIIs and two SdKfz-231s but had destroyed or run off 35 British tanks.

Final positions of the forces at game's end.
Conclusions
I had a great time and learned a lot in this game. Facing down the horde of Honeys was a blast. I've never had so many tanks looking across the table at me in Flames of War. It is initially intimidating to say the least. But it does not have to be so.
The PzKw-III Short has pretty good chances against the Honey that comes in at 1/3rd cost of the Panzer. They key here will to be try to keep the range over 16". At that range the Pzkw-III's worse result to the AT 7 of Honey is a "bailed out." I had my tanks bailed out a lot in this game but protected ammo got them up every time. I can foresee German players who are facing the Honey swarm using Blitz to back up the Panzers! Then shooting, and then trying for a Shoot and Scoot to move back another 4."
A Honey swarm in the hands of a skilled player will be devastating. If supported by some 25pdrs, they'll be able to lay down a sizable smoke screen or two with a wave of Cross-Country Dashing Honeys right behind I. Then on the next turn they'll be on the flanks of the Panzers. German players may have to use infantry and guns as a shield between them and the Honeys.
Honey troops are fragile They only pass Unit Last Stand on a 5+. The "aggressive" has them being hit on a 3+, but keeping them at range will make that a 4+. German forces will have to do what I tried to do, which was the distribute fires as much as possible and try to force last stand checks rather than trying to destroyed the Honey troops outright. Hopefully your opponent will not roll as well as Charles did in this game and pass those first four or five Last Stand tests!

One thing that I did notice during our play is that when a a bailed tank fails to remount, it really puts pressure on keeping the rest of the troop stationary or the risk for a Last Stand check is much greater. More than a few times, Charles would have one Honey KO'd and one Honey bailed which really left him no option for moving the unit's command Honey forward without automatically risking a Last Stand check in the following turn.
The Grants were just plain out tuff! The "Cautious" rating made them really hard to hit at range and/or when they are in cover. Protected ammo largely negates the bailed outs that you manage to achieve. In this game I destroyed only one Grant. They are tough to dislodge from a position and if they are rolling in the advance with the Honeys, the Panzers may need to just ignore them and focus on the more fragile Honeys until those are neutralized, then work on the Grants. A risky proposition to be sure, but Honeys on your flanks may be worse than Grants to your front, especially if the later remain at long range.
Speaking of range...did I mention keeping the British at long range as log as possible is key? My platoon of two PzKw-IV Longs at 20pts was just not effective. The extra range and Firepower of the long 7.5cm gun is great, but at this point I'm thinking three PzKw-III Longs and 21 points is a better bargain. The long 5cm still have a long range at 28", AT 9 is just one less than the AT 10 of the 7.5cm long. The FP is one less for the 5cm long, but you'll have two more shots with Three PzKw-IIIs and one more hull to absorb hits or assault. I think adding one 5cm Long to each of my PzKw-III platoons will be SOP. Better yet would be four Marders at 16pts in place of the two PzKw-IV Longs as long range snipers, but I don't have any of those in my collection....yet!
Finally, I don't think my "Alpha Strike" strategy against the British in this game was using the Version 4 rules to my best advantage. I could have potentially Spearheaded my hole force closer to the objective I placed. This would allow me to set up my PaKs and infantry as a buffer between the on board British and the objective. This then might have let my Panzers pick off the British reserves as they trickled on to the board.

I must add Marders to my DAK force!
I can't say that the Honey swarm is completely balanced. It might very well be a great force for newer players to use as it can shed platoon after platoon while player learns his lessons with it. It is so big and so mobile; new players will recover from mistakes and have a fighting chance right to the end with it. Veteran players will be a real threat pushing this swarm, but the force will bleed points. Even with the lowest score being a 6-3 in Version 4, this force may give up too many points for the serious player gunning for the top place in a tournament.I can say the "Honey Swarm" is a lot of fun to play with and against. The brittle nature of the Honey troops will have both players on the edge of their seats throughout the whole game! I’m really loving these Version 4 Mid War swirling tank fights in the desert! Pure adrenalin!
Tom has been playing wargames since the late 70’s, and Flames of War since 2007. He maintains a gaming website www.battlevault.com for the BattleVault Gamers of Kentuckiana and posts and moderates WWPD as Iron-Tom.


