This is part of the Judge Dredd series of posts. See the Main Article for more information.
The Build - The Belt
People are doing a lot of different things for the belt and buckle. I decided to go ahead and order a buckle with my badge from Sean Cho (rattlehead1 [AT] msn [DOT]com) on the Facebook Group. His buckle is very accurate and very well made. I used a little wash on it and it was ready to go. I found a great Dickie's belt that allowed me to attach the buckle on a flat surface with just a piece of Velcro. This was one of the easiest parts of the build.
For the accessories, I decided not to make much. I ordered the leather from Dave's Leathers (dferrickleather [AT] yahoo [DOT] com) for about $160. I ordered mines and grenades and such from vendors listed in the Facebook Group file.
For the magazines, you can use Tactical Magazine Pouch, which is pretty close to the screen-used.
Patterns - Update 11/13/2014
In helping a friend with her build, she found these great patterns for the belt accessories. These templates were created by Steve Mack on the JUDGE DREDD Costume Group on Facebook. Thanks, Steve!
Door Mine Pouch
Stun Grenade Pouch
Med Pouch
Med Pouch/Grenade Holder
I made the Med Pouch out of 1/4" EVA Foam and it worked great. I did use some thin Kydex to reinforce the inside of the back wall and the sides for strength. For the cross, I just cut one out of 3mm foam and glued it on - I was pressed for time.
--- end update
Cuffs - Update 9/3/2014
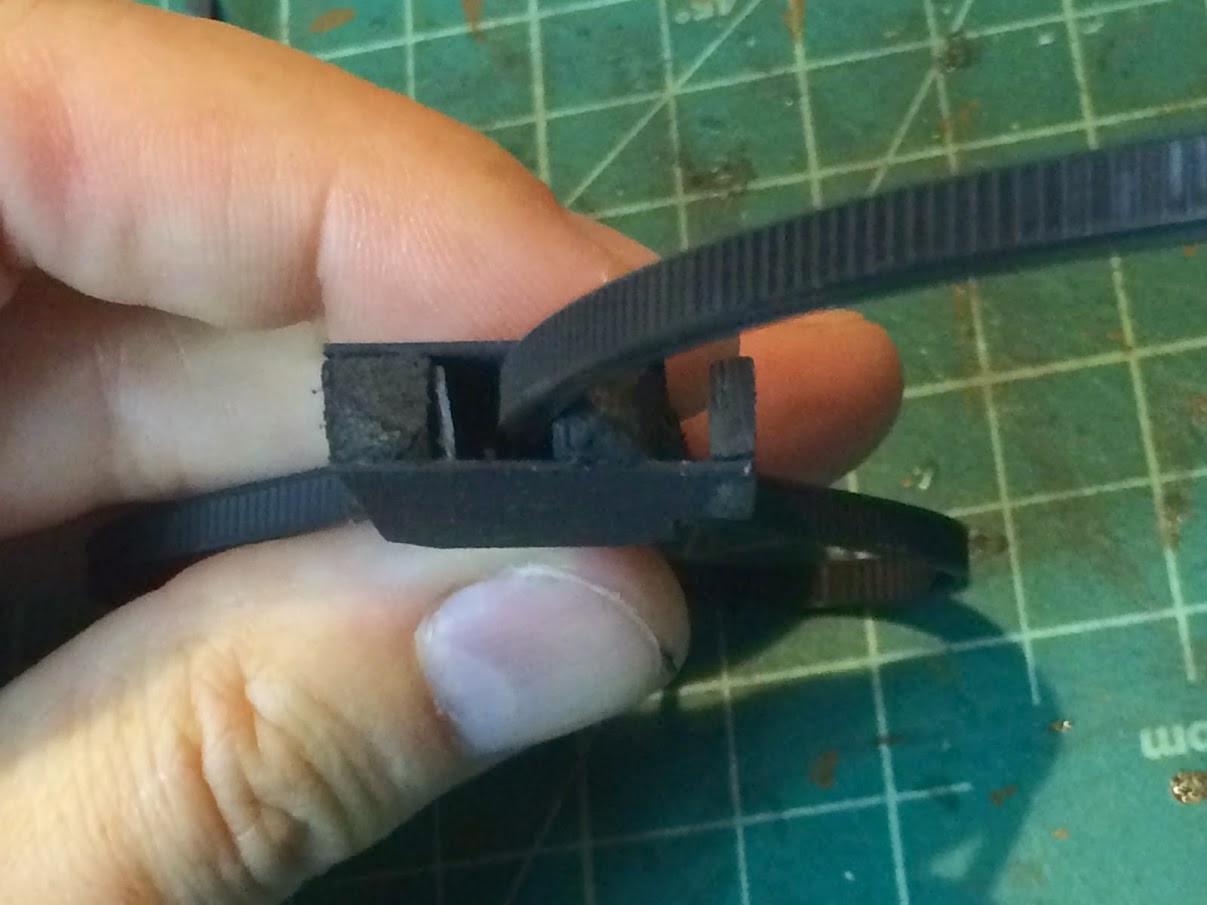
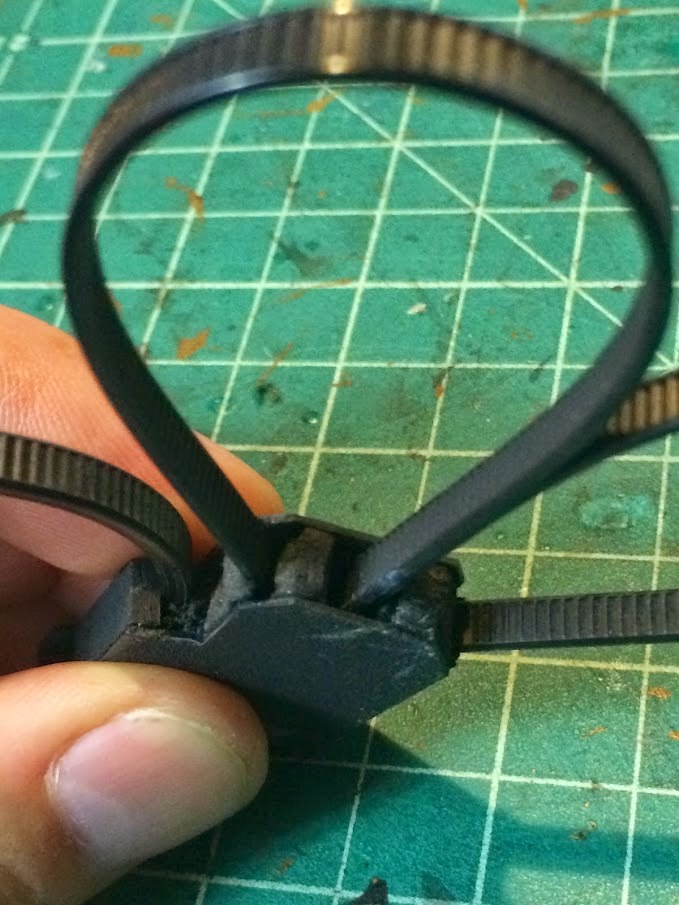
For my recent event, I had no cuffs at all, so I decided to make some not very screen accurate ones just to have something on the belt. Again, thanks to Studio Creations, there is a build sheet for the cuffs. I simply used some of my spare .028" Kydex to fashion the top and the bottom pieces. I then cut strips of the kydex that were a little thicker than the zip ties I had to make a channel down the center of the plates. I glued those in, making sure to leave enough room to two zip ties. Next, I took 4 layers of kydex and made the outside piece where the two ties are held in place. For the last bit, I just glued in some 1/4" craft foam to fill out the thickness. After that, I hacked up the foam to fit and the ends of the zip ties and glued them in. I wrapped the zip ties in place and glued them together at the ends. Next, glued the top on and call it a day.
Screen accurate? Absolutely not - these are not long enough or thick enough to match the screen. Cost? Probably $.25 and they are better than nothing. I could have probably done something with the ends, but I was in a big hurry and I can always chop them off and make them better later.
Flash Bang Grenades Update - 9/5/2014
Originally, I just had nothing in my flash bang pouch. This was fine, but I cannot keep the build static, so I got busy building some grenades! Apparently, the ones used in the movie were 1.75", which is a little larger than a ping-pong ball (40mm). I figured that these would be close enough! I looked into ordering these, but found you can really only buy a bunch. This took me to my local sporting good store where I got 6 balls for about $4.
Hold your ping-pong ball up to a light and note the natural line running right around the middle of the ball. This is where the two halves join. Use your sharpie to trace this so you can see it.
Next, use the tip pictured above in your rotary tool to slowly and carefully grind away at the line your just drew.
Use sandpaper to clean this up
To trace a line for the switch, I used the inside of a roll of electrical tape. I held this tight to the ball and just traced a line with my trusty sharpie.
I used the same technique as above to grind out the switch. Be very careful on this part, as the material is only half as thick as the middle part.
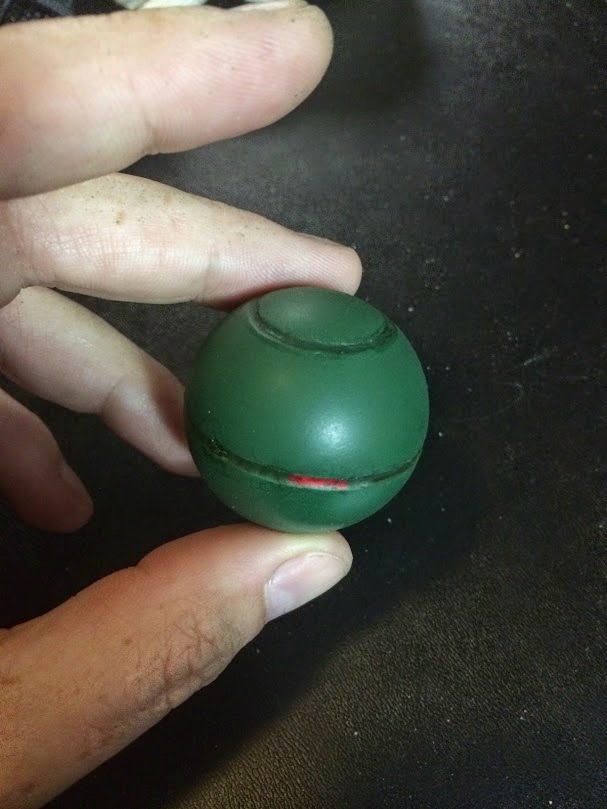
I used some thin wire to secure the ball and paint it. When this was dry, I used a brush to fill in the area around the middle and paint in a red indicator. Then, I used some black wash to darken the depressions. Last, I sealed the ball with a matte spray.
Screen accurate? Nope. Cheap and looks good on the belt? Yep!
--- end update

For the magazines, you can use Tactical Magazine Pouch, which is pretty close to the screen-used.
Patterns - Update 11/13/2014
In helping a friend with her build, she found these great patterns for the belt accessories. These templates were created by Steve Mack on the JUDGE DREDD Costume Group on Facebook. Thanks, Steve!
Door Mine Pouch
Stun Grenade Pouch
Med Pouch
Med Pouch/Grenade Holder
I made the Med Pouch out of 1/4" EVA Foam and it worked great. I did use some thin Kydex to reinforce the inside of the back wall and the sides for strength. For the cross, I just cut one out of 3mm foam and glued it on - I was pressed for time.
--- end update
Cuffs - Update 9/3/2014
For my recent event, I had no cuffs at all, so I decided to make some not very screen accurate ones just to have something on the belt. Again, thanks to Studio Creations, there is a build sheet for the cuffs. I simply used some of my spare .028" Kydex to fashion the top and the bottom pieces. I then cut strips of the kydex that were a little thicker than the zip ties I had to make a channel down the center of the plates. I glued those in, making sure to leave enough room to two zip ties. Next, I took 4 layers of kydex and made the outside piece where the two ties are held in place. For the last bit, I just glued in some 1/4" craft foam to fill out the thickness. After that, I hacked up the foam to fit and the ends of the zip ties and glued them in. I wrapped the zip ties in place and glued them together at the ends. Next, glued the top on and call it a day.
 |
| Craft foam sandwiched between kydex. |
 |
| See the channel created with the kydex? |
 |
| Carved areas to fit the ends of the zip ties. |
Screen accurate? Absolutely not - these are not long enough or thick enough to match the screen. Cost? Probably $.25 and they are better than nothing. I could have probably done something with the ends, but I was in a big hurry and I can always chop them off and make them better later.
Flash Bang Grenades Update - 9/5/2014
Originally, I just had nothing in my flash bang pouch. This was fine, but I cannot keep the build static, so I got busy building some grenades! Apparently, the ones used in the movie were 1.75", which is a little larger than a ping-pong ball (40mm). I figured that these would be close enough! I looked into ordering these, but found you can really only buy a bunch. This took me to my local sporting good store where I got 6 balls for about $4.
Hold your ping-pong ball up to a light and note the natural line running right around the middle of the ball. This is where the two halves join. Use your sharpie to trace this so you can see it.
Next, use the tip pictured above in your rotary tool to slowly and carefully grind away at the line your just drew.
Use sandpaper to clean this up
To trace a line for the switch, I used the inside of a roll of electrical tape. I held this tight to the ball and just traced a line with my trusty sharpie.
I used the same technique as above to grind out the switch. Be very careful on this part, as the material is only half as thick as the middle part.
I used some thin wire to secure the ball and paint it. When this was dry, I used a brush to fill in the area around the middle and paint in a red indicator. Then, I used some black wash to darken the depressions. Last, I sealed the ball with a matte spray.
Screen accurate? Nope. Cheap and looks good on the belt? Yep!
--- end update


