


 By Special Guest Dennis Berwick
Today we will continue the article on Basing a Pak 40. For this article to make sense you may want to read Part 1, which is available here.
I've never been a big fan of using 'green stuff' to level out bases, spending hours of hobby time pressing putty onto the base around the model isn't that fun. Here is a simpler way that takes a few models to master but is very effective and much faster.
We start with the crew of the Pak 40 super-glued to their bases, then mix up some liquid nails to a slightly thicker then PVA consistency (the same way we did in the previous article).

Now apply a generous layer across the base of the model. The best way, is to brush against the edge in a downward motion to make a blob of the liquid nails on the base, then use a tooth pic to work it into place. Make sure it's all the way to the feet/knees while you avoid touching the model.
If at any point you make a mistake simply hold the model under running water, grab an old tooth brush and brush away. The liquid nails will just wash off and the brush will get it out of the details/cracks if needed.

Once coated, run a finger around the edge to clean it up any overlap or excess.

Next sit model back into the Pak base, it's the easiest way to line up our "ground effects" to tie them into the base.

I tried to line up the different textures by simply sprinkling them inline with what i used on the Pak's base - so sand with sand and tea with tea - this will tie the base together better when we finish.
Now remove the model, shake of any loose gravel/sand/tea leaves and place it in a container of Building Sand (very fine stuff).

DO NOT SCOOP the model through the sand. Hold the model in place and sprinkle/pour/agitate the sand onto it.

Next step, is to do another edge clean with your finger tip.

Finally grab a model knife and remove any unwanted sand from the feet/model before leaving to dry.

I did this for the rest of the crew and now we will continue on with the Pak 40 base.
Base coating was done with a darker brown. I used a decent quality acrylic paints for all of the following steps, all are from the local craft stores and some of the more artist type ones will need to be watered down a little.

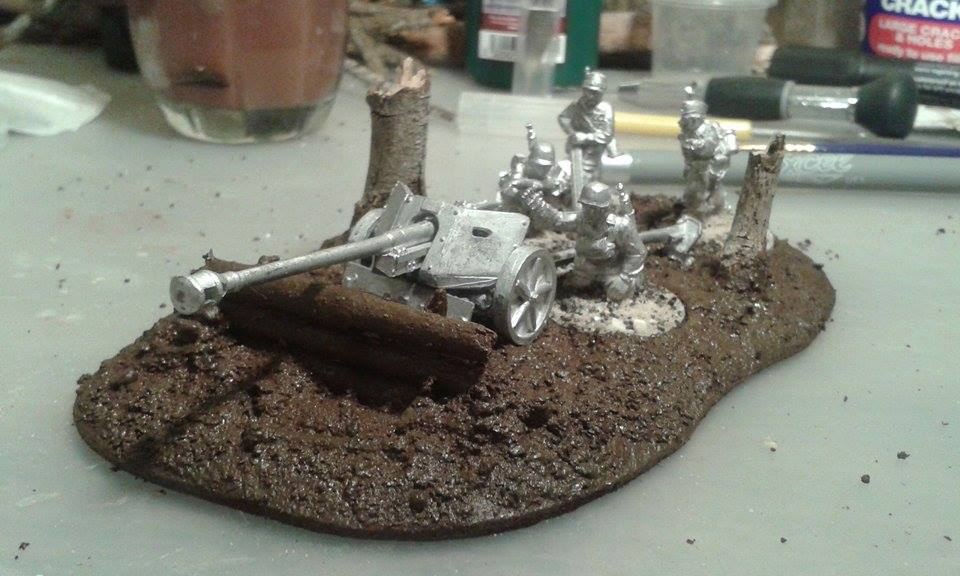
I also lightly painted the stumps/log wall with the same brown at this point. The last step for paint, was a light dry brush of 'Slate' (pictured) on all the wood pieces, the base was then given a light brush of the 'Mocca' (pictured) to give a final highlight on the dirt areas.

Note - I didn't paint the inside of the tree stumps to give that genuine "wood" colour. The crew bases will be done once they're undercoated, with the same colours and same steps.

Next step is flocking, I have a number of different flock and grass options to play with, having more options is the easiest way to make your base look more effective.

To start with I chose where I was going to add the larger 'pull apart' pieces and the grass tufts, both of these were glued into place with clear craft glue. Any mistakes made with the craft glue can be covered with flock.

Now the loose and fine flock was glued into place with watered down PVA, making sure I cover any craft glue marks. Sometimes to get this fine stuff to stick into place you will need to gently press it onto the spot you want it with your finger.

After a short 10 minute dry, I went over a few of the flocked spots and some bare areas with some more watered down PVA, then sprinkled some green tea leaves to give the impression of leaf litter.

You could easily shake off the excess tea and call it done from here with only the models to paint.
But I'm trying something a little different....

Using a syringe I added small drops of the realistic water to all the low points and holes in the base to give the impression of puddles.

This was covered with a empty ice cream bin and left to dry for 24 Hours. And that is our base completed for the project.From here I only needed to paint the gun and crew. The mud built up on the wheels of the Pak 40 was made by mixing some builders sand into the burnt umber i used on the base.


Hopefully this article will help and inspire others with their own armies.
Until next time,
Dennis


