 |
| Did I over do the mud on the wheels on this side? Maybe. |
There was a very impressive level of packing -- everything was bubble wrapped and really, really secure. The model comes in all white plastic-y resin (I forgot to take a picture) with a ton of stowage and extras. I declined to add any of these, as I wanted to get the tank painted and see how it looked first -- I can always add things to the model. I was a little concerned that the gun was plastic as well, but it turned out fine.
I spent very little time cleaning flash and was VERY impressed with the level of detail on this model. The tracks are particularly impressive, with deep recesses and very little deformation.
I decided that I wanted to go for a battle-worn look, similar to my other Bolt Action vehicles. This thing is early production and has survived for quite a while, eh? I really wanted to go the extra mile and use some of my pigments to get a really filthy look. I especially wanted to get a nice rust look, as I have never really gotten that to look right with pigments.
 |
| The wheels on this side look better to me. I am not sure that I got the wear on the painted surfaces even -- I might have to re-visit the box on the back of the turret. |
 |
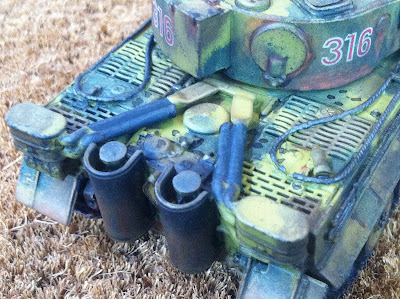
| The deck is insanely detailed, with deep recesses. One of the cables is a little screwy, but you don't really notice. I might fix it later with some green stuff. |
I went for quite a bit of chipping and wear. I don't really like to have the rust red primer show through, as I think it gets lost on the model. I also declined to use a white outline in the chips, as I think that looks a little cartoon-like in 1/56th.
Above, you see my rust effect. I am moderately pleased with it. I did use alcohol to fix the pigments this time, and that seems to have done better than mineral spirits.
I am particularly pleased with the right-side tracks and wheels. Unseen in the picture is a little bit of bare metal shining through on the outsides of the wheels. I tried to replicate this look on the left-side track, but I don't think I did a particularly good job. Oh well, I am still learning how to use the pigments.
For decals, I used Company B. I may go back and add some unit decals later, but for now I am going to let this model sit a while before returning for any upgrades.
 |
| Size comparison to Warlord Games M10. |
Conclusion: 10/10
I REALLY like this model. It came packed well, lots of options, great details and assembled really easily. I think this thing looks great.
One thing I HOPE you didn't notice was my re-paint of several sections. I failed to follow this prep advice on the web site and ended up with some severe bubbling of the paint after using a Gloss Varnish spray can. In most areas, I used some thinner and a pencil eraser to smooth out the bubbles fine. However, I had to cut off about 1/2 of both the front hull deck and about the same amount from the turret and repaint/repair. So, I learned a very valuable lesson: When getting a model from a new manufacturer, go read their web site for any special advice and instructions.


