


By Iron Tom
Ron, Tony, Greg and Tom of the BattleVault Gamers got together to play a Flames of War game using the Arab-Israeli “Fate of a Nation” book. Ron and Tony played the Israelis while Greg and Tom played the United Arab Republic (UAR) Forces. Both forces were just over 2000 points and we rolled up Fighting Withdrawal as a mission with Greg and Tom’s UAR force defending.
The Battlefield:

The Battlefield was set up using a GeoHex base to which Tom’s growing collection of Battlefront desert terrain was added, to include the new Mosques and walls set.
The Forces:

The UAR force was centered on a Tank Battalion of T-55s with Infantry, Artillery, and AT support.

The UAR force in miniature. Note: We always pace our artillery off-board when playing “Fate of a Nation Games.”

The UAR Tank Battalion Commander
The Israeli Force:

The Israeli Force was also a Tank force with mix of upgraded Shermans a Sho't tanks supported by mechanized infantry and a short battery of 25 pdr's, also placed off board.

The Israeli force in miniature models.
Deployments:

The objectives were placed on on escarpment on the left, a palm grove in the middle and behind a palm grove on the right.

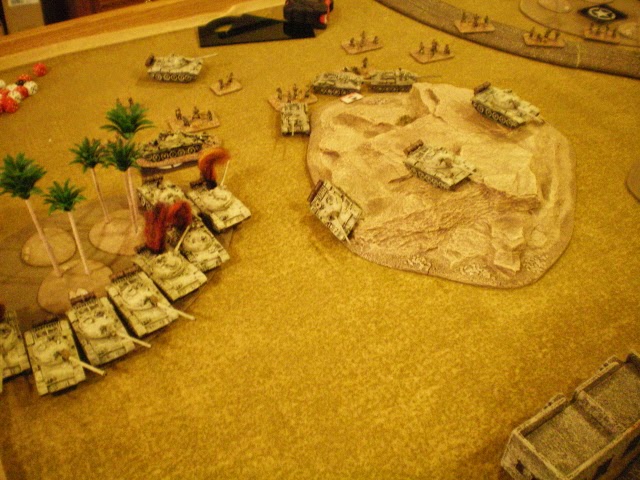
The UAR deployed one T-55 company on the left escarpment tied in with the large infantry company that extended across the center to the right of the UAR deployment zone.

The UAR far right was anchored by a T-55 company deployed in a palm grove just in front of the right objective.

The UAR's full force deployed.

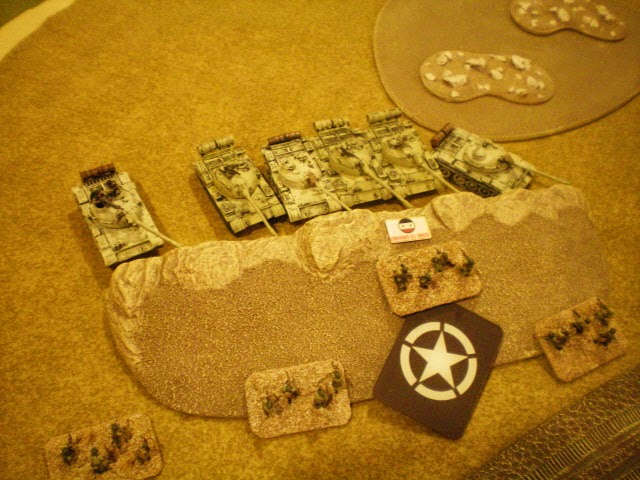
The Israeli force deployed the Sho't heavy tanks in the center, flanked by upgraded Shermans on either side, and the infantry on the far right.
The Israelis opened the game with a salvo from the the M51 Ishermans which, with their re-rolls at long range when stationary, had little problem knocking out just over half of the T-55 Company on the UAR right.

Even Gone-to-Ground and Concealed is not enough to protect the UAR T-55's from accurate Israeli Tank fire. The T-55 Company fails its required morale check and flees.
The UAR 3rd company deploys from Ambush


On the UAR right the 1st UAR Tank Co tries to take advantage of the Israeli infantry being in the open and without tank support of their own.

The Israelis, in turn two, continue to focus fire on the UAR 3rd Tank Co. The salvo is devastating and the company is nearly knocked out, but the command tank survives and is able to hide behind terrain to deny the Israeli tanks from completely destroying the unit.

A good plan, but the UAR Forward observer succeeds in spotting and targeting the Israeli infantry anyway. The fire does no real damage but the Israeli infantry is pinned and will fail six rally attempts and be "stuck" for the remainder of the battle.


The UAR 3rd Tank company was pulled off the field with its last surviving tank to fulfill the missions withdrawal requirement. The M51 Ishermans seeing the withdrawal of the last tank on their flank work up a frenzy and charge the UAR Infantry company. Though pinned, both Blindicide teams near the assault score two hits and stop the Isherman assault! These hits cause a lost and a bailed tank which, along with a previously destroyed Isherman (Knocked out by SU-100's before they died), required a platoon morale check. The M51 Isherman platoon fails this check and the UAR forces finally have a successful outcome.


Though the Israelis have only lost one platoon themselves, time is short and they must press the center objective soon. They absolutely need their infantry to rally and assist in whittling down the large UAR infantry company defending the center objective.

But...the Israeli infantry refuses to rally, rolling the fourth "1" in a row!

So, the Israeli tanks have to go it alone. Though they have no problem closing to assault, they can only kill a few teams at a time, and the UAR infantry wisely just falls back rather than counter attacking and incurring more loses. The Sho't assault first and when the UAR foot troops break off, they preclude the M50 Super Shermans from having any chance of killing UAR infantry.

The Israeli tanks finally clear and secure the center objective, but it's too late as it's the last turn and they will never start a turn in possession of an objective. Though they killed off a lot of UAR Infantry the UAR Infantry company was just too large and too spread out to get close enough to force a unit morale check.
So the game ended as a 4-3 win for the UAR. The most successful “tactic” for the UAR was to continuously break off and get away from the Israeli tanks, thus the “Run Away” title for this AAR. Yes the UAR troops “ran” but they only ran just enough as required and this coupled with a little luck on their right against the M51 Ishermans and the right with the “permanently pinned” Israeli Mech Infantry allowed the UAR force to squeak out the win!
The four of us had a really good time playing a game that came right down the wire. It did not seem like it was going to be close. The Israeli tanks quickly made short work of 2/3rds of the UAR tanks and it quickly became apparent that taking on the Israeli tanks head to head was not going to work for the UAR. Instead a very careful delay would have to be used to keep the Israelis from taking an objective while also preventing the UAR from suffering too many losses.
Fortunately for the UAR players, the Israeli players seemed a bit “loss adverse” and used their “Stormtrooper” moves to move back to get into cover or out of Line-of-sight rather than using it to advance. Just one or two turns more of stormtroopering forward could have bought the Israeli that “extra move” they needed to fully secure victory.
The most amazing aspect of this game for me was how well the M51 Ishermans did. With rerolling missies at long range, the four M51s seemed to account for far more T-55 kills than the better Sho’t tanks. I myself am starting an AMX-13 based Israeli tank force, but I’m beginning to wonder if the M51 Ishermans might have been a better fit for me?
Tom has been playing wargames since the late 70’s, and Flames of War since 2007. He maintains a gaming website www.battlevault.com for the BattleVault Gamers of Kentuckiana and posts and moderates WWPD as Iron-Tom.


