


by Allen Smith - (also works in 15mm)
 |
| Vroooooooom!! |
The beauty of Team Yankee is that you can basically do what
you want! So with that in mind, I decided
to go NATO Tri-Color.
My reasoning was… well… laziness and historical reasons. For laziness, I did not want to do MERDC as
it is a 4 color camo pattern – granted two colors are a vast percentage of the
surface area and the other colors are a much smaller percentage. But that means work. And I don’t want to work. Oh yeah, the M1 was not in MERDC, but that is
another story. I didn’t want to use a
simple forest green color because I do want a contrast on the table with
Soviets running around in their plain green vehicles. So I went with the Tri-Color. Of course, the pattern did start appearing in
1984, so it really isn’t too much of a stretch to say the least.
 |
| Too much work in 6mm! |
Now, what is the pattern?
I am no expert on the subject at all.
I am sure we will see stuff posted from BF on the subject, but at a high
level it is a common scheme that all NATO members agreed to paint their vehicles. One purpose for the common scheme was to
eliminate the possibility of the WARPAC units deciphering the nation they were
facing by simply looking at the camo pattern.
Sounds reasonable.
So off I went ready to paint all my vehicles with green,
brown and black splotches!
And not so fast my friend…
I had to find examples of the pattern for M1s. After scouring the internet for pictures and
other models and images, I finally stumbled on the exact specifications in the
US Army Technical Bulletin: TB-43-0209.
Now this document was published in 1990 or 1991, but it is the pattern
used in the 80's. And guess what? If you look in the document, you can paint by
numbers!
For example, the specifications for the M1:
 |
| Get those coloring pencils ready! |

So armed with colored pencils, I filled in the camo
pattern. That gave me the template to work
off of for my 6mm vehicles. The good thing about 6mm is that we just have to give the inference on the pattern. The scale is small enough that we do not have to be 100% accurate. For example:
 |
| Colored pattern |


Good luck with whatever pattern you choose!

 |
| M113 right side (compare to pattern above) |
 |
| M113 top side (compare to pattern above) |
As for the paint colors, well I cheated. I saw that Mig AMMO had two acrylic sets
available – NATO Tri-Color and Modern Soviet (1956+).


Being lazy, I grabbed these immediately. And the colors are great. The NATO set comes with Matte Black, NATO Brown
and NATO Green. Note about the
brand. They are a bit thinner than
Vallejo. This is good and bad. The good is that it works great in an
airbrush. The bad is that you will need
to do several layers when using a brush.
This normally is not an issue, but when you are painting a camo pattern
in 6mm, it would be great if you didn’t have to do it several times. Now don’t get me wrong! I like the paints and I would encourage you
to use the set. I just wanted to give a
heads up.
My process:
1) I use
Vallejo Surface Primer Nato Green to prime all my vehicles. The color is good, but it is a bit too dark
to really use as a base coat. I apply
this with an airbrush at a PSI around 13 to 15.
2) Once
completely dried, I apply the Mig AMMO NATO Green color to the vehicle with an
airbrush (same PSI). With a thinner
application, you can pick up the darker undertone of the primer in places. So don’t think you have to soak the model in
paint.
 |
| The M48 primed and base coated |
3) Once
this is dry, then it is time for the brush.
I start with NATO Brown. I chose
to start with this because it is the smallest surface area of the camo
pattern. Green and black are much more
of the pattern. That means I can use the
brown as a type of landmark on the vehicles because at 6mm, the camo pattern
will not be 100% accurate. But what is
important is to be consistent from vehicle to vehicle because they are all supposed
to look identical. I start with an
entire stick of vehicles, paint the brown, then go back to the first and repeat
the process to build up the color. Feel
free to leave a single coat if you want more of a faded color and effect.
 |
| M60 with NATO Brown applied |
4) After
the brown is dry enough to handle, I apply the NATO Black color from the
set. Using the brown as reference, this
process goes quickly.
 |
| Tri-Color! |
5) Now
comes the optional part of the process.
To the dismay of many, I actually apply a pin wash in 6mm. It really is not as bad as you think and the
effect works very well – especially on desert tan! Here with the camo, the trick is to hit the
areas that you want to create depth. In
6mm, you really are not hitting panel lines.
What you are hitting are engine decks, stowage, hatches, lights,
anything that you will hit with a dry brush later you want to pin wash around
to really make the details pop. And hit
the tracks / road wheels with a very heavy and liberal wash. In 6mm, this is really the only weathering you
need to do on the road wheels and under carriage. I use the Mig Dark Wash for this process. And because it is an enamel, make sure you
let it dry completely before the next step.
6) Taking
Vallejo Iraqi Sand, apply a dry brush on the entire model. Go heavier on hatches and things that stick
out. Go heavy, but not as heavy on all
the exposed angles of the vehicle – like the front, the hard angles on the M1,
etc. Then do a light dry brush across
the whole vehicle. This last step will
do two things for you in 6mm – it will give a weathered effect and it will
soften the camo lines. This really is
the secret sauce here because it is so flippin’ easy and the results are
superb.
7) Paint
a few details, like the tracks (Vallejo Panzer Grey) and any lights you may
wish to paint.
8) Place
on the table and have fun!
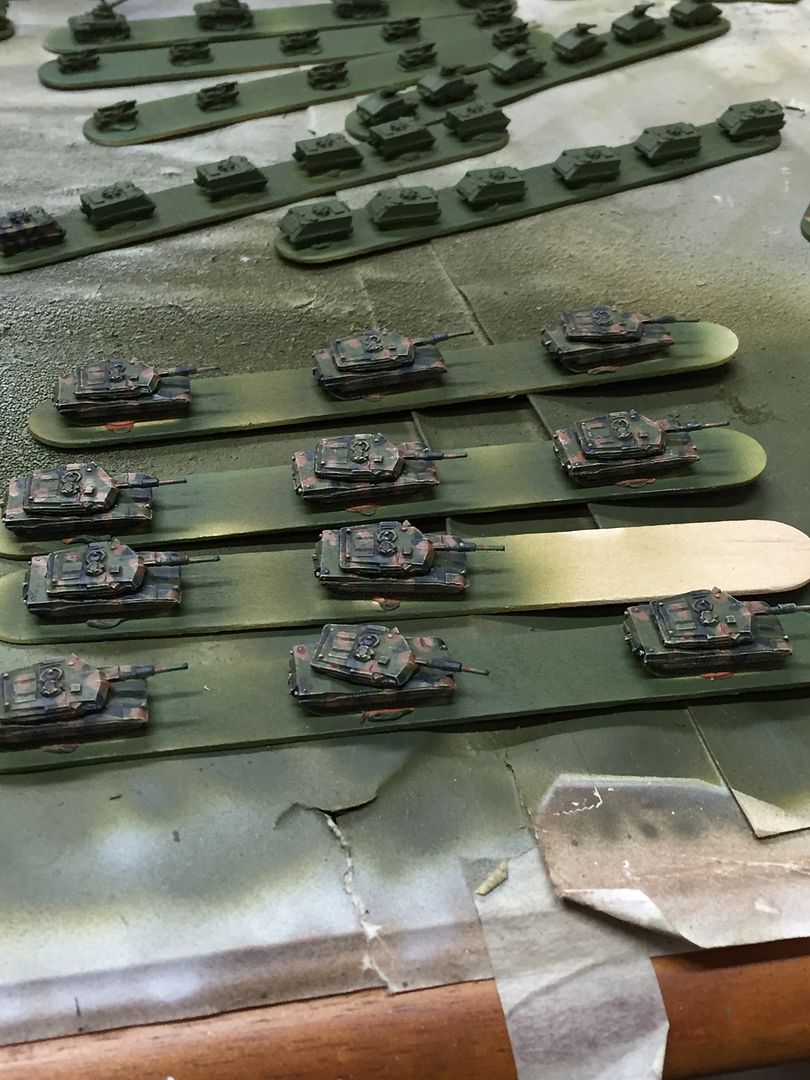 |
| Finished result |
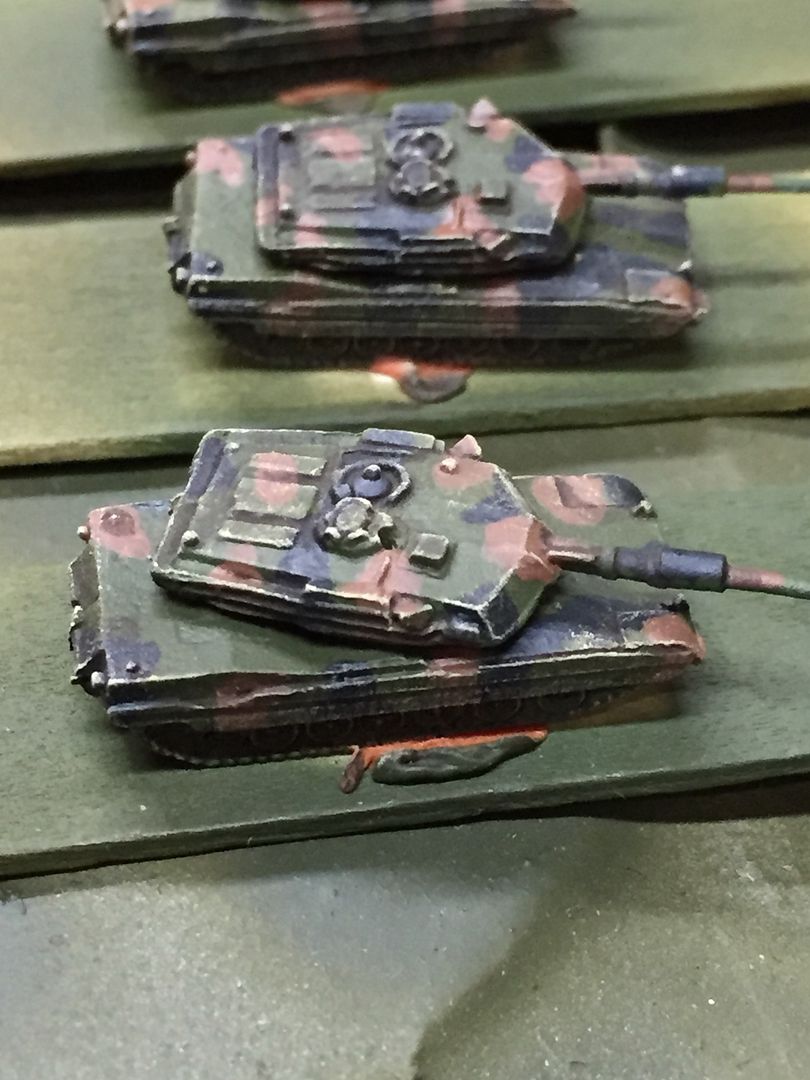 |
| Finished result close up |
With those steps above, you can blitz your way through
6mm. If you want to save some time, you
can apply the wash as a full wash using a thinner wash. It works, but for my taste it just does not
work as well.
While the steps are similar for 15mm, you can do a lot more
details and color modulation effects.
That will just have to be another post!
Good luck with whatever pattern you choose!


