


 One of my first articles for WWPD was on building my British Airborne Company. Having bought more infantry than anyone would ever need, and having it sit in my closet for 2 years, I decided to try and start working on it. Years have past, and much has been done, but one major project eluded me: a display board for this army. Below is the finished product, but I will be trying to walk you through how I got it to look like this. I don't profess to be as good as many terrain makers as I have seen, but hopefully I can give you a little inspiration and a few easy steps you can build off of.
 I started, as one always should, with a rough plan. I already have a carrying tray that fits these pieces of pink foam (with some modifications before construction.) I made the frame out of scrap wood that I sanded, cut and fit together, follower by sanding and staining. I won't be showing that part however, just the assembly of the main display piece.

The original idea was to use a few ruined buildings I had partially painted, or at least primed, as centerpieces or accent pieces for a destroyed intersection. But these are valuable pieces, and I found they were too tall for my purposes. Their ability to hide guys inside of them work great in game terms, but not so much in display terms. And they take up enormous space on the display itself, making it more unwieldy than I intend. I resolved instead to use balsa wood and craft sticks to glue together my own wrecked buildings. (you see the scraps of wood in the foreground.
Some of my weapons of choice:

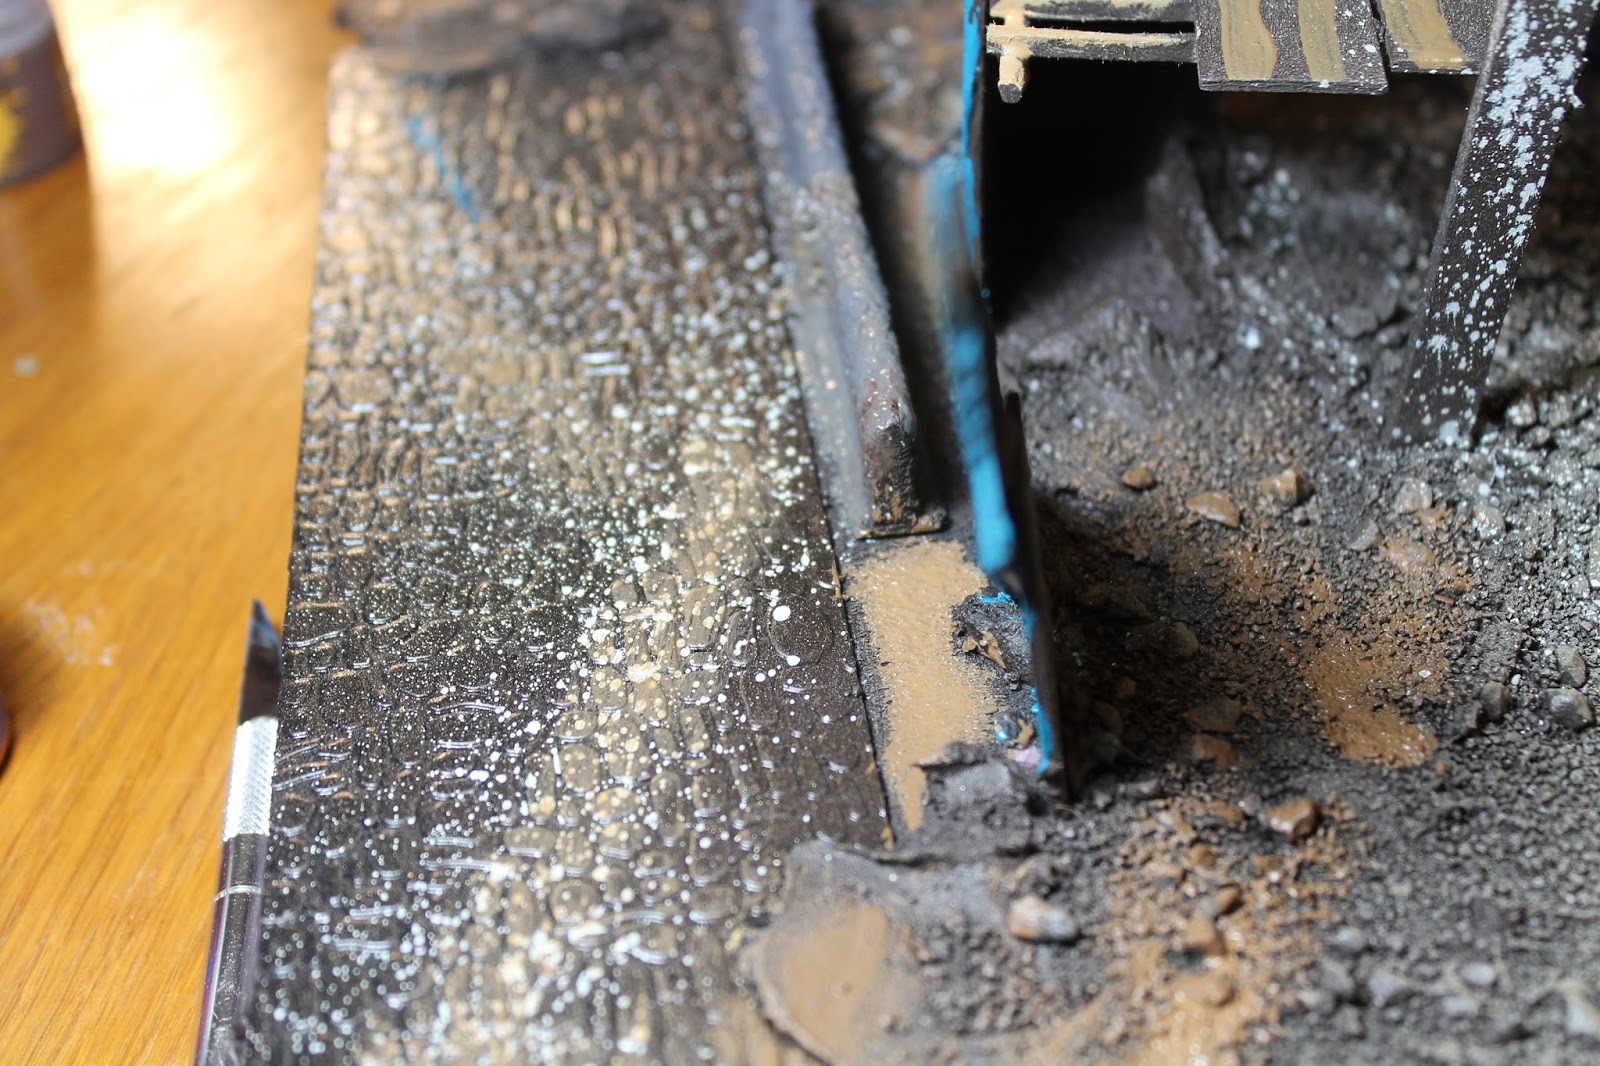
Lightweight Spackle patch and prime....I use modelling paste for small bases as it is smoother and more malleable, but for a bigger project like this, more quantity is needed. This is lightweight (as the name implies) is key. it ensures your board doesn't weigh a ton, and can be smoothed into the cracks and points where it is needed. I used the walls you see in the foreground from stonehouse miniatures to create the appearance of streets. A hot glue gun is your best option for fixing pieces to your pink foam, as superglue tends to melt it in places, and doesn't form a reliable bond.

Kitty litter. Clean of course, is a huge help in giving the appearance of a variety of larger and varied sized pieces of debris.
Once all the main pieces are fixed in place with hot glue, and you have the outline of where you are working, you can spackle. Once it is down, you'll want to work fast, using a pallette knife to spread it across larger sections like icing a cake, and a popsicle stick to work it into more narrow areas. brushes won't work here, it's not viscous enough for it to push it around properly. Don't worry too much about pieces that stick up or clump, as you'll be covering them pretty fast with debris and other rocks, so as to give the ground a more realistic appearance. I also mixed in some crushed seashells I had lying around. finishing it with white playground sand.


Moving from the west and then proceeding clockwise, I shoved scarps of wood into the board itself and spackled around it, a hot glue gun fastened the tallest building to itself and I put in a support beam to ensure it could support the weight of infantry pewter models. I used a pre-made cobblestone road roll of laminate to give the effect of a road on the left.


I think the key here is that the three grades of debris give the effect of real ground. and since its a wreck, its hard to do it wrong. as long as things look like they fell the right way, you're golden.
At this point I gave it a black prime of spray paint, followed by a spray paint of bittersweet brown (all flat, matte, no gloss or silk) this gives us a base of brown to work with that is still very dark.
One of the initial mistakes I made when making urban rubble was to assume the base coat should be grey. But the majority is brown, with accents of bricks, and lighter stone, all things which are easier to add in a drybrush. Brown base however, cannot be added later. Take my advice, start dark brown, and work your way up with layers.

At this point, I have starting doing brush work. little splotches of lighter browns, as well as drybrushing with dark grey, followed by a much lighter grey as a quick touch to the tops.
The buildings, I painted with some GW colors that I don't really use in WW2 painting. Then I start flocking. It gives you a nice pop of color, which you want in a few places. Try and mix your grasses a bit to give a more varied effect. Below are some pre-flocking pictures


The flocking is my favorite part. I have amassed quite a collection of different grasses and grit types. I love army painter's stuff.
To give the best overall appearance of varied color, I use 3 types of basing grit. For grasses, I typically use watered down white glue, followed by a dusting of grasses. but for the stone and grit pieces, rubber cement is much better, it holds well, is colorless, and can be added to easily.
brown battlefield


Rubber cement on first, followed by a light dusting of brown and black, and finished with ash, which would land on top. I do a lot of Italian cooking, so I imagine I'l sprinkling some cheese on top of pasta.
Below, is the mixed effect of painting layers, as well as the rubber cement technique in the upper right.

I made some custom bases out of all the extra figurines I had from the gun blisters that V4 says I don't need anymore. large base plus leftover jagdpanther shells = cool scenic basing opportunity.

Finding propaganda posters or ads from the time period, pasting the photo onto a document and shrinking it down before printing it and cutting it out, can yield some fun wall art for your buildings.
I found a dutch propaganda poster.

I added in some of my Brit paras to show them in what will become their native habitat.


Overall, I'm happy with how this turned out. I've made a desert board, river crossing (had some fun with water effect) and a standard mountain/road board. Winter is next, and a bocage display is in the running.
Here is the finished final product. I may still add road signs later on, and some civilians running around, but I'm happy with is as is for now.

I hope this inspired you to try it out on your own, and I know there are many ways to improve on any technique. I'm not a perfectionist, so some awesome techniques I have seen from others didn't work for me as well as this did. sloppy, lots of pieces, and easily covered mistakes sounds like my favorite method and that's what this is. Happy building, and thanks for reading.
Tom Mullane (aka Captainecho on the forums) has been playing flames of war and painting minis since 2011. He is a social studies teacher in Brewster, NY and lives in Danbury CT. He plays with Ordo-Ineptus at Hobbytown in New Milford CT.


