| My first game back in Richmond! Jon and I were both pretty jazzed to play something out of Italy. Like Jon, I'm pretty smitten with the HG Panzerkompanie out of the Fortress Italy book recently released for Late War Flames of War play, and also really wanted to get some Elefants on the table... just because. We rolled for the mission and came up with Encounter. I rolled as "attacker" and Jon rolled for first turn. |
Jon's British Motor Infantry
- HQ + 2 mortars (lead by 2iC)
- Motor Rifle Platoon
- Motor Rifle Platoon
- 6 Pounders Battery (late)
- 4x M10Cs
- 4x Shermans, 1 upgrade to Sherman IIA (76mm)
- 4 Priests + AOP
- Recce Patrol with PIAT upgrade
| Steven's HG Panzerkompanie
- HQ: 1 Panzer III M, 1 Panzer III N
- Panzer Platoon: 2x Panzer III M, 2x Panzer III N
- Panzer Platoon: 2x Panzer III M, 2x Panzer III N
- Heavy Panzerspah: 2x 8-rads
- Schwere Panzerjaeger: 2x Elefants
- Anti-Tank Guns: 3x Pak 40s
- Rocket Artillery (Heer): 3x Nebelwerfers
|
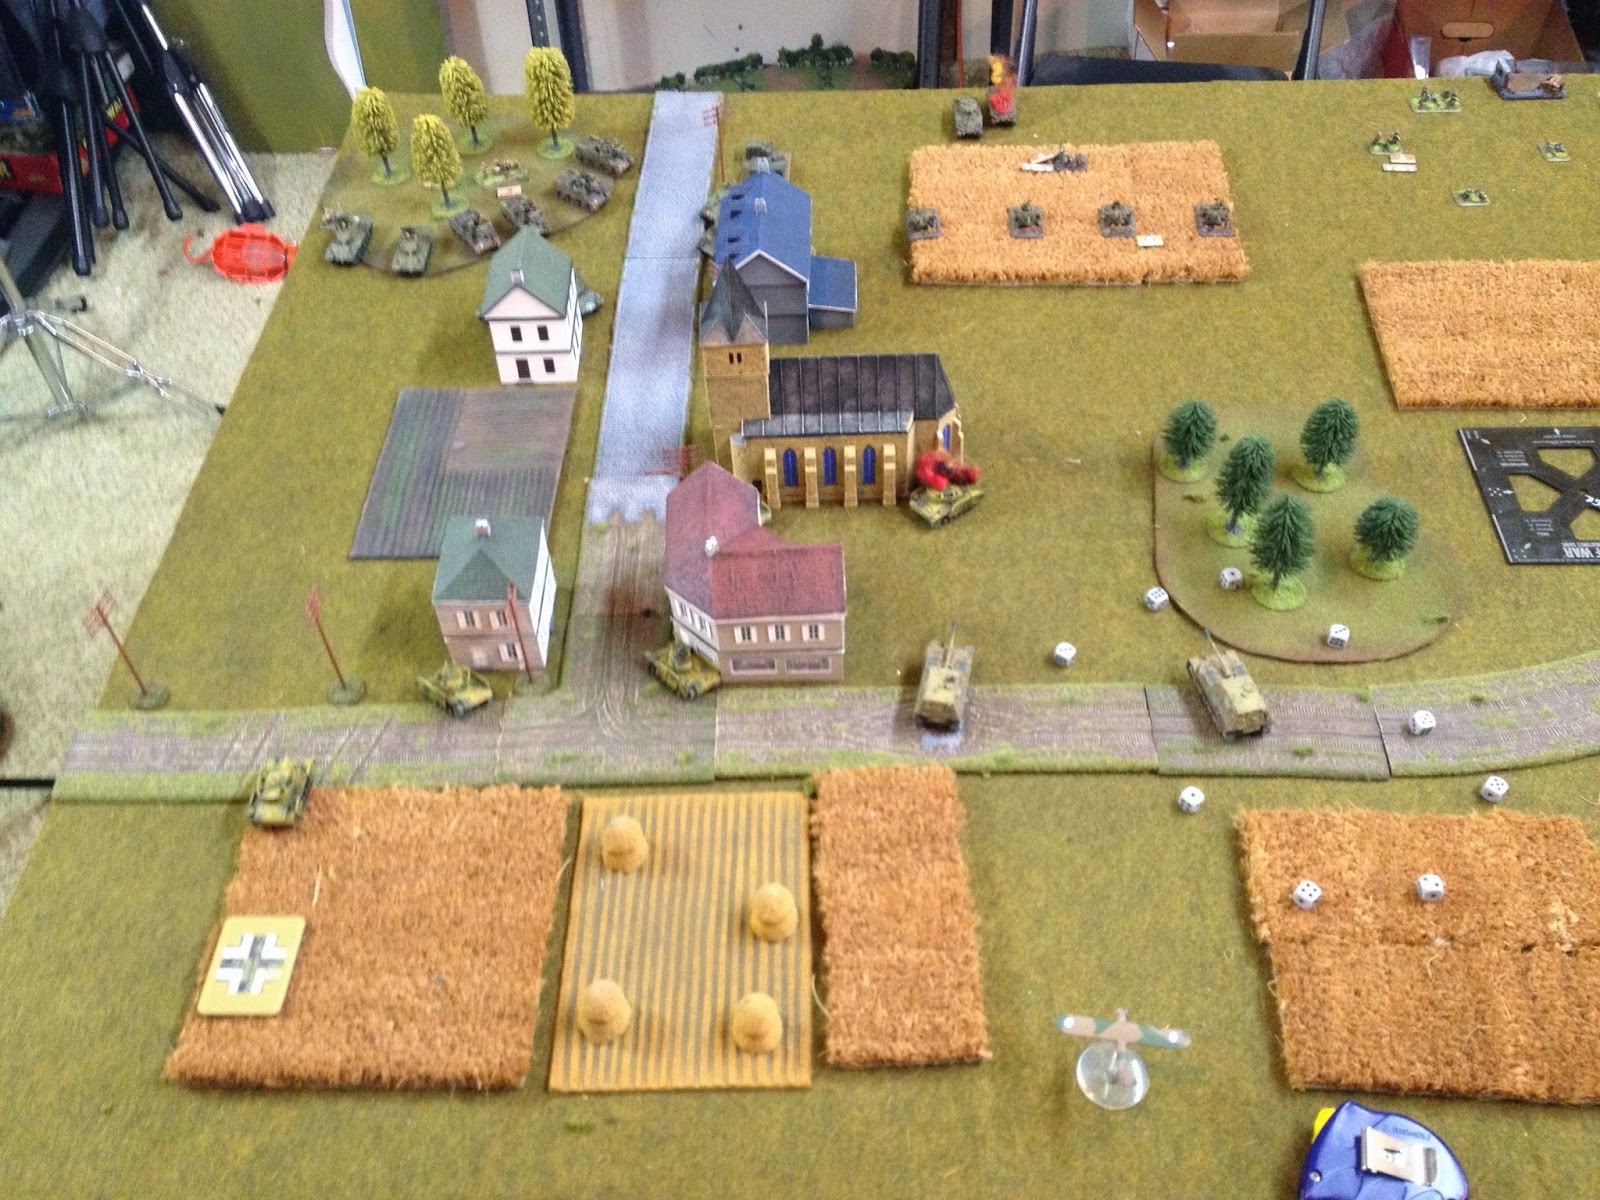
I start with all of my Panzers and the Elefants. We both deploy heavily on the left (from my perspective- as will all references be for this game) 2/3 of the board.
Jon starts with 1 platoon of infantry, 6 pounders, Shermans, and Priests on the board.
Panzer IIIs on my left most objective.
Elefants deploy in the middle, ready to push forward.
Jon's Priests deploy on his left flank (again, from my perspective)
Jon's center: 6 pounders and shermans.
Jon's infantry.
TURN ONE
My left Panzer platoon and the 2iC take up concealed positions ready to fire on Jon's priests.
Jon's priests are just within my 24" range, but are vet and gone to ground so no shooting this round!
With Jon's light right flank, I decide to move my right panzers at the double around the hill.
Elefants, on the other hand, drive forward opposite the shermans and 6 pounders.
TURN TWO
Jon mostly stays gone to ground, but pulls his Shermans back out of the wheat.
The double moving Panzers double move again, pushing up the right flank.
Elefants stay still and open up on the Shermans. They knock one out and bail another one.
The left flank.
TURN THREE
Jon's M10s arrive from reserve.
Jon's remaining shermans skeedaddle, but the bailed one stays bailed.
Jon's 6 pounders fire on the one Panzer staring at them and knock it out.
The left.
A bigger view of the left. Note the smoked Elefant.
Elefants drive forward and knock out one 6 pounder.
Panzers open up on the M10s and knock one out and bail another.
M10s after receiving fire.
TURN FOUR
Jon opens fire and knocks out a tank and bails the 2iC.
8-rads arrive from reserve
As do the Nebelwerfers
Panzers on the right move into striking distance. With most of Jon's AT assets concentrated on the other side of the board, they have a juicy target. Jon's 6 pounders do have solid coverage of this area though, so something must be done. The tank that bogs down here remains bogged for the duration of the game!
Jon's recce arrives, but on the side with the flanking tanks.
TURN FIVE
Jon's center. Reserve infantry is hustling towards the other objective.
The shootout on this flank continues.
Jon's Shermans decide to push forward, blazing away on the Panzers.
While his artillery ranges in on a few Panzer IIIs on the other flank.
Pak 40s arrive right where they're needed!
And nail the 2 Shermans in front of them.
The Elefants move to knock out the last Sherman. One of them risks side shots from the 6 pounders- come on Stormtrooper!
The Panzers on the right move into a position to launch an assault.
And do! They kill one team and push the platoon back.
Thankfully, the Elefants stormtrooper.
8-Rads move away from the rear objective. I intended to keep them on security, but now wish I had pushed them the turn before.
The developing left flank at the end of the turn.
TURN SIX
Jon wisely decides to use his priests on the Pak 40s, wiping 2 out.
Then the M10s knock out a Panzer III forcing the remaining two to flee the battlefield! Even the HG "guards" re-roll doesn't save them!
Nebelwerfers rain down on Jon's 2 M10s, bailing them both. Jon passes his morale check for them.
The Panzer IIIs blast Jon's recce (one survives) and then assaults his freshly arrived mortars (who were within 8" of the recce), eliminating them.
On his turn, Jon rotated the 6 pounders to fire on the Panzer IIIs. I decide that's too risky as the Panzer IIIs are the unit that is going to win the battle for me, so the Elefants assault.
In the end, one Elefant burns, but the 6 pounders are destroyed.
At the end of this decisive turn, the Germans are down a Panzer platoon. The Pak 40s are gutted, and one elefant burns. The British are down mortars, Shermans, and 6 pounders. The M10s and carriers are bloodied.
The developing situation.
TURN SEVEN
Jon's fresh Motor platoon moves to fire the PIAT And launch an assault on the Elefant.
Meanwhile, the M10s reposition to shoot at the Panzer IIIs pushing the objective.
And nail one!
The Motor infantry whiff with the PIAT but fail tank terror to assault. The 8-rads move up to provide additional defensive fire should the infantry try again...
So the Elefant can fire on the M10s. One more M10 brews up, but again Jon passes morale!
The Panzer IIIs push the objective again.
Both motor platoons are gutted.
But the steadfast British knock out another Panzer III with the PIAT. That Panzer III is the German company commander, leaving both sides with no senior leadership! (The British CO and 2IC were killed earlier). In the end, the Motor platoon on the objective breaks, but the "freshly arrived" one sticks around. Jon is now at 4 dead platoons.
At the end of my turn, I make a fatal mistake. For some stupid reason, I rotate my Elefant to be perpendicular to the board edge, forgetting about Jon's remaining M10.
Jon doesn't forget...
Jon's remaining motor platoon is reduced to 3 teams, and pinned. But the PIAT is in range! After trying to dig, he needs a 6 to hit.
BOOM goes the Elefant!
Jon rolls a 6, I fail an armor save, and Jon rolls a 5 for firepower! Boom goes the Panzer! That's a platoon check!
The left.
The right. Thankfully, the Panzers pass morale.
On the German turn, the Pak 40 opens up on the last M10, knocking him out.
RESULT: The Germans have 1 Pak 40, a Nebelwerfer battery, 2 Panzer IIIs, and 2 8-rads left alive, but score a 4-3.
This wound up being a really fun game! It was looking like the Germans were going to sweep it early on, but Jon's luck changed and made it a nail-biter. I liked my list- I'm not sure it's super "competetive", but it was a fun one to run. The Elefants worked out- sure I lost them both and they didn't really "make up their points" but they enabled me to push the center and cleared the way for my main thrust on the right flank. Losing the one to 6 pounder defensive fire was a risk I had to take. Losing the 2nd to the M10 was just my big mistake of not taking flank armor into account!
Anyhow, it was awesome to get a game in with Jon using mostly my own models! |
Generated by WWPD's BatRepper Software.