


Week Two: The Infantry
I've decided to start by assembling and painting all the infantry I will need.
First up, obtain the models. Panzer Lehr has its own range of figures, from way back in the Villers Bocage days. Historically, the Lehr division had its own shorter style of tunic, which is modeled on the figures from this range. My FLGS didn't have enough Lehr figures on the shelf, so I mixed in other Germans. I'm not worried about accuracy -- the Germans had all sorts of supply issues, and their troops wore a mixture of different uniform styles. Just make sure that whatever you buy, you get enough shreks.
So next I get all the figures out of their blisters. I use a pair of hobby shears and an X-acto knife to clean away the flash, and sort them into little piles by type.
I lay out the bases for my platoons. That's six medium bases for each platoon, and four small bases. The medium bases should each get one machine-gun figure and his loader, plus some other dudes. A full team would have five total figures, but I often put only three or four on my bases. (There are casualties in war, after all.) Three small bases will have one panzershrek (the bazooka looking thing) and one other figure. The last small base should have a command team of one or two figures. One of them should hold a panzerfaust (the bowling pin looking thing); I usually pick SMGs and pointing dudes for the others.
I then get out my Vallejo pumice. It's a kind of sticky paste with little rocks in it. When it dries, it hardens into a nice earth-looking irregular surface. I scrape it across the base with a knife. Then I grab my little tin of Gale-force 9 crushed stone. It's actually a concrete. The "rocks" are often too big as supplied, so I shatter them with a hammer. I press the "rocks" and the figures into the putty, making a little diorama. The putty helps hide the ungainly round tab under the figures' feet. Then I let the whole thing dry. The putty usually holds everything into place just fine, but if I figure or rock falls out, I superglue it back into position.
 |
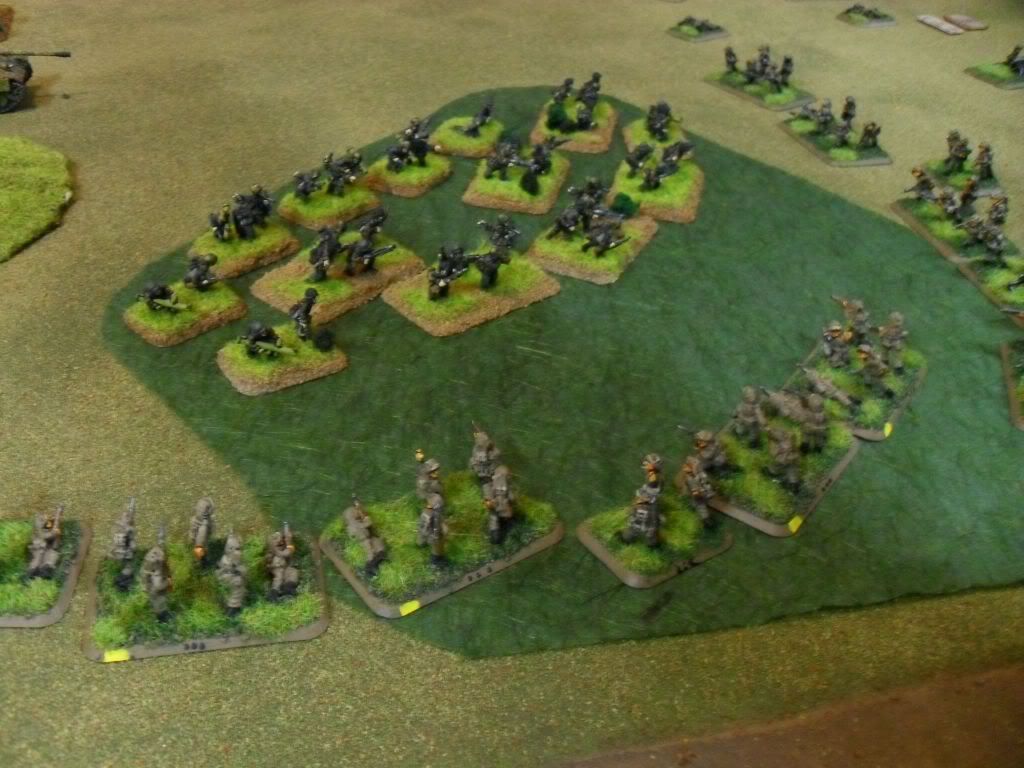
| These are Steven's Panzer Lehr- not Tom's |
I paint all my figures on the base -- it makes it a lot easier to get the earth and stone right. I have a good eye, so I don't much worry about not being able to reach. The first coat is a chocolate brown layer covering everything. When that is dry, I layer on a drybrush of medium brown or light green onto the earth effects. Then I paint the rocks and drybrush them. The actual figures are next. I give them an undercoat of Feldgrau, sometimes darkened down. Then I add some white to it and drybrush it upwards. Flesh, boots, webbing, and metal all get their own spot painting with a 10/0 brush. Finally I slop on some brown/black ink to give it all depth. Last of all, I will paint the helmets in three-color camo.
For figures in 15mm, there is only so much detail the eye can distinguish from a playing distance. Therefore I aim for contrast over detail or complex shading.
Once the paint is dry, I spray everything with a sealant.
The last step is flocking. I usually add smaller gravel and some static grass. I mix up some water and white glue, and paint it where I want my extras to go, then I dip the base into the flock or gravel. The pumice already makes a good ground effect, so I don't cover the whole base. I try to use the flock to mask the bases on the figures.
DISCUSS THIS ARTICLE ON OUR FORUM


