


Trench lines give infantry concealment and bulletproof cover like foxholes, but allow your infantry to move along the trench line and remain gone to ground, provided that did not fire and the trench doesn't get picked up if your troops move away. In battle this means you can move troops to and from hot spots along the line and bring troops in from reserve under the protection of their trenches.
Battlefront has a great series of pre-built pre-painted trenches in their field fortification product line. These products come four in a pack (32"/80cm) for both Desert and European battlefields and cost about $25 a box. Each trench line is 8" in length which is the standard length of most field fortifications in Flames of War (mine fields, barbwire, street barricades etc.) and should give protection to four medium stands of infantry.
While these pre-painted tench lines from Battlefront are amazing and a great deal I always had one problem with them. The trenches have a front, but don't have a back. All the images of trenches I have seen are have both a back and a front.


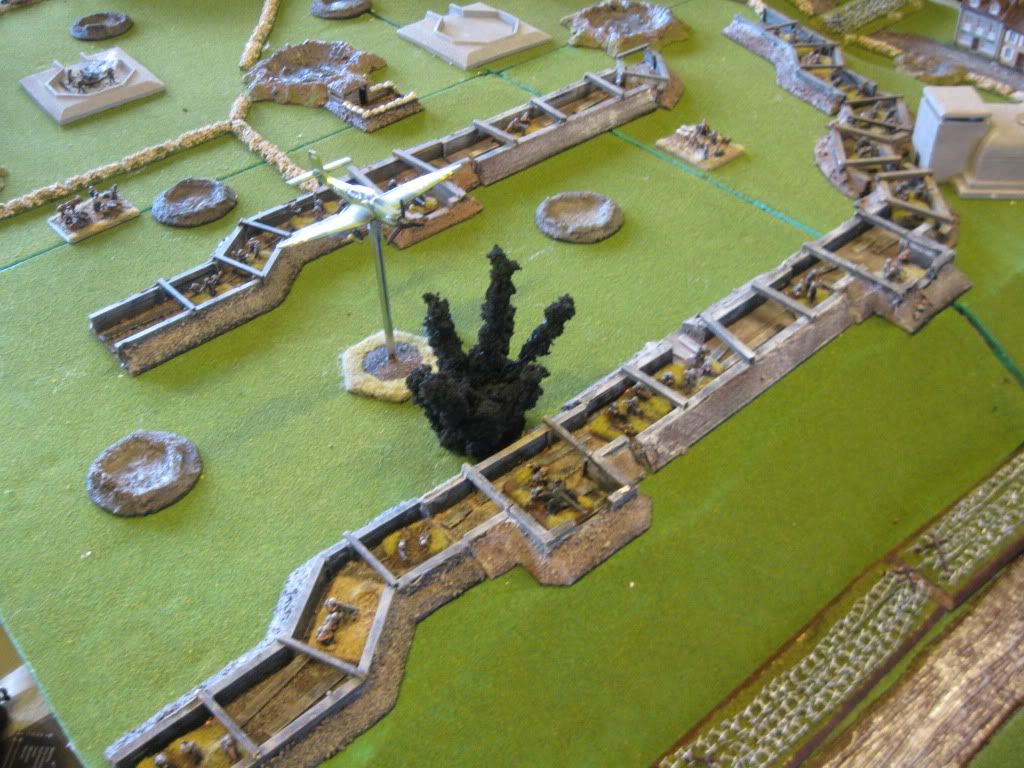
Years ago I built my own trenches with both fronts and back for a D-Day board. Since then they have been features in many of the battle reports. In a recent Operation Sealion game these trenches where manned by valiant, but overwhelm Canadians defending the Southern Shore of England.

Trench lines are easy to build and fairly inexpensive. Before you start you need the following supplies:
MDF or Basswood board
90 degree triangular strips of balsa wood
Various balsa wood size pieces
Various size ballast
Old paint brushGood paint briush
White glue
Water
Super Glue
Puddy
Flock or Static Grass
Pencil or Pen
Ruler or straight edge
Hobby knife
Hobby saw
Puddy Knife
Paint
The wood supplies for 3 sections of trench lines cost me about $7 at the local hobby shop.
First thing to do is cut the my smaller size wood into manageable size pieces and cut the basswood board into and 8" piece using the saw and knife.

After cutting the basswood into an 8" piece out line the shape of the trench using a pen/pencil, straight edge and a few infantry stands. I made my trench line run at an angle to look more irregular and not straight.

Once the trench floor is outlined build a wall with the various size pieces of balsa wood and glue them in place using the super glue. then take 90 degree angular pieces of wood, cut to size and super glue them to the outside of the trench. This angled wood will be covered in ballast later to look like mounded dirt. When you make the second wall check to make sure your stands will still fit before gluing the wood in place. They should be snug, but not tight.
note: I used super glue because it dries fast and does not warp the wood like white glue.
note: I used super glue because it dries fast and does not warp the wood like white glue.

Once both sides of the trench walls are completed double check one more time to ensure stands will fit, if the fit is too tight take your knife and trim the inside of the wall so that the stands will fit in the trench. If you dont once you paint the piece the stands will get stuck and the wood will chip.

Once the trench walls and sides are built trim up the base and give it a small lip. Take either your knife or sand paper and round out the edges of the base.

Once you have trimmed and rounded that base add wood strips to the inside of the trench for walking planks. This will not only give the bottle of the trench character, but will boost the troops up a little more and helps prevent the base from warping when you apply white glue or paint. Feel free to add pieces from your bits box (barrels, shells, MGs, etc) or other items to give the section more character. Just make sure that you can easily place and remove stands in the trench sections. I have added an exit to the back of this section of trench.

Next fill in the gaps in the wood with some putty to get it ready for ballasting.

Using white glue apply ballast to the outside slops of the trench and the inside ground. Before the glue dries wipe off and excess ballast on the interior walls or walk ways.

After the ballast dries I go over the top of it with watered down white glue again to seal it down. This will prevent the ballast from flaking off during painting or later during game play.

After all glue is dry prime the trench section black then paint it to match your army and style of terrain.
note: how it should be painted is not as important as bulding the pieces, players should painted the trench to their own taste and in their style so that it matches their terrain and armies. Do not feel obligated to paint your pieces like I do.
note: how it should be painted is not as important as bulding the pieces, players should painted the trench to their own taste and in their style so that it matches their terrain and armies. Do not feel obligated to paint your pieces like I do.

I used a dark brown on the dirt and a dirty grey for the wood. I then dry brushed a few different shades of browns and grey's to bring out the highlights and used static grass on the base.


Here is a shot with my new snow troops in the trench. I know they are a little out of place, but it was all I had available at the desk when the pictures were taken. Battlefront miniatures will just pop over the top of these trenchlines so the shoulders and heads are exposed on standing figures.

When building these you can experiment with different shapes and styles of trenches to give your trenches an irregular look. You can also easily make bends, turns, gun pits and T sections for your trenches.
Hope this tutorial was useful. These trenches are cheap, are very easy make and look awesome once finished and on the battlefield.
“Craig Baxter is a miniature wargamer from Anchorage, AK. When he’s not contributing to WWPD.net he is busy blogging, painting, modeling and rolling dice. You can find more of his work and articles at frozengamerak.blogspot.com.”


